
_SvIncludePlusContent-NEW - Azure User Guide
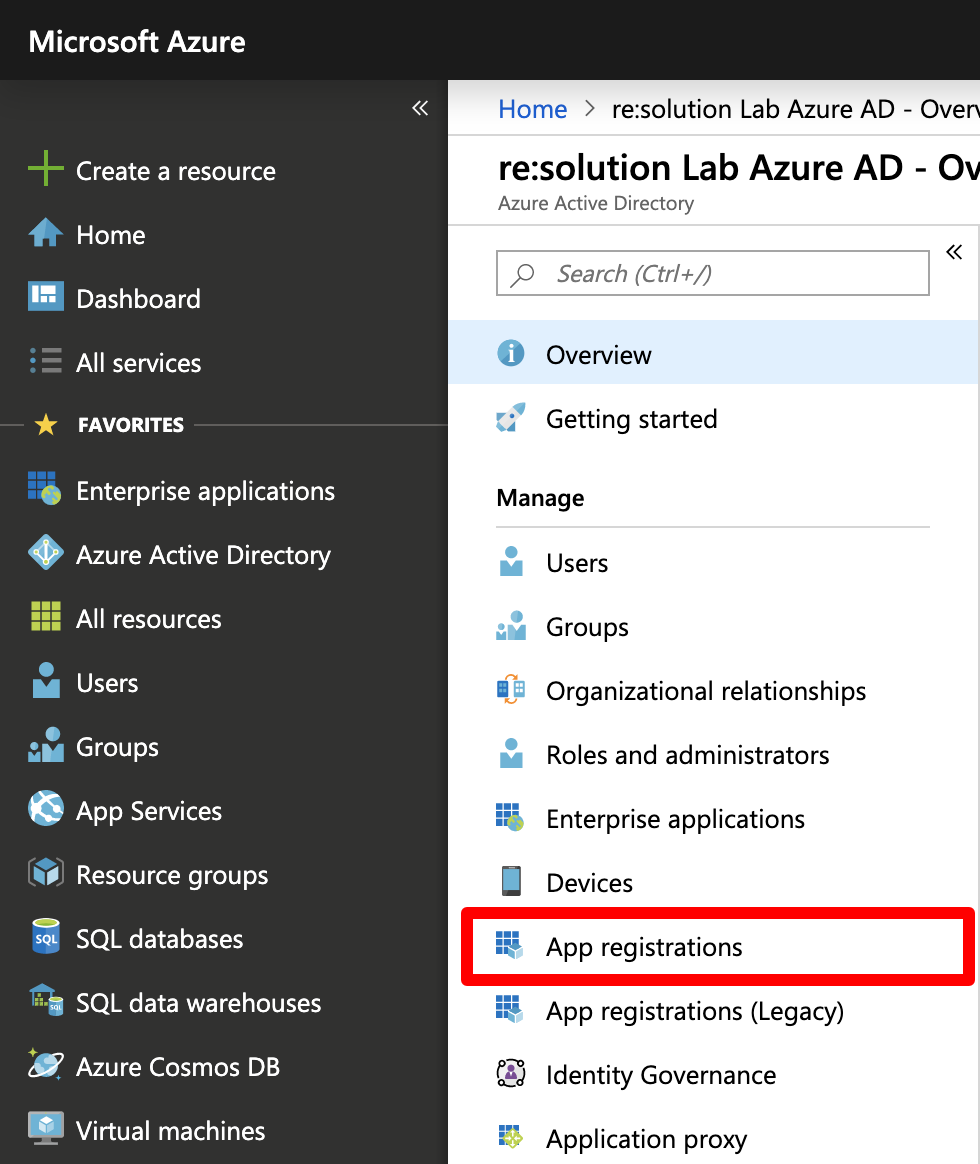
Go to http://portal.azure.com and click Azure Active directory.

In the Azure Active directory, click App registrations.
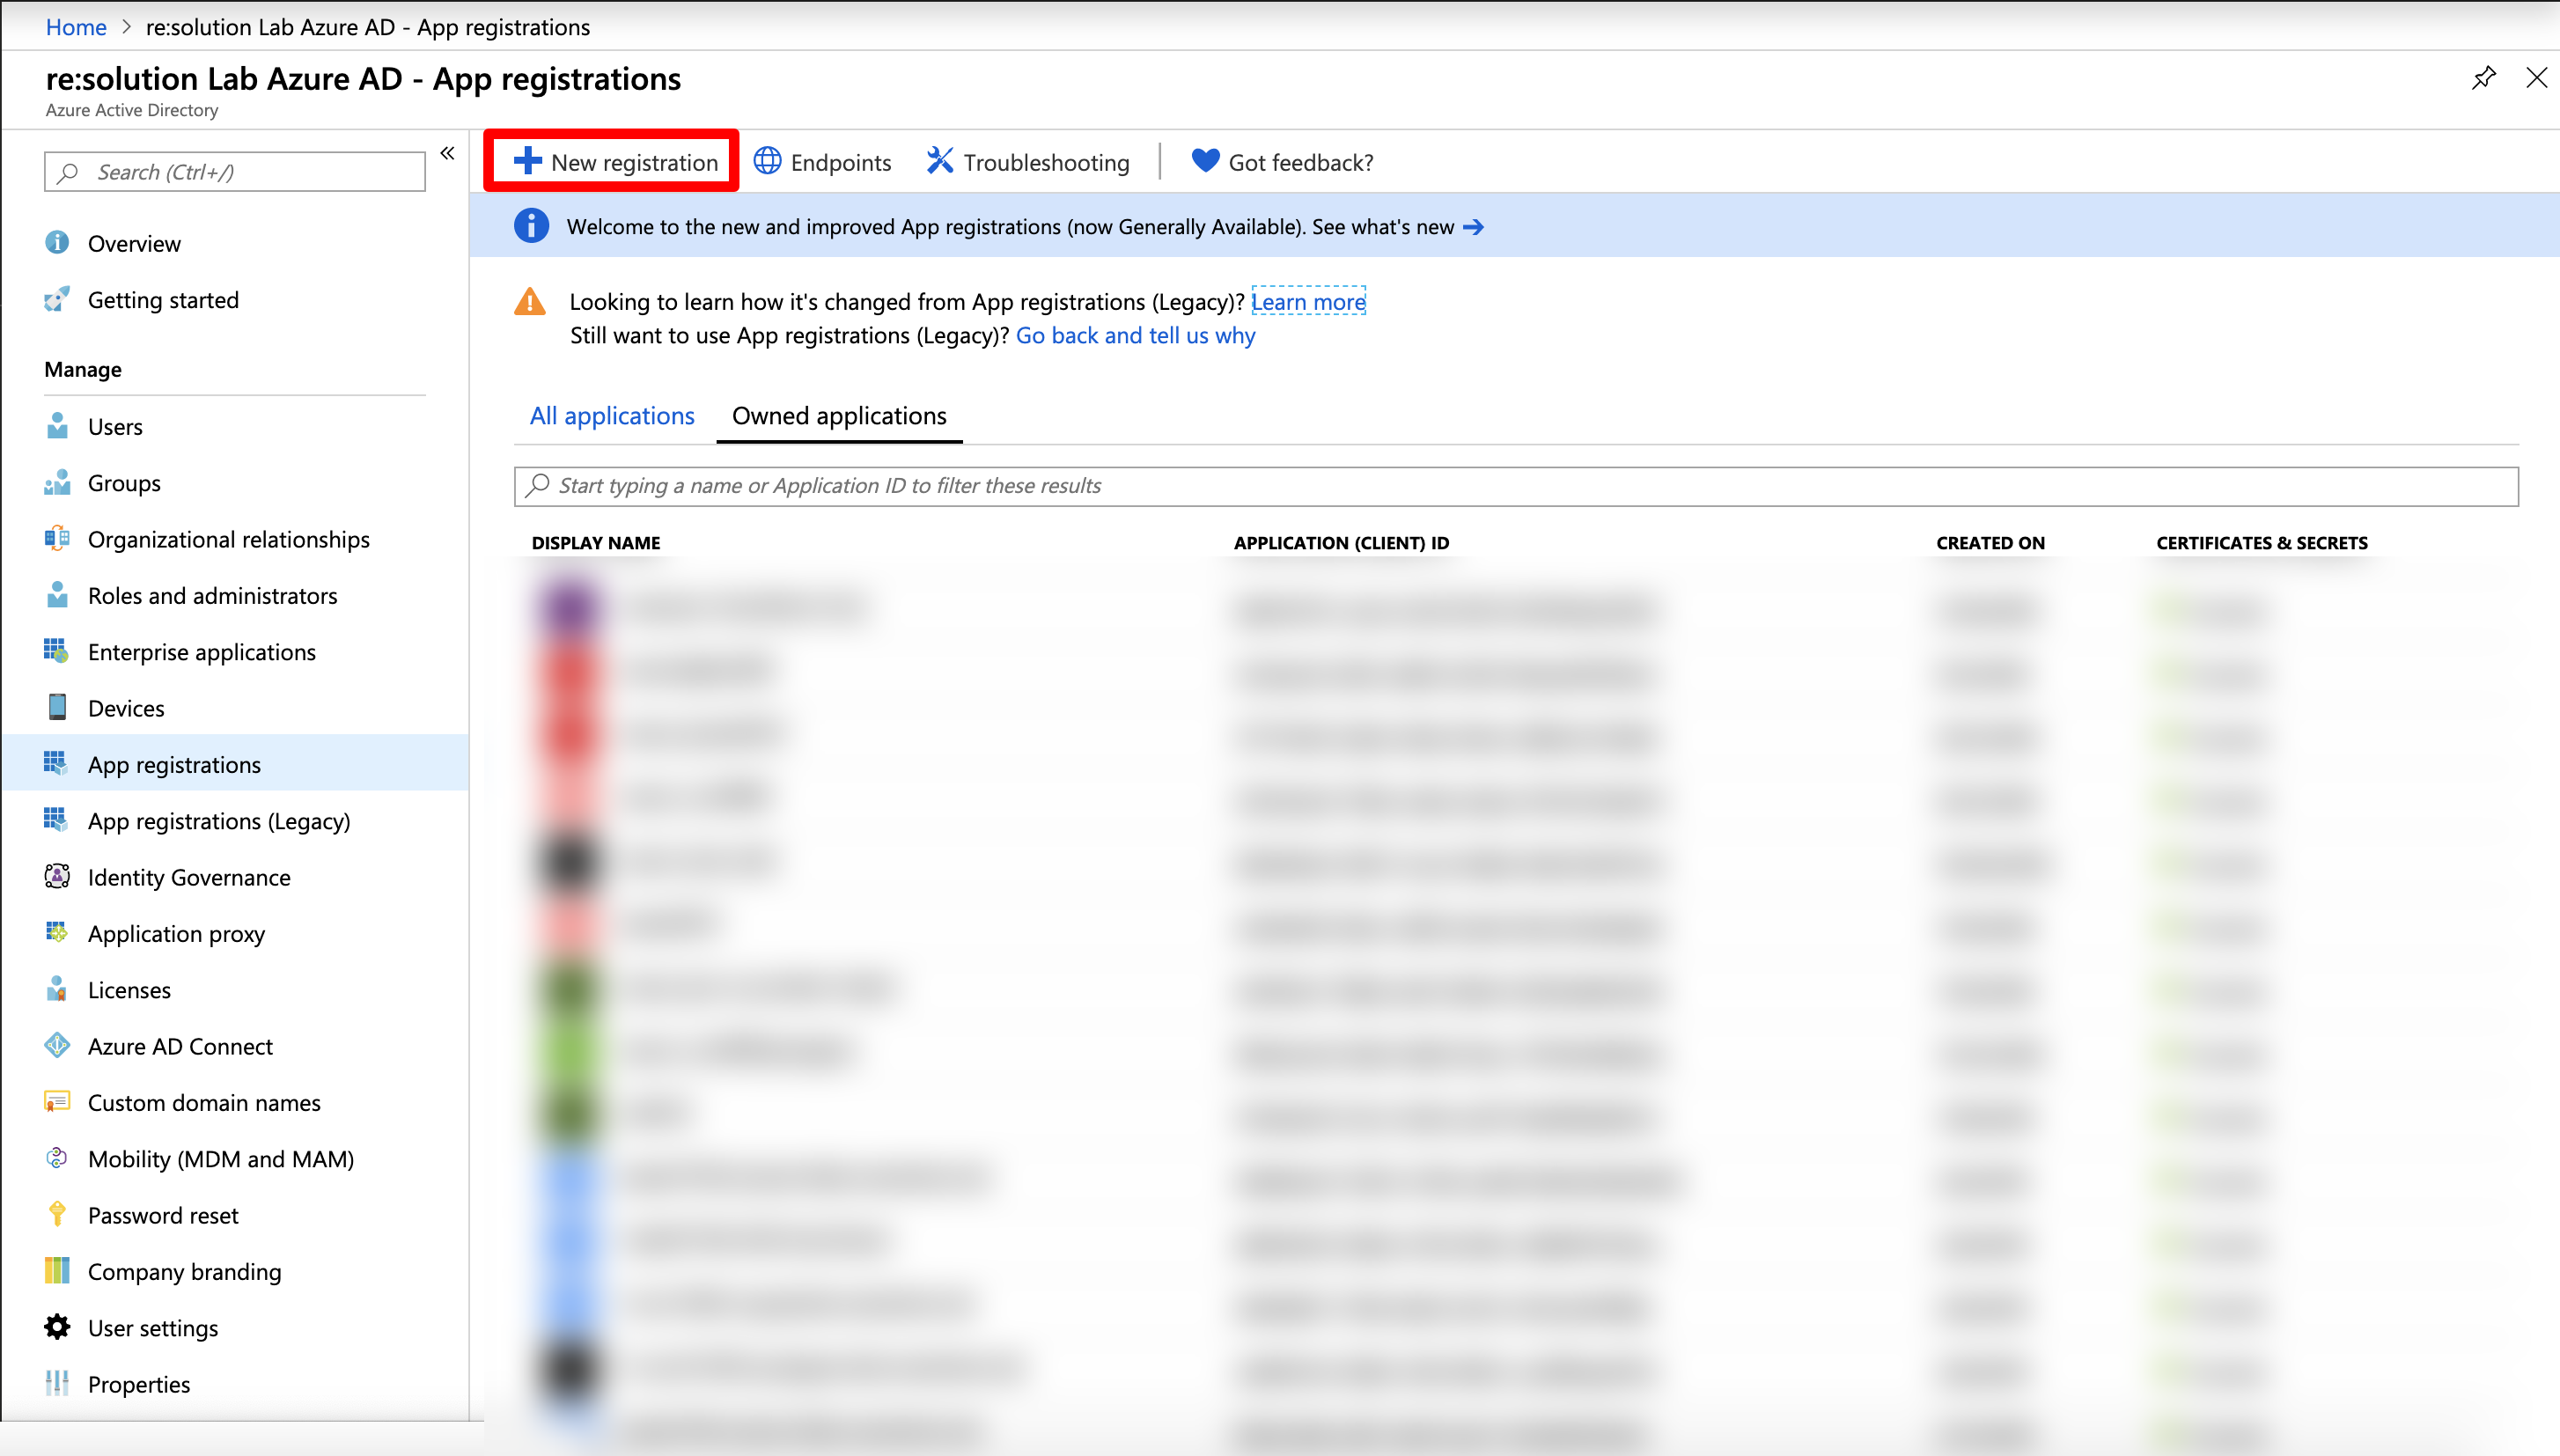
Click New registration to create a new app.
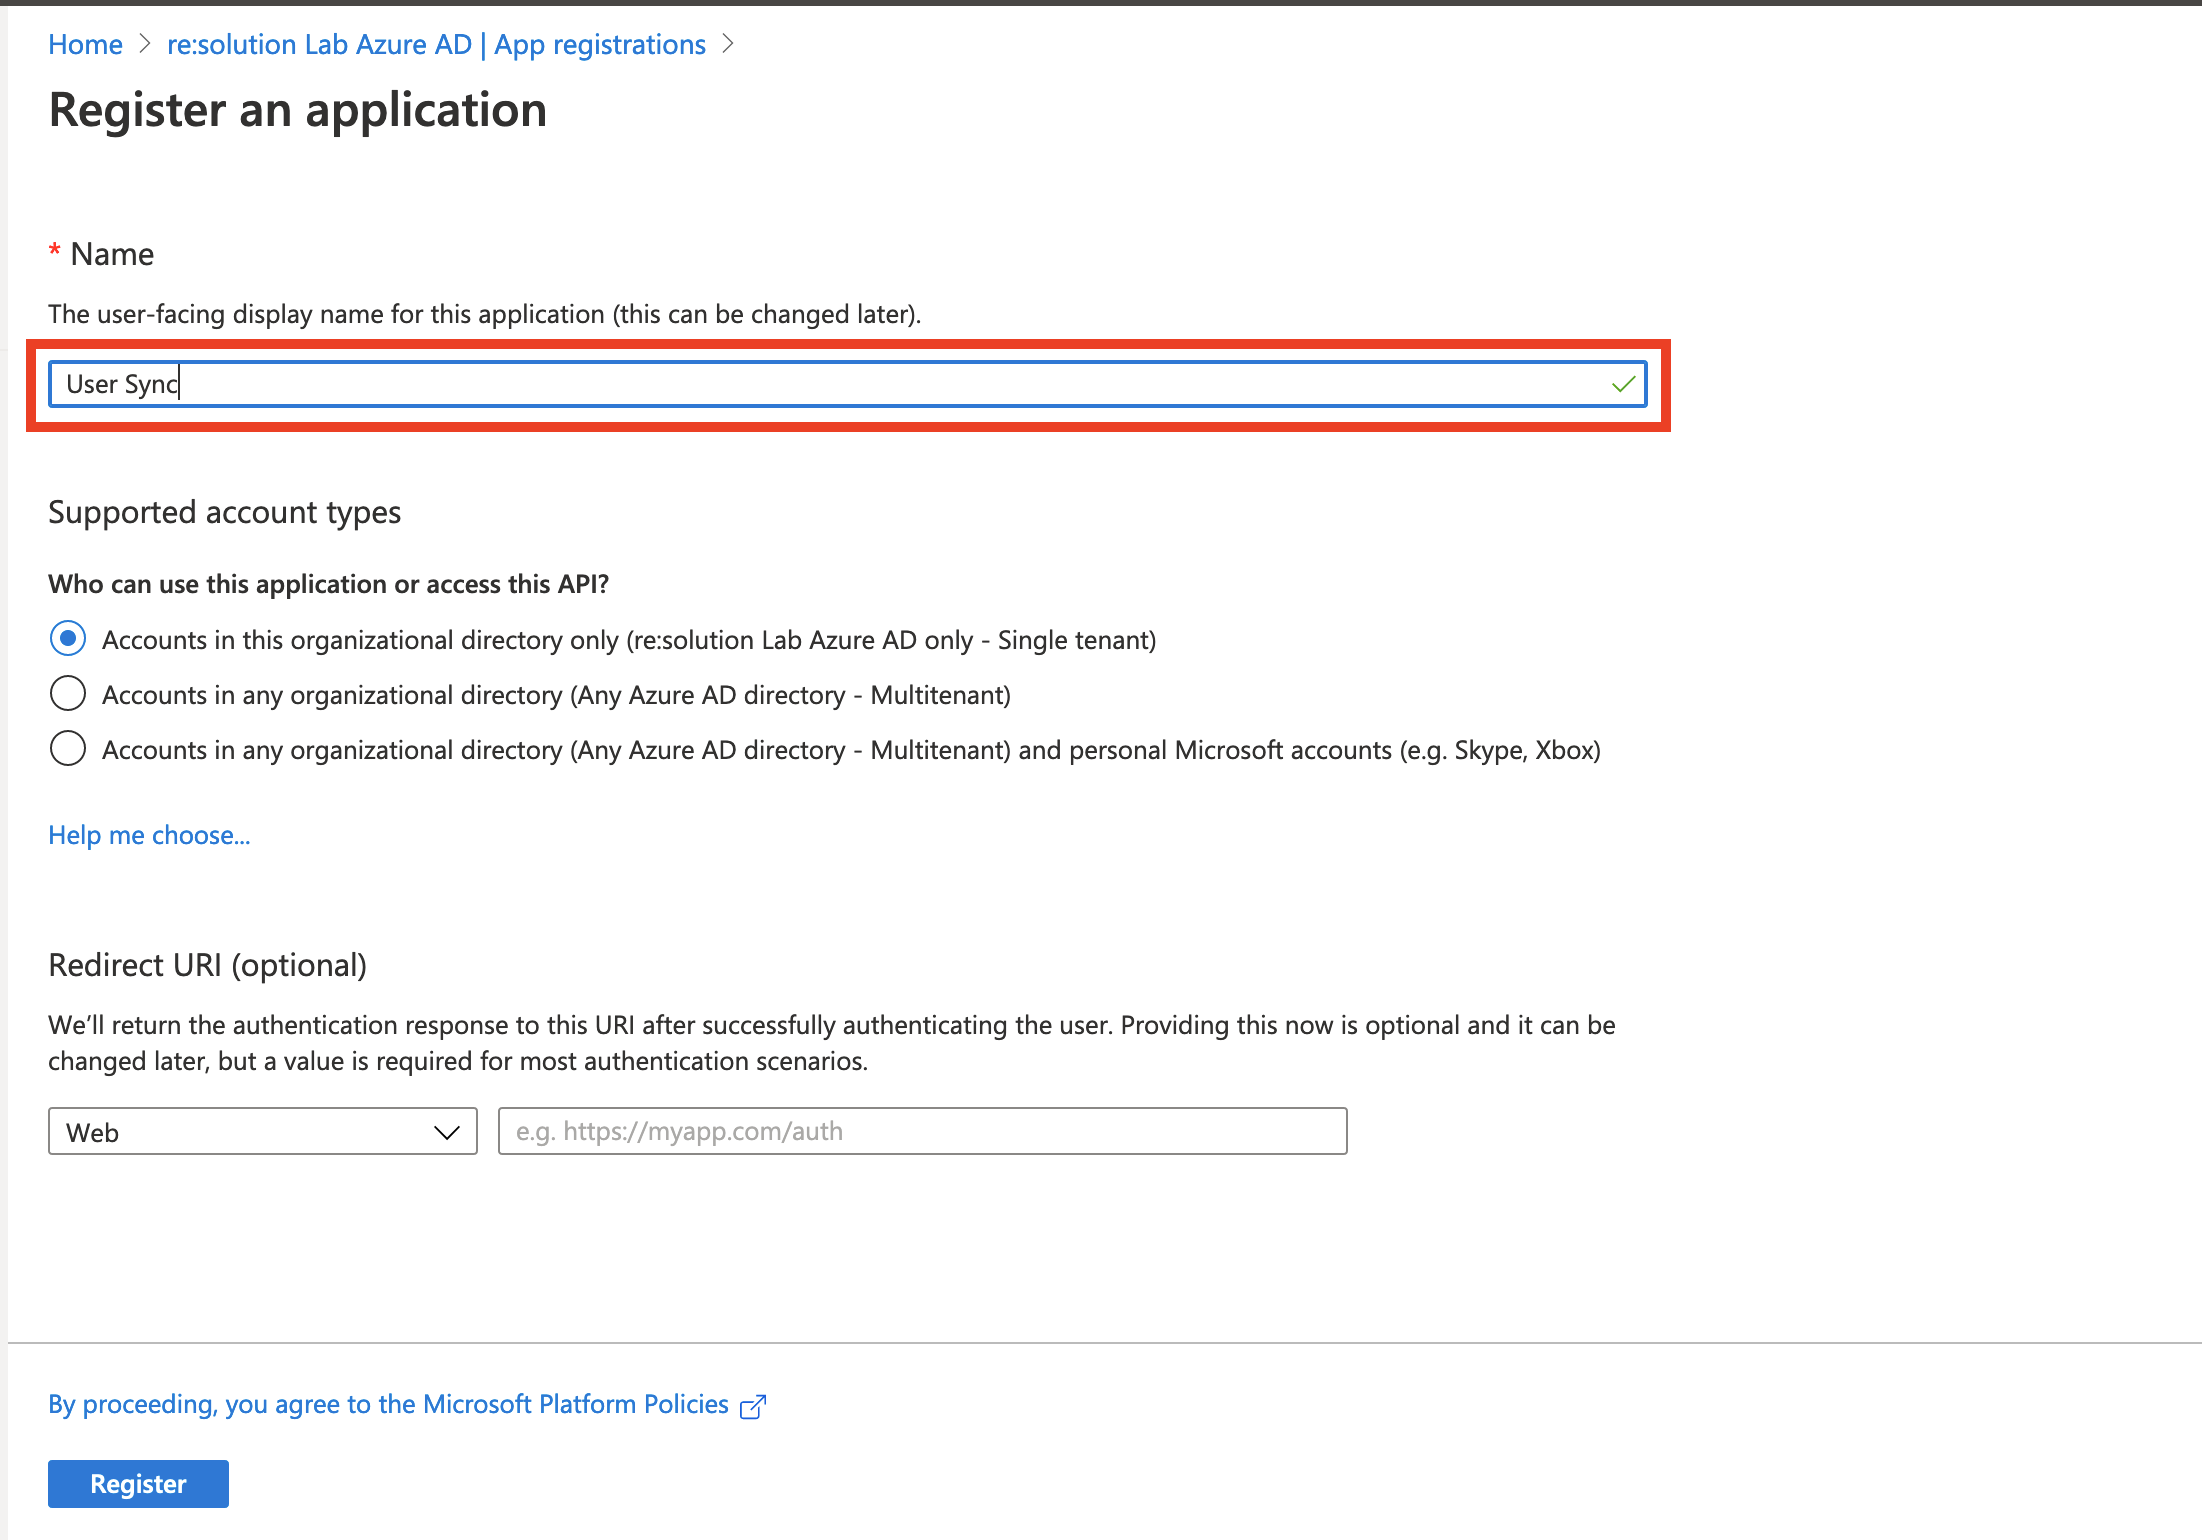
Enter a name for your application and click on Register to proceed.
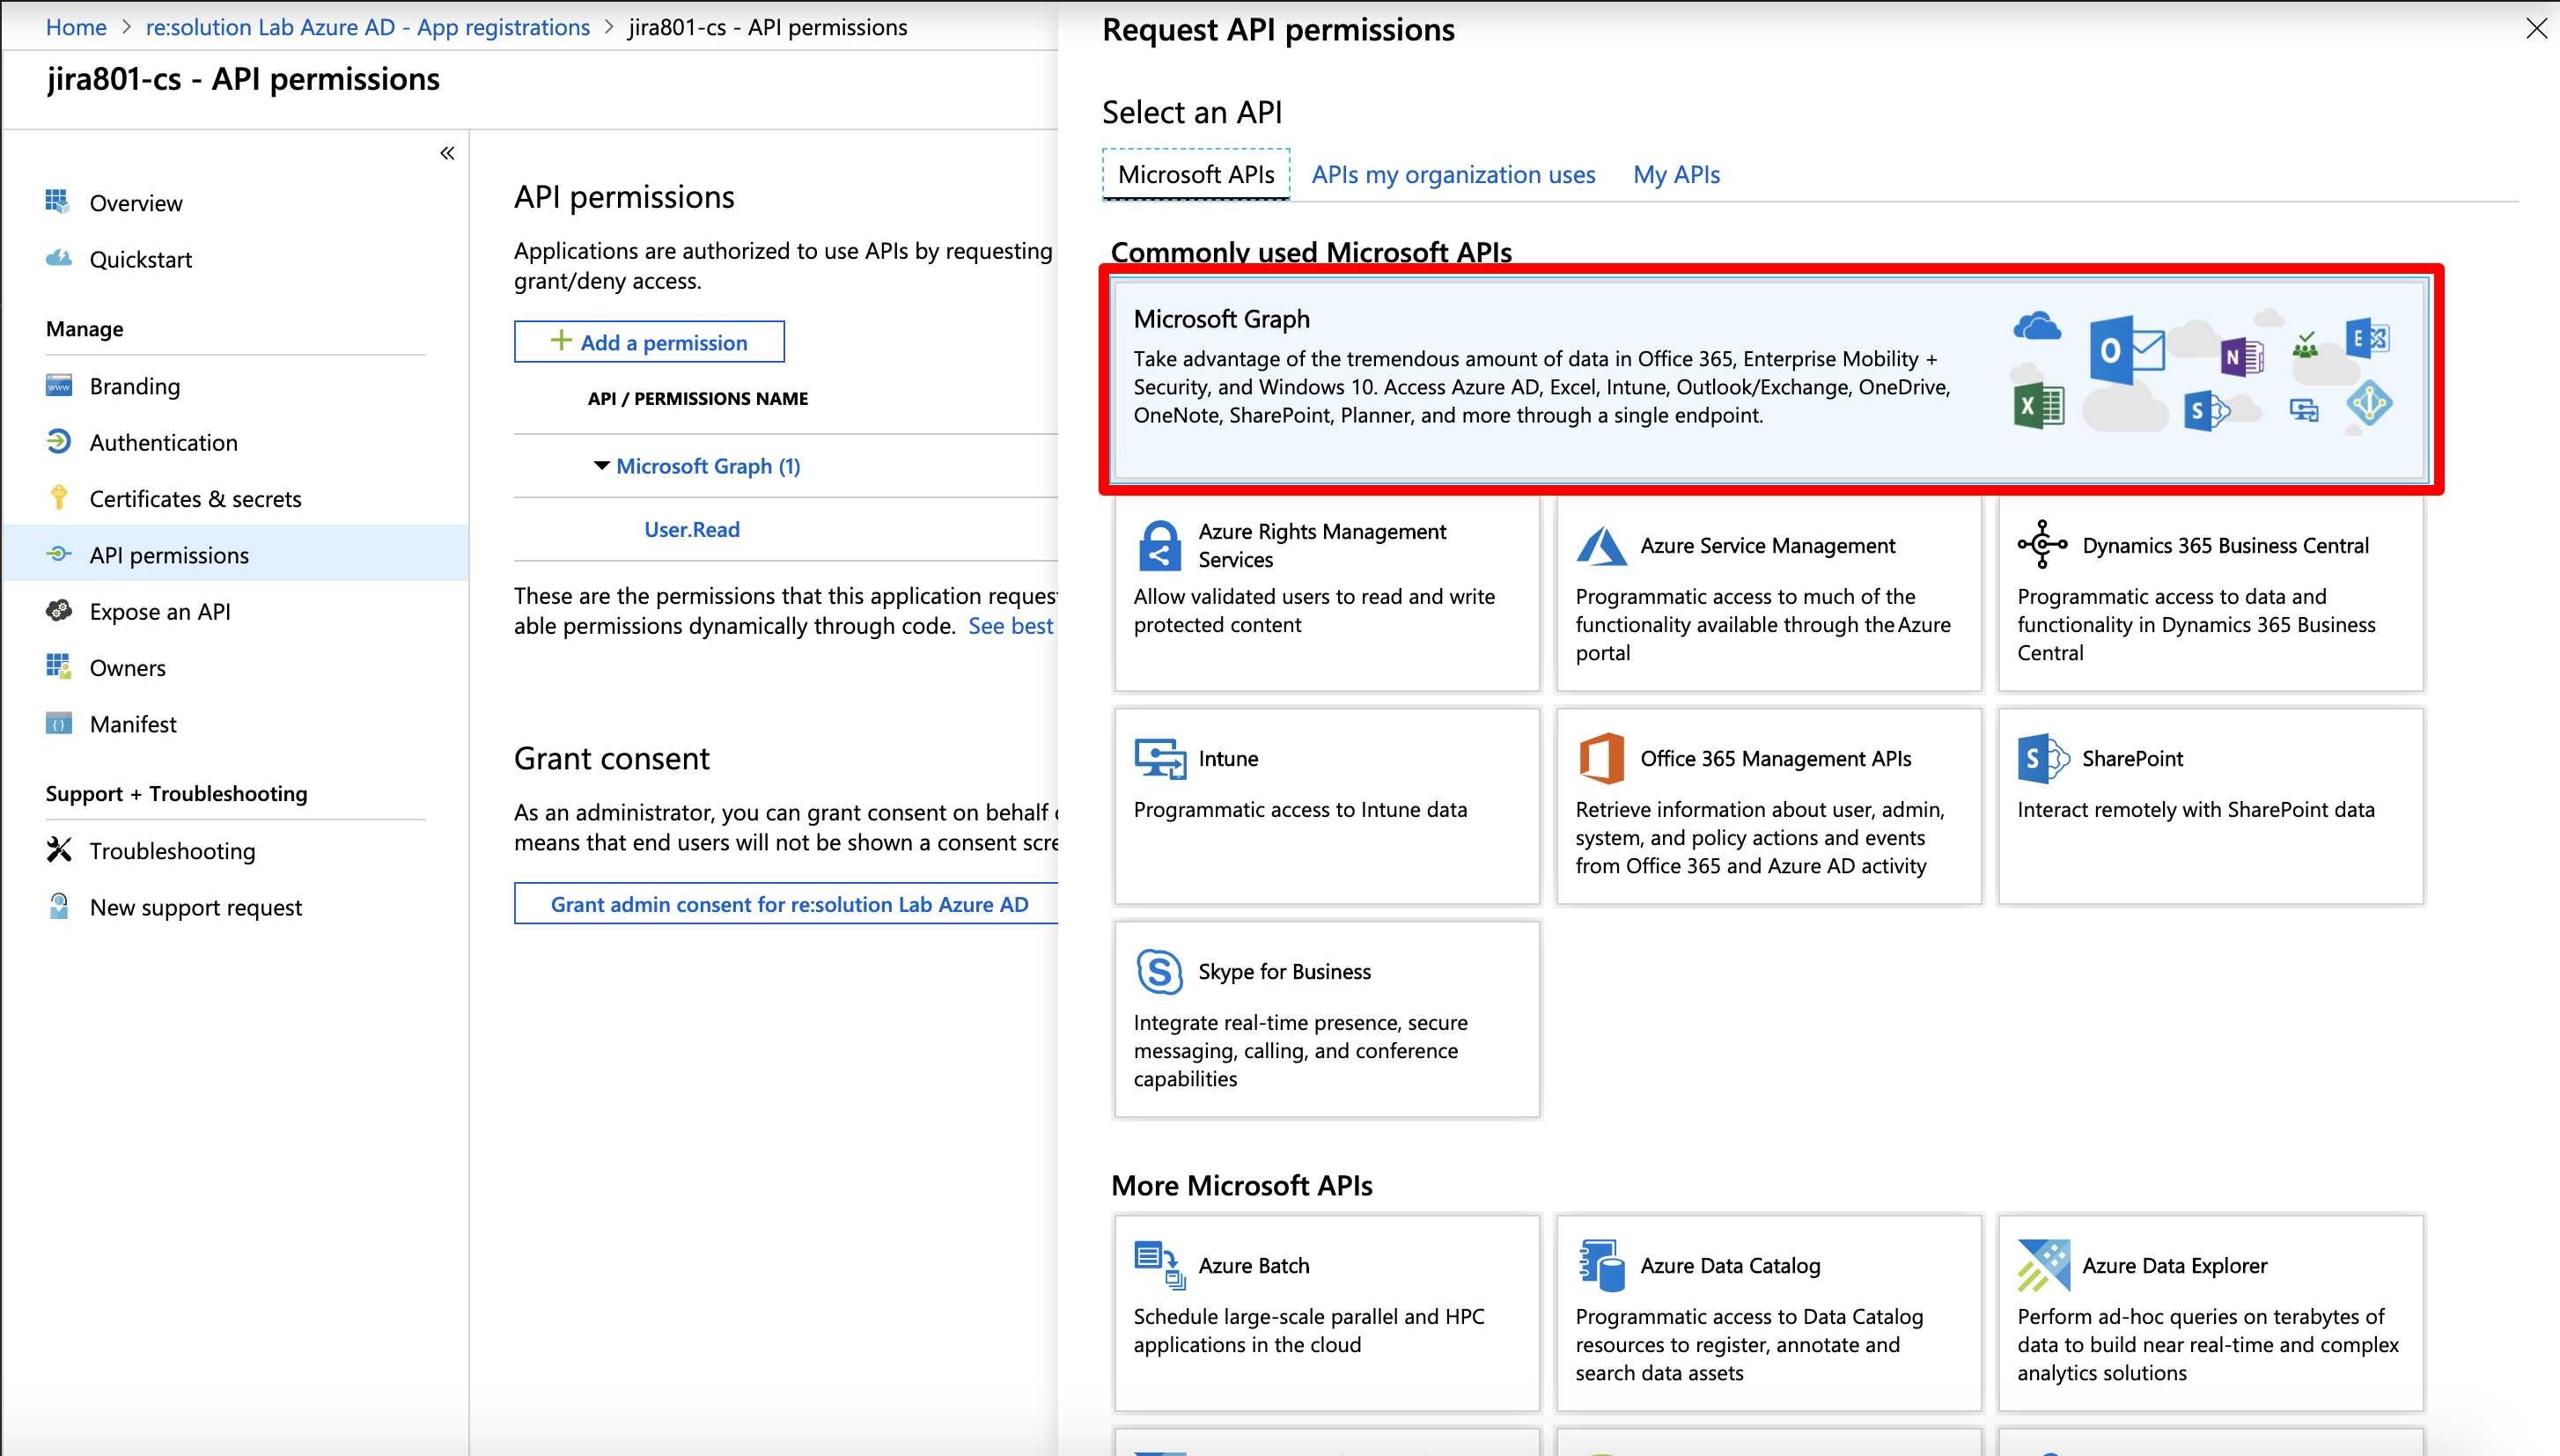
Click API permissions in the left panel and then on Add a permission.
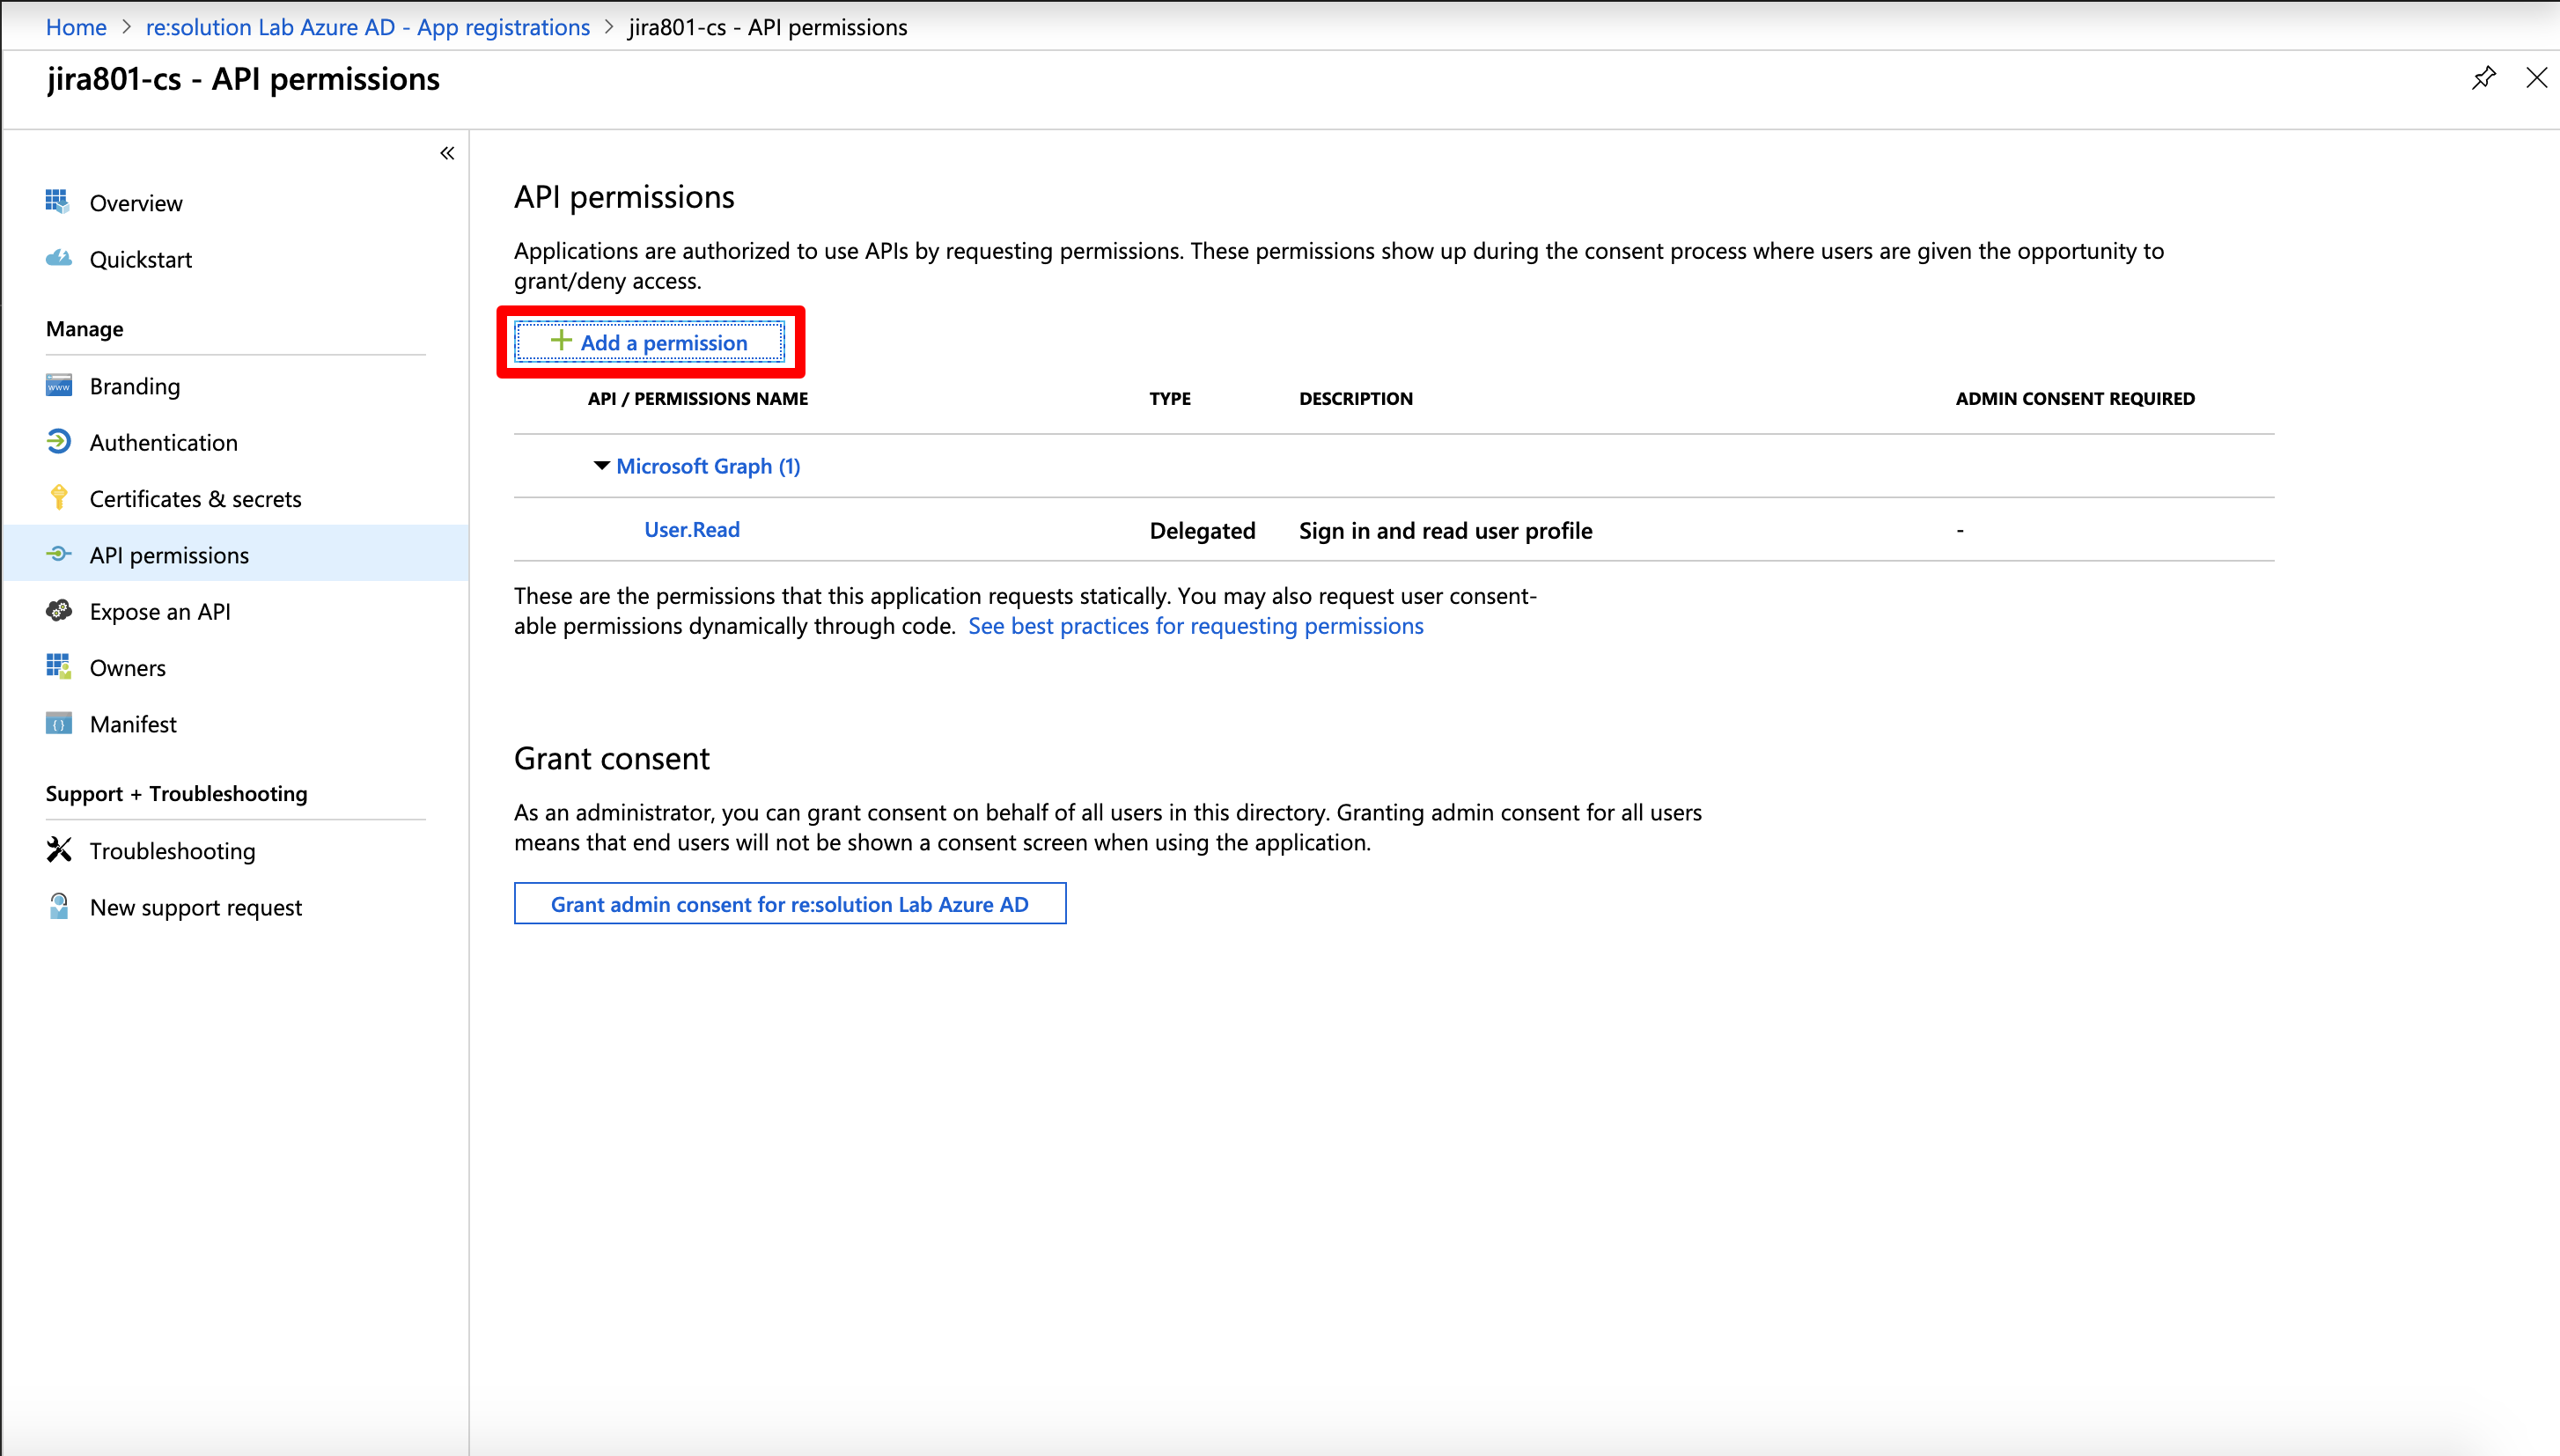
Select Microsoft Graph.
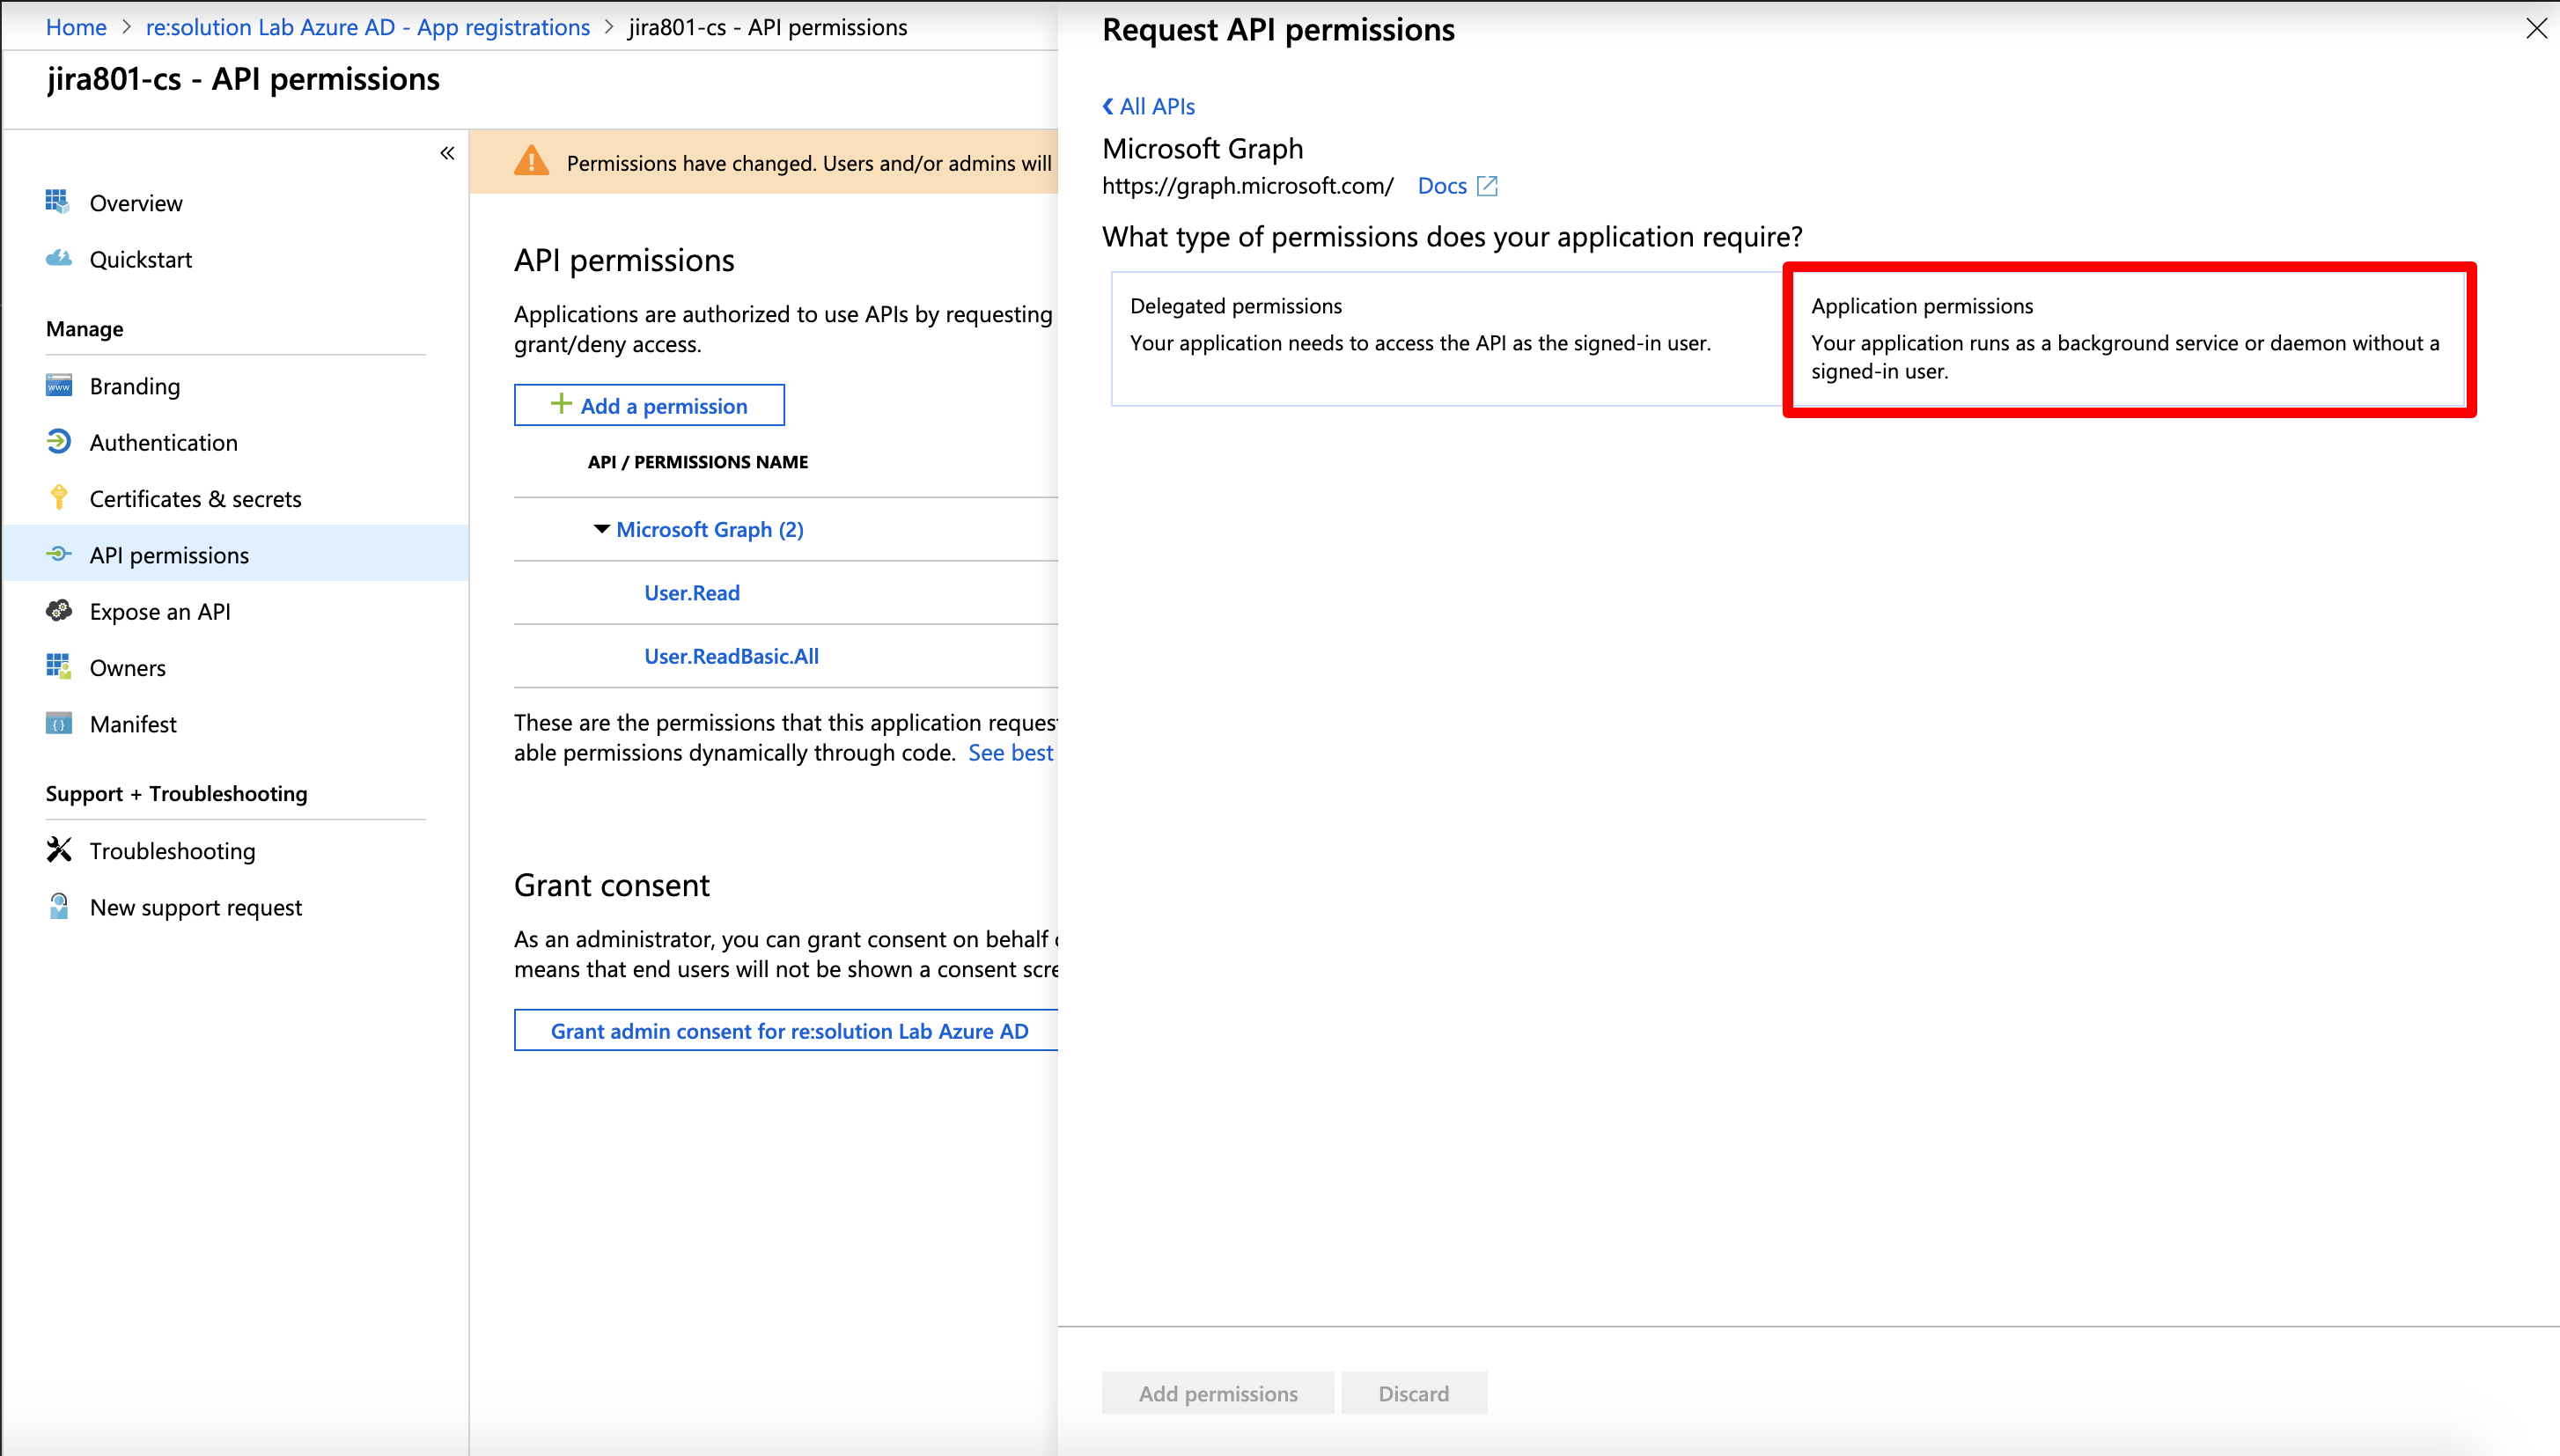
Choose Application permissions.
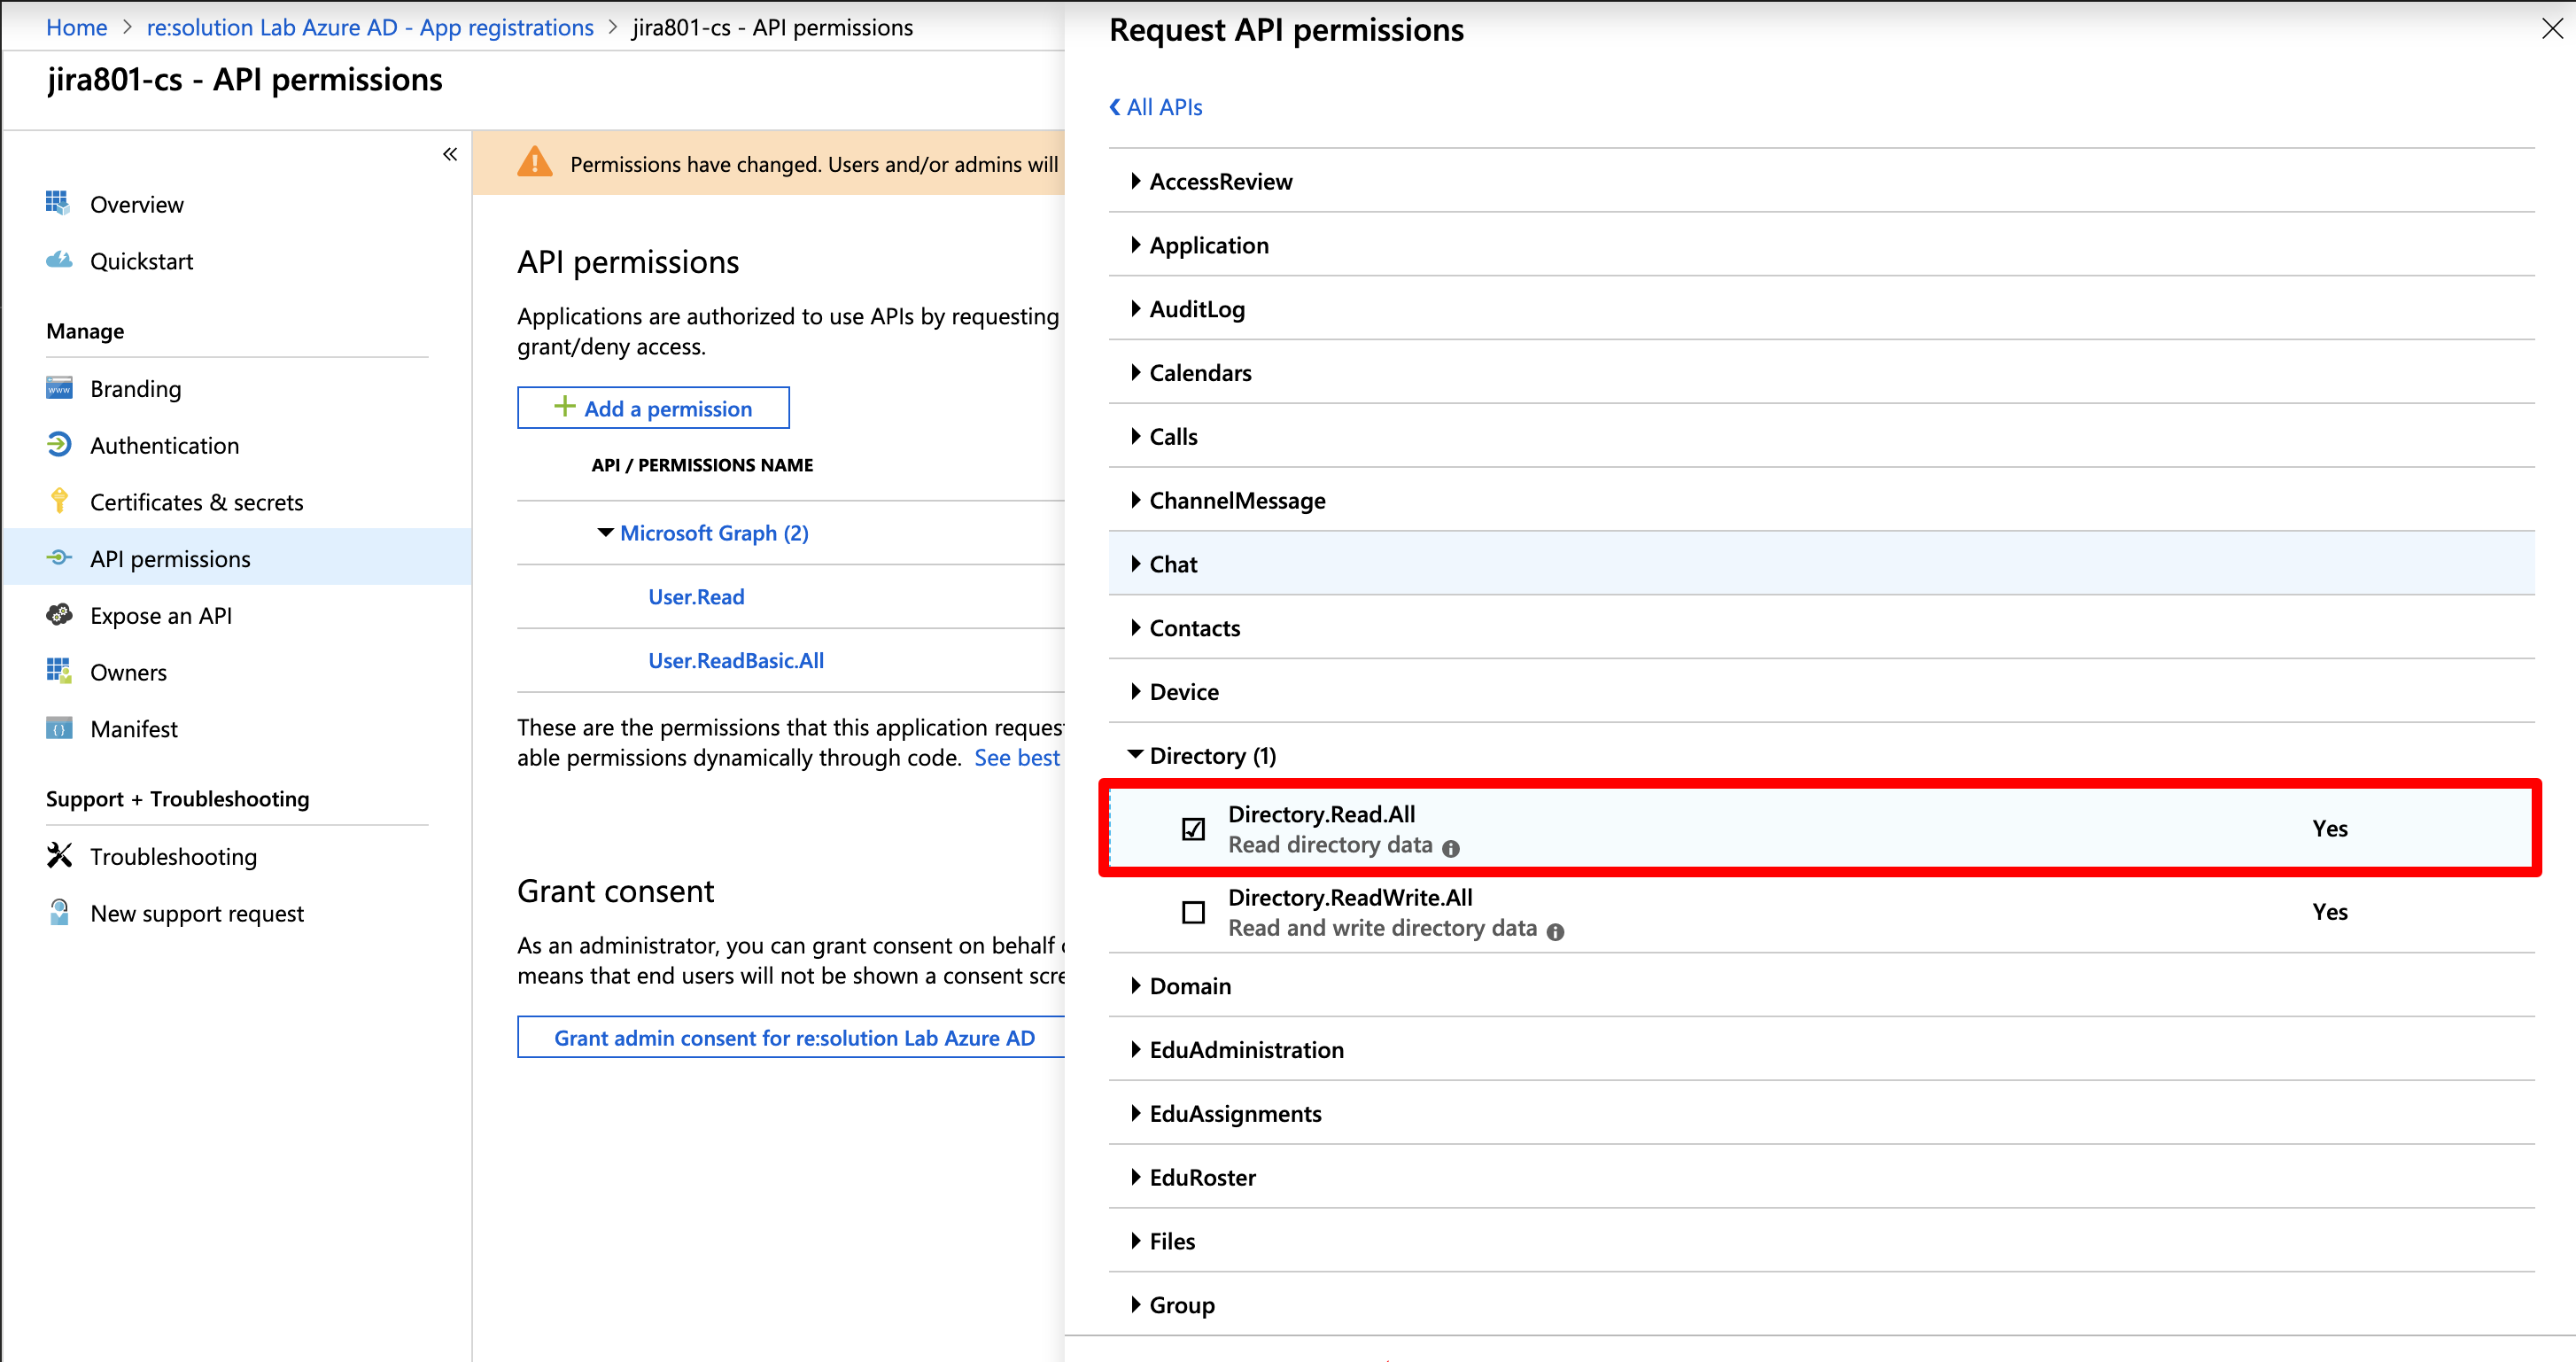
Expand Directory and tick Directory.Read.All
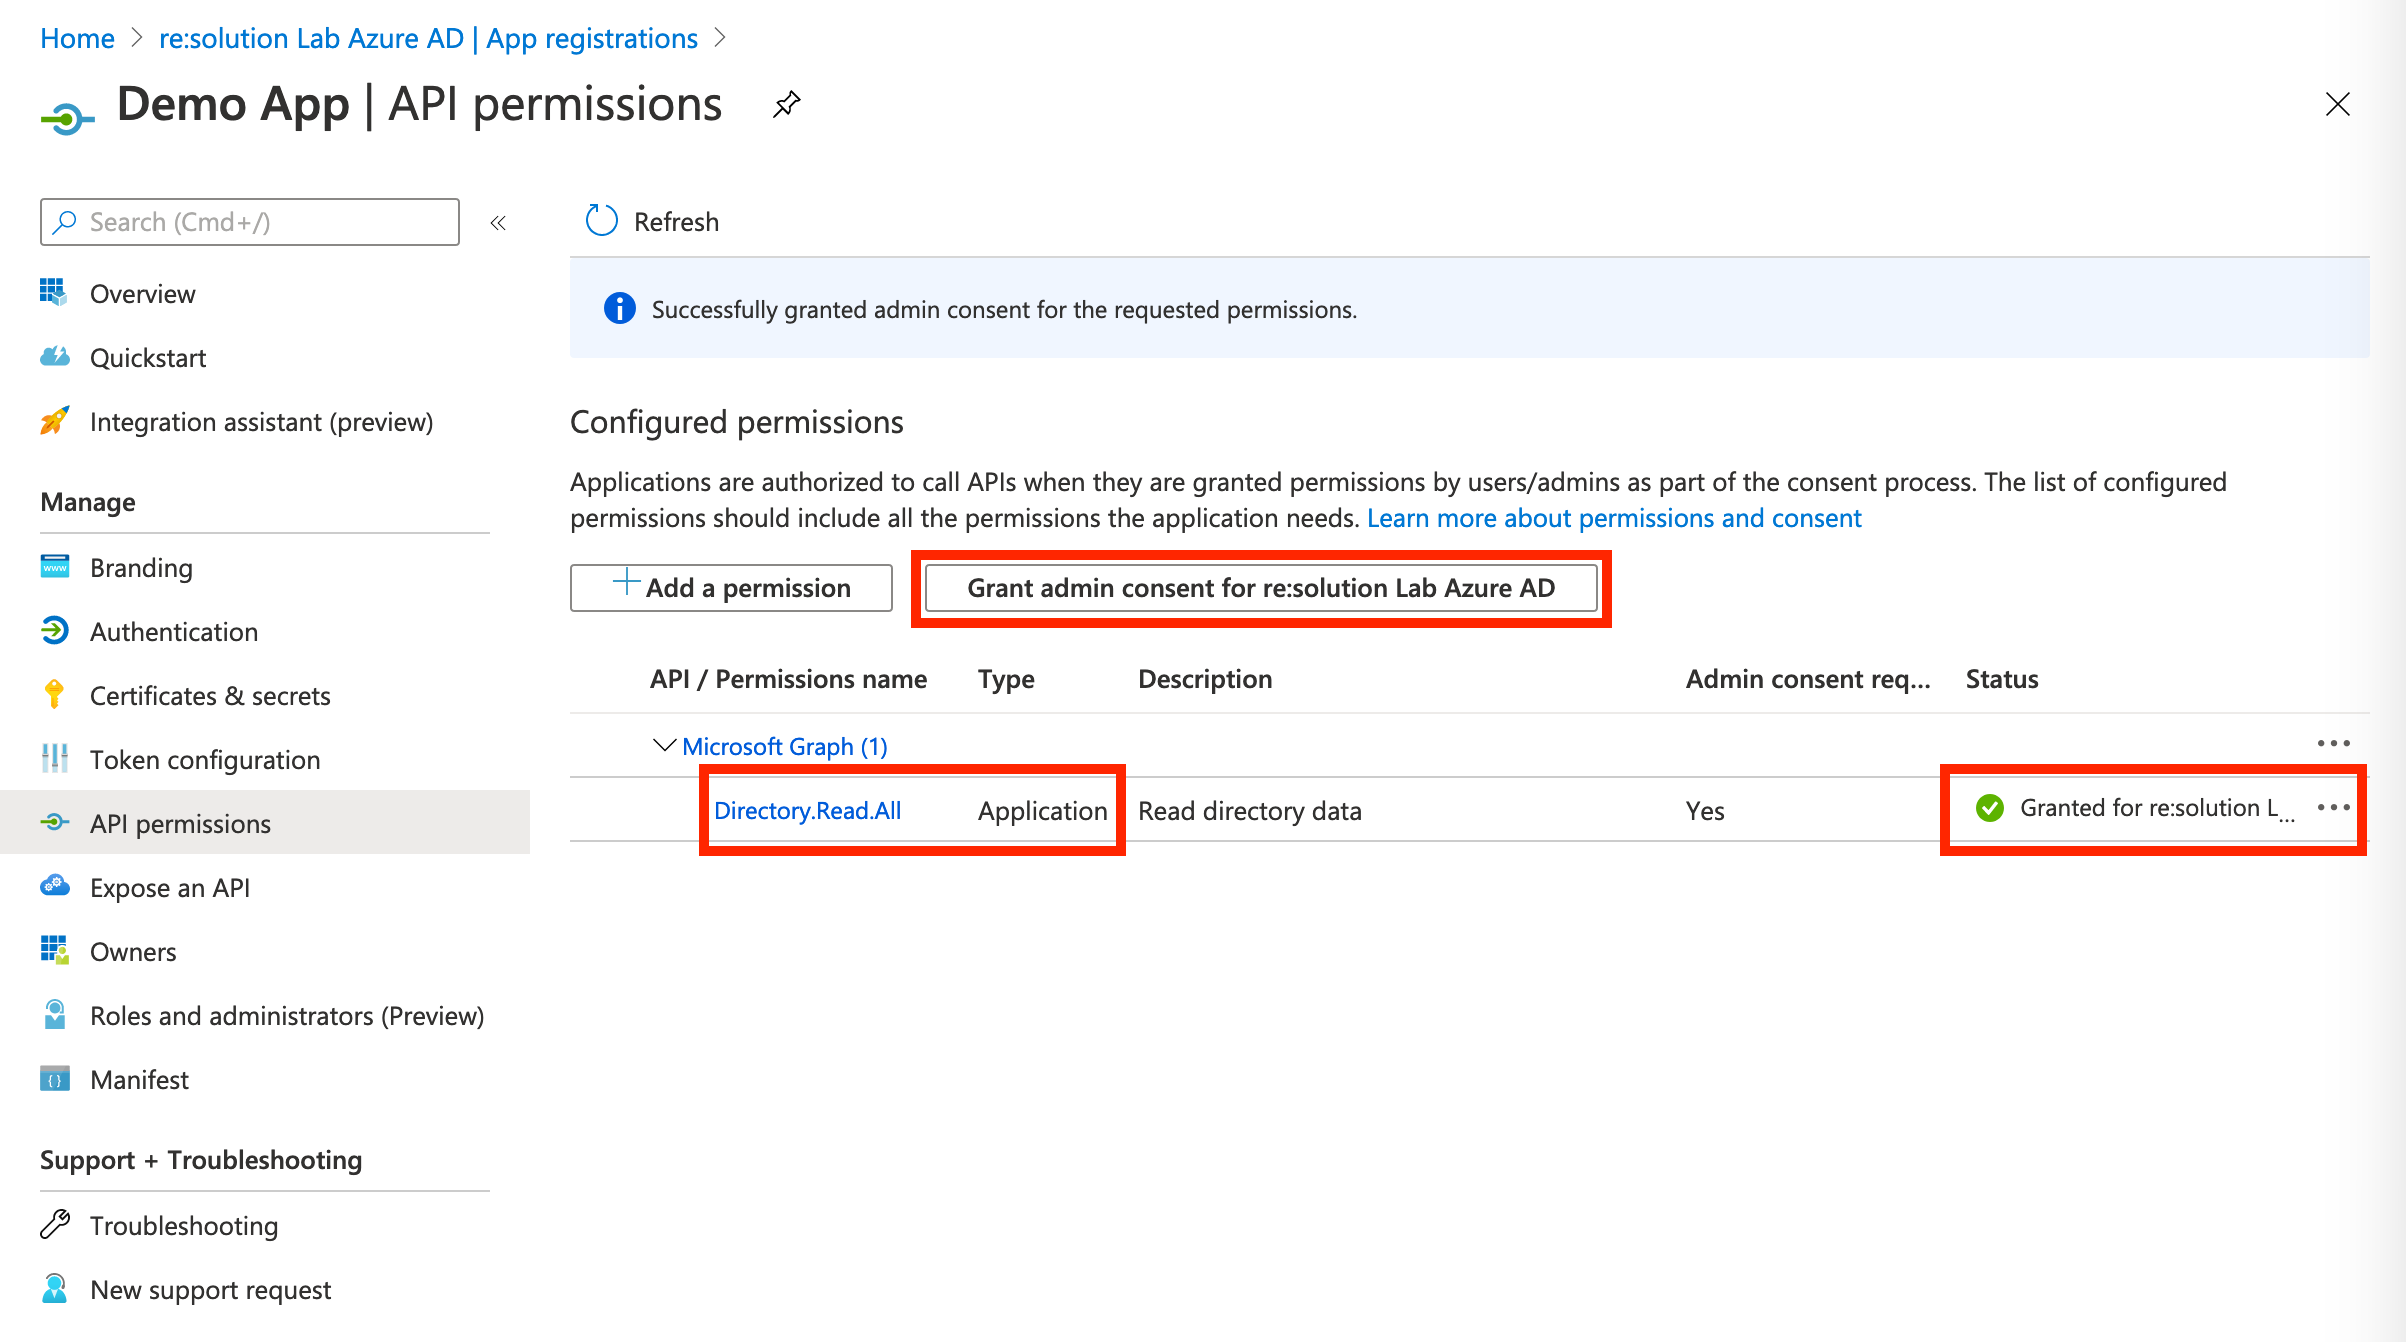
Click on "Grant admin consent for ...".
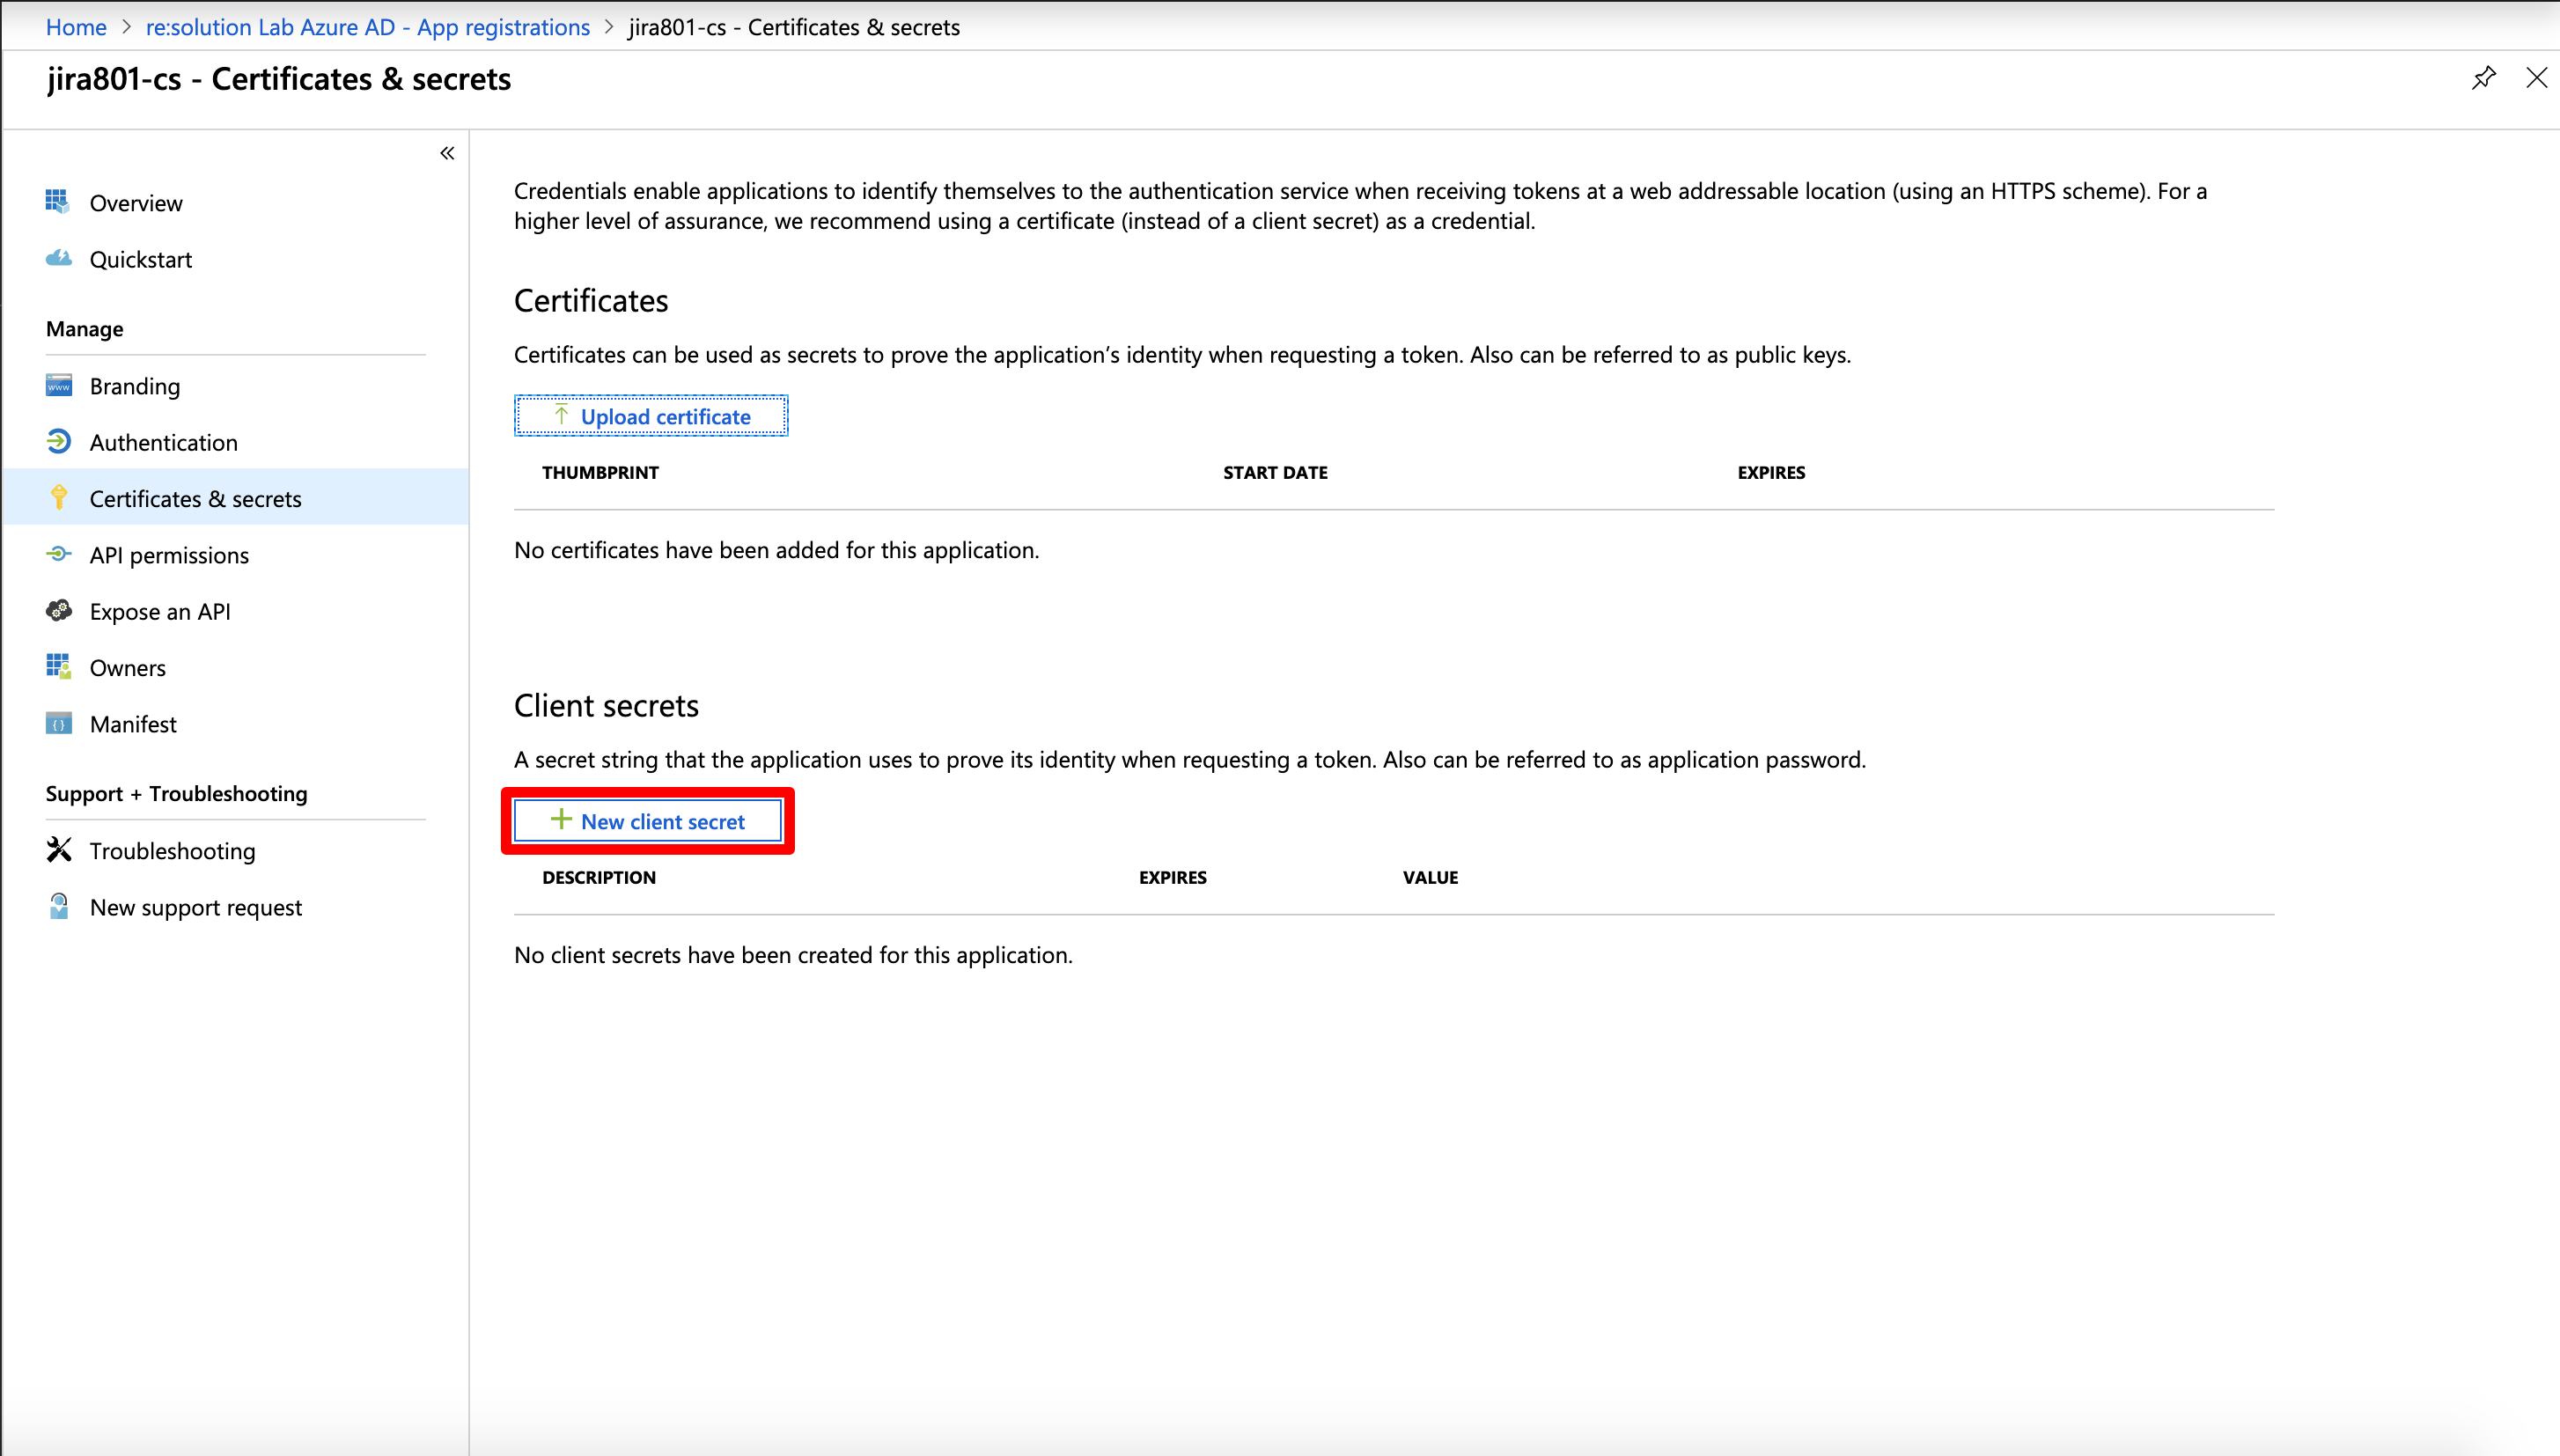
For the next step, click on Certificates & secrets in the left panel, and then click on New client secret.
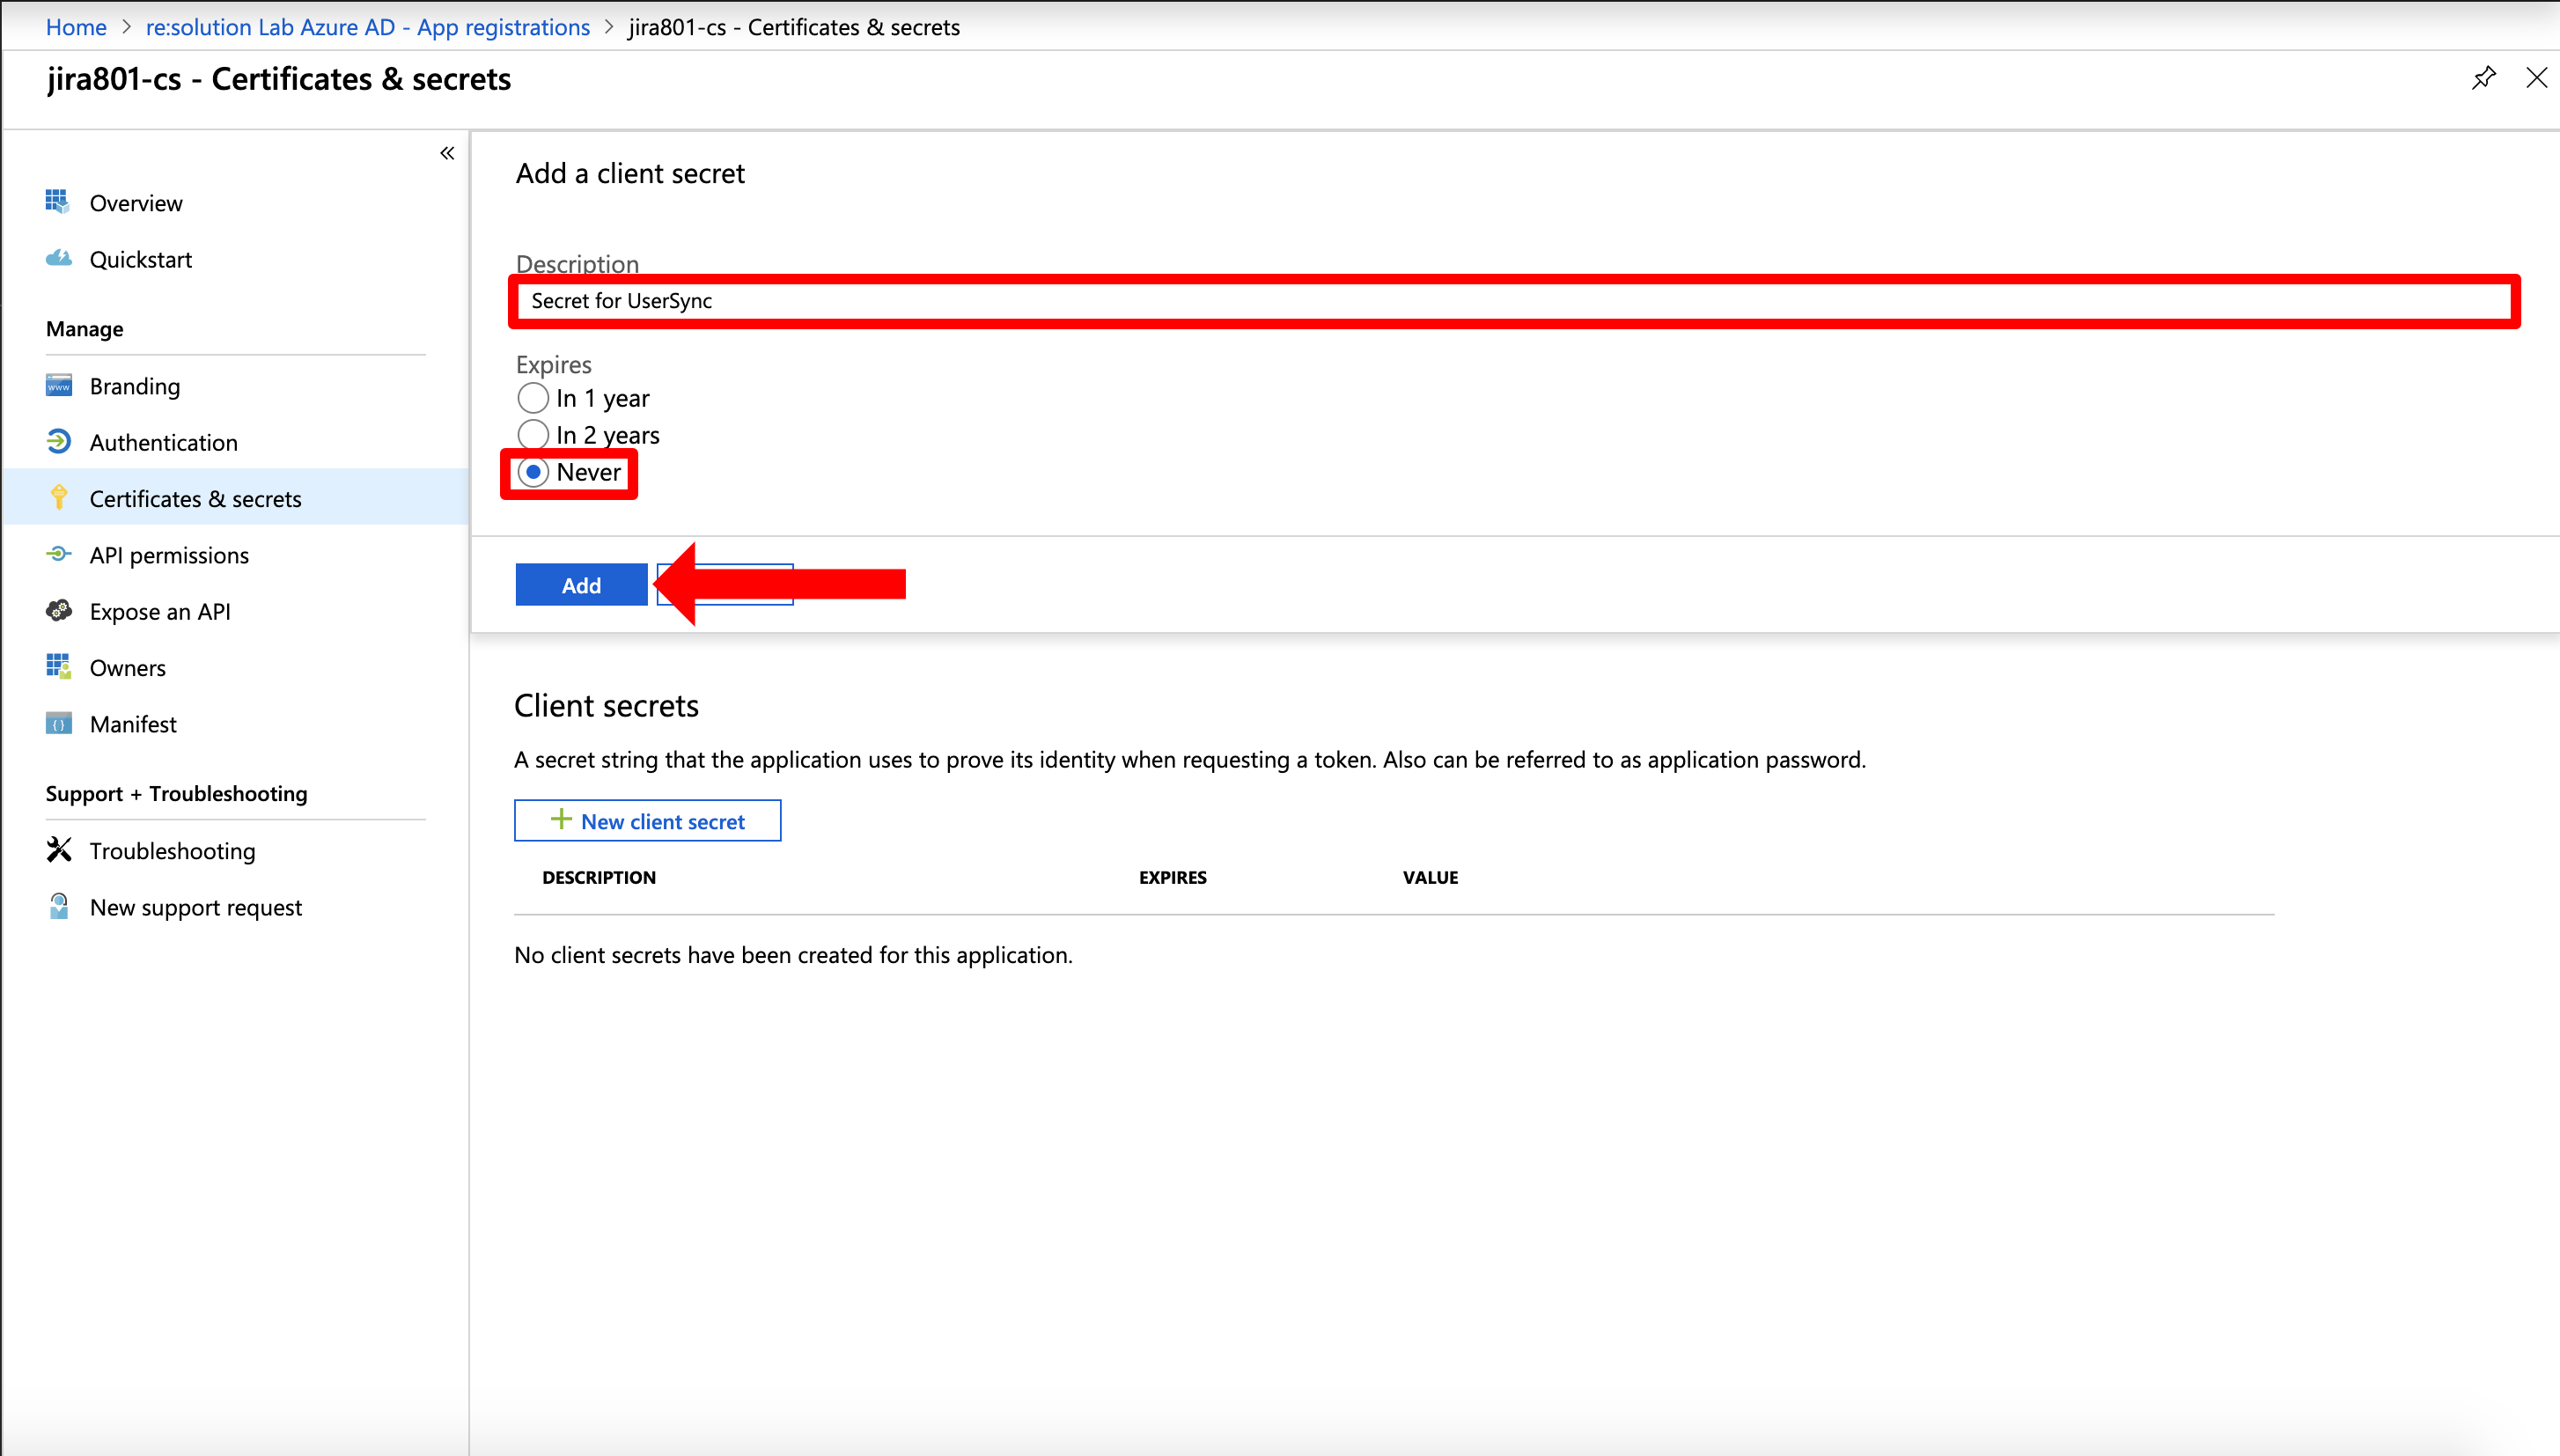
Enter a description for the secret and also set an expiry date. Click on Add to confirm.
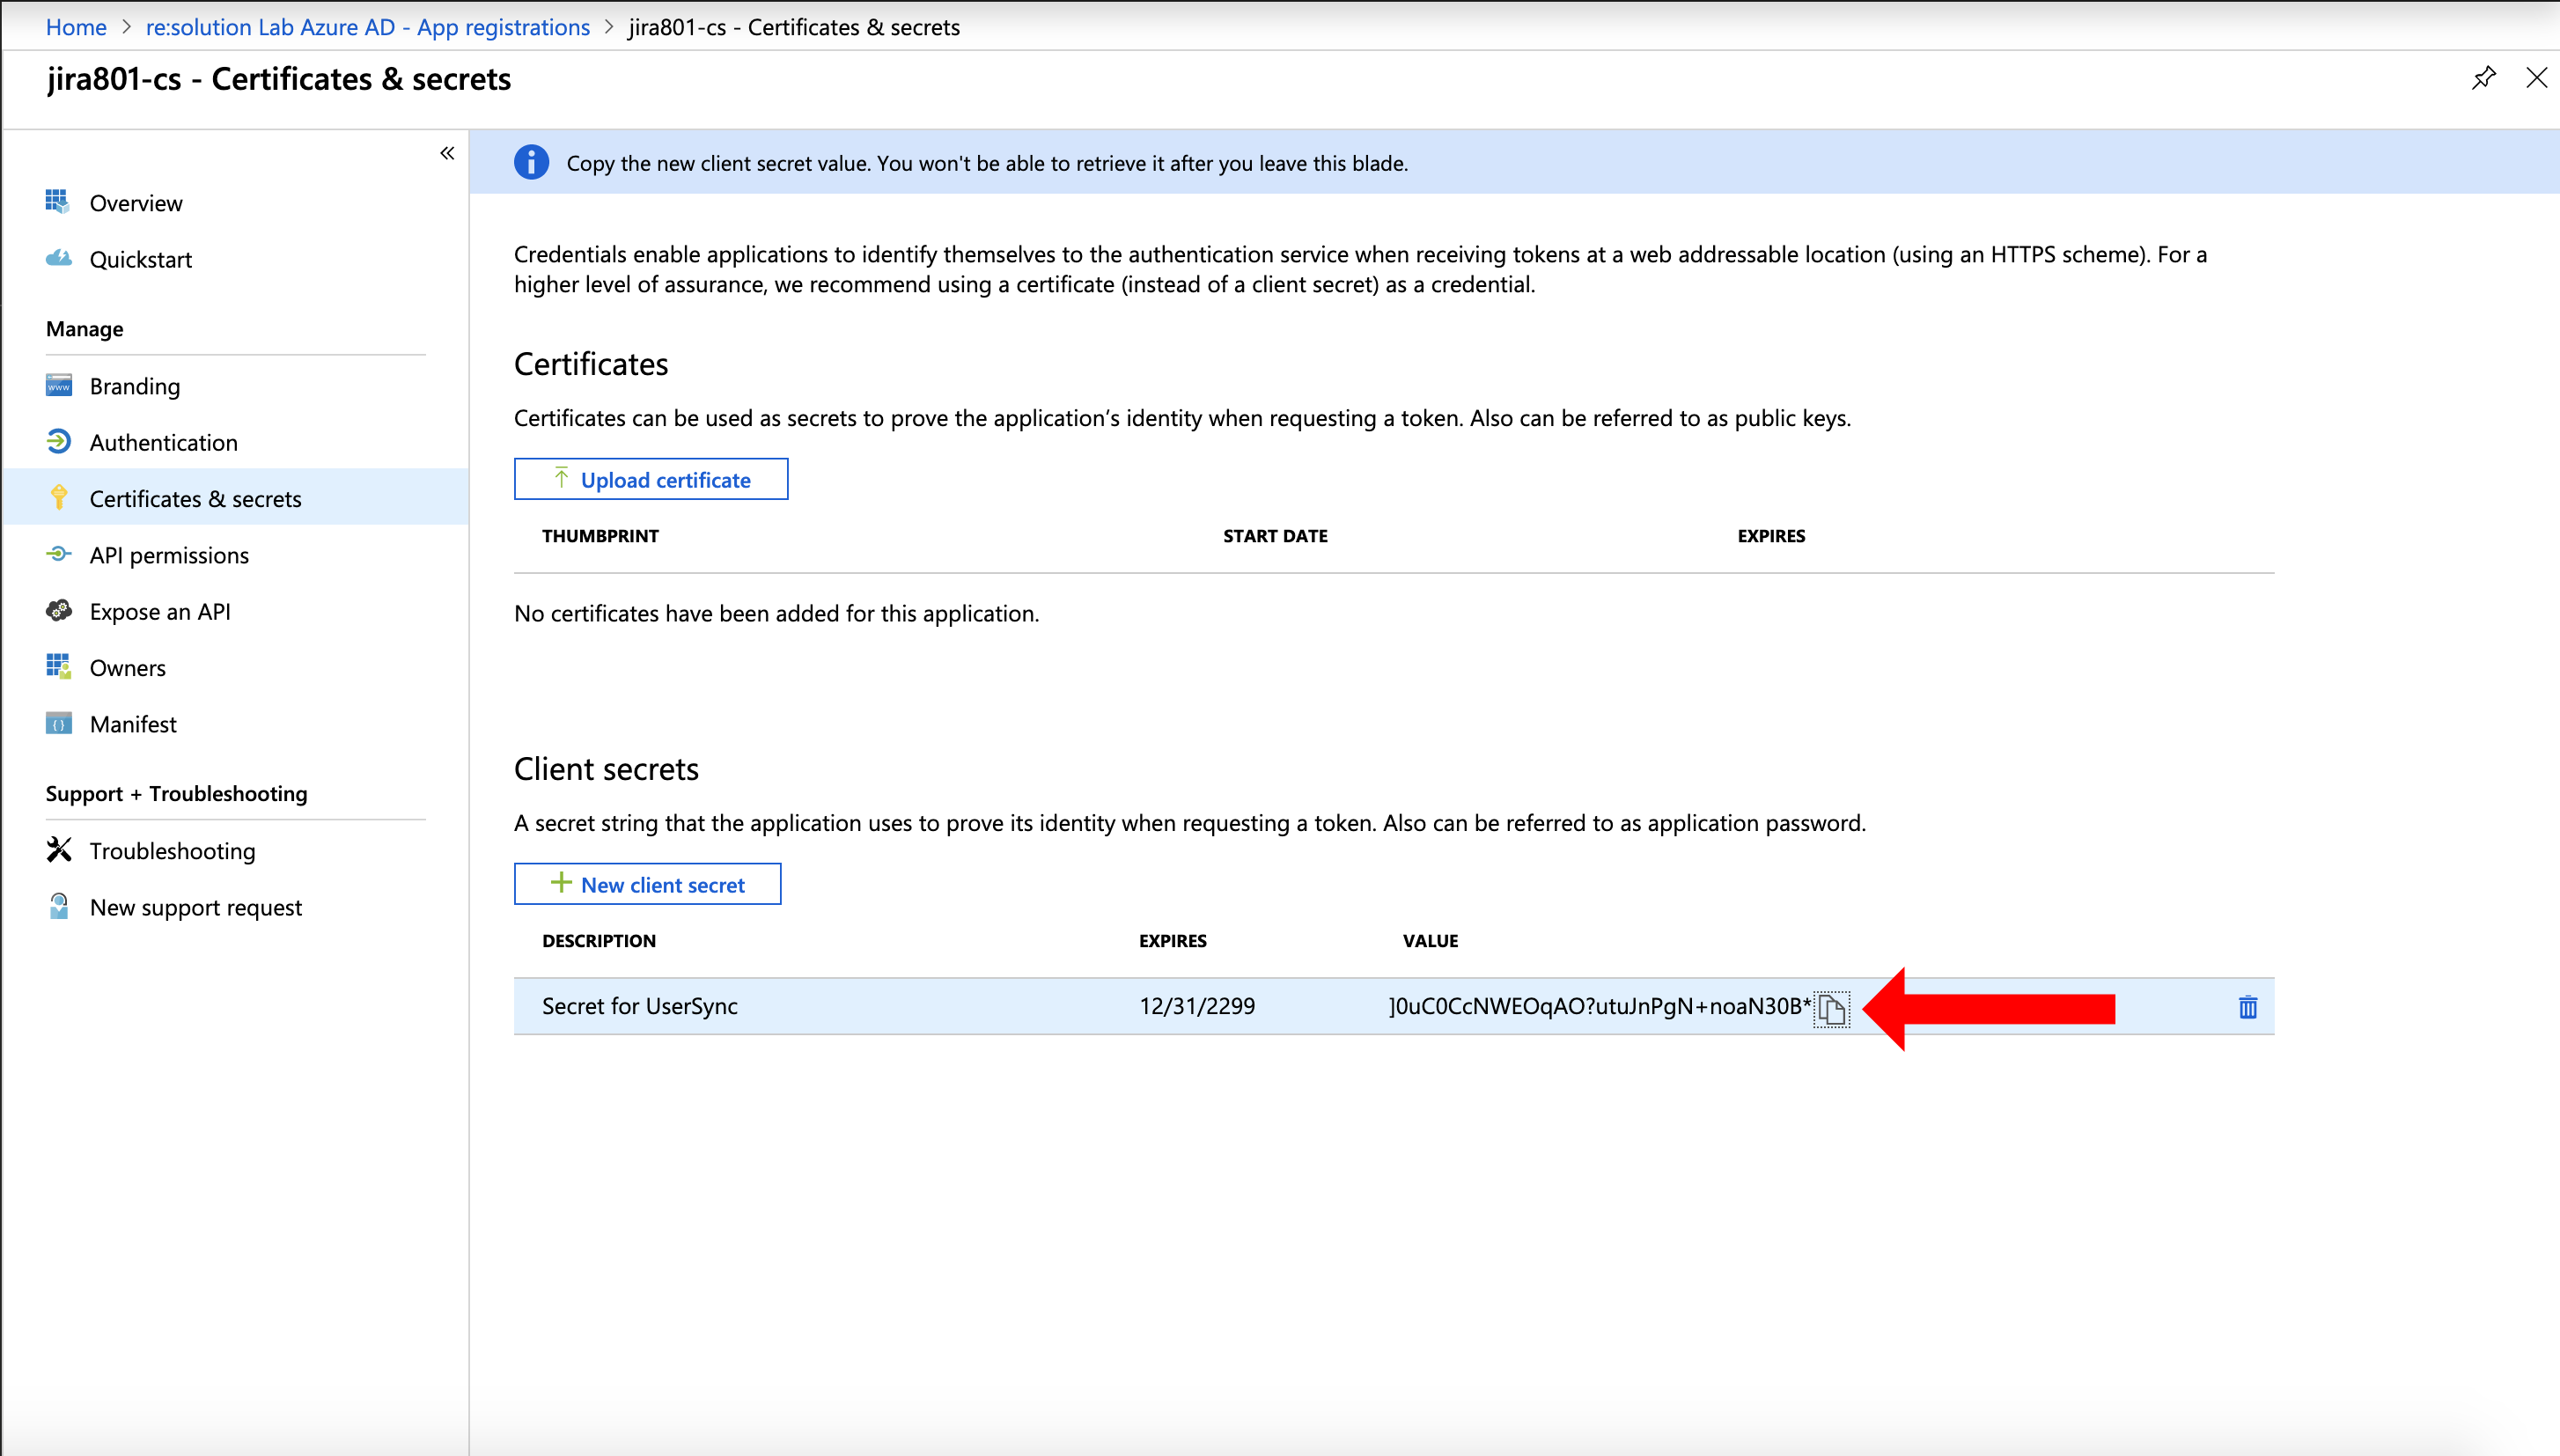
Your Client secret will displayed only once, thus copy the secret. Of course it is possible to create a new secret, if you lost your secret.
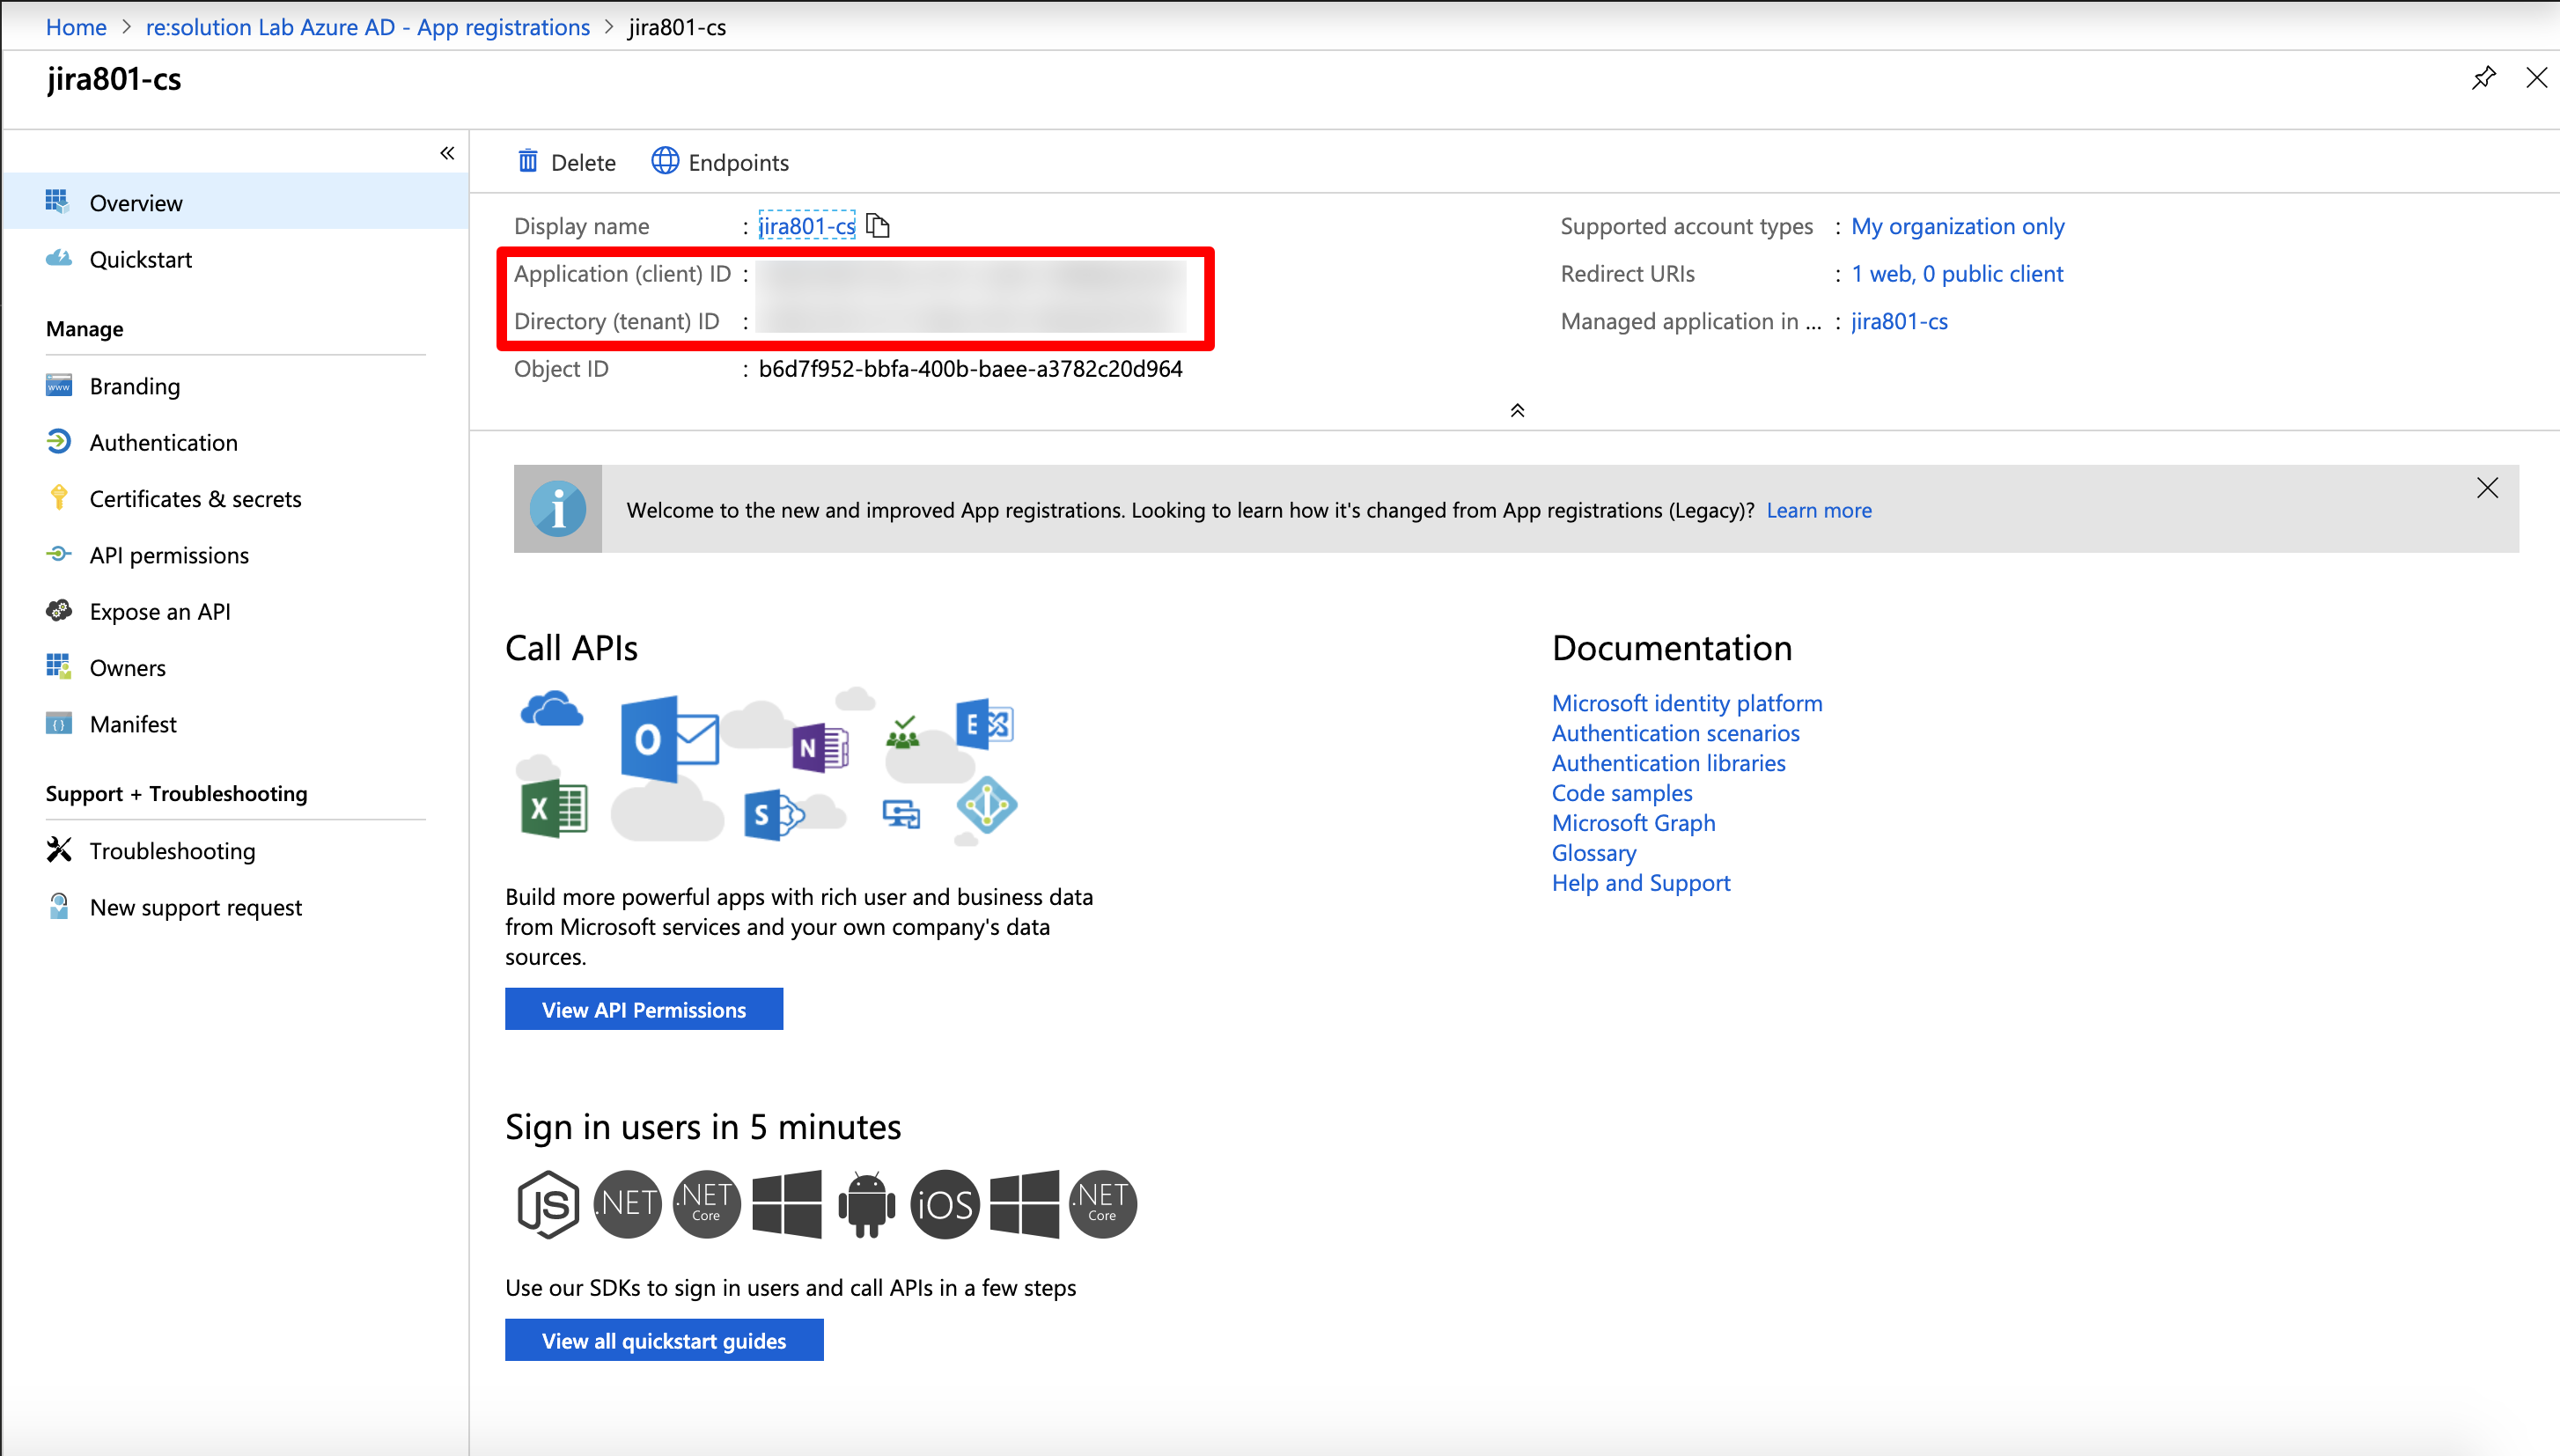
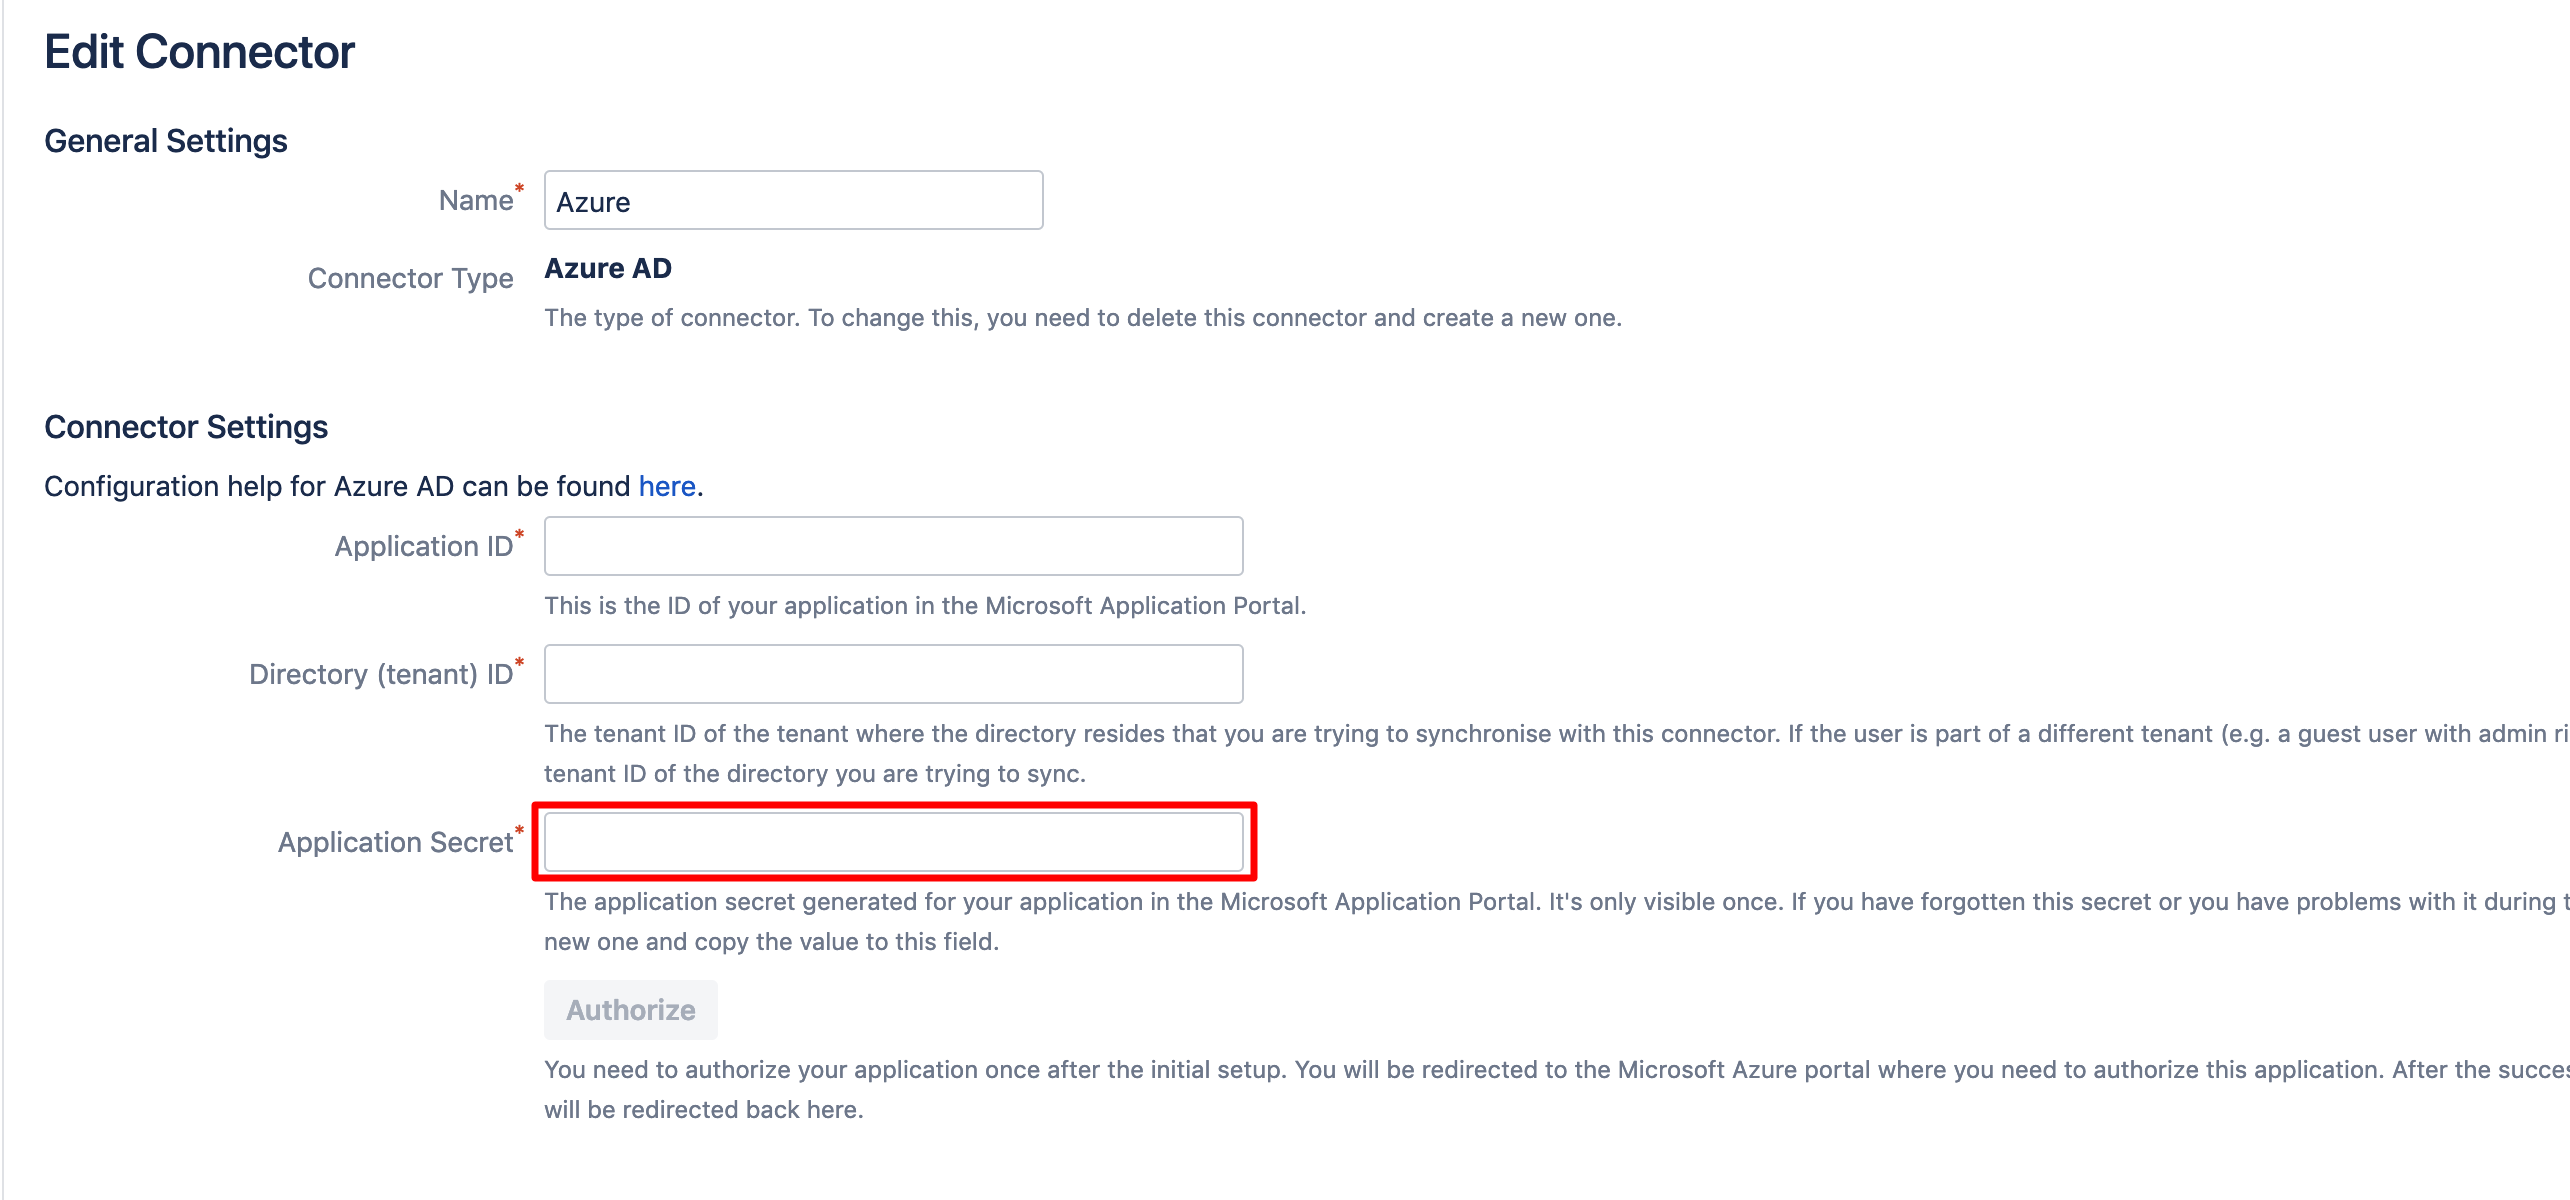
Go overview page of the Azure AD app. Copy the Application ID and the Directory (tenant ID). Now, it is time to head over to your Atlassian application.
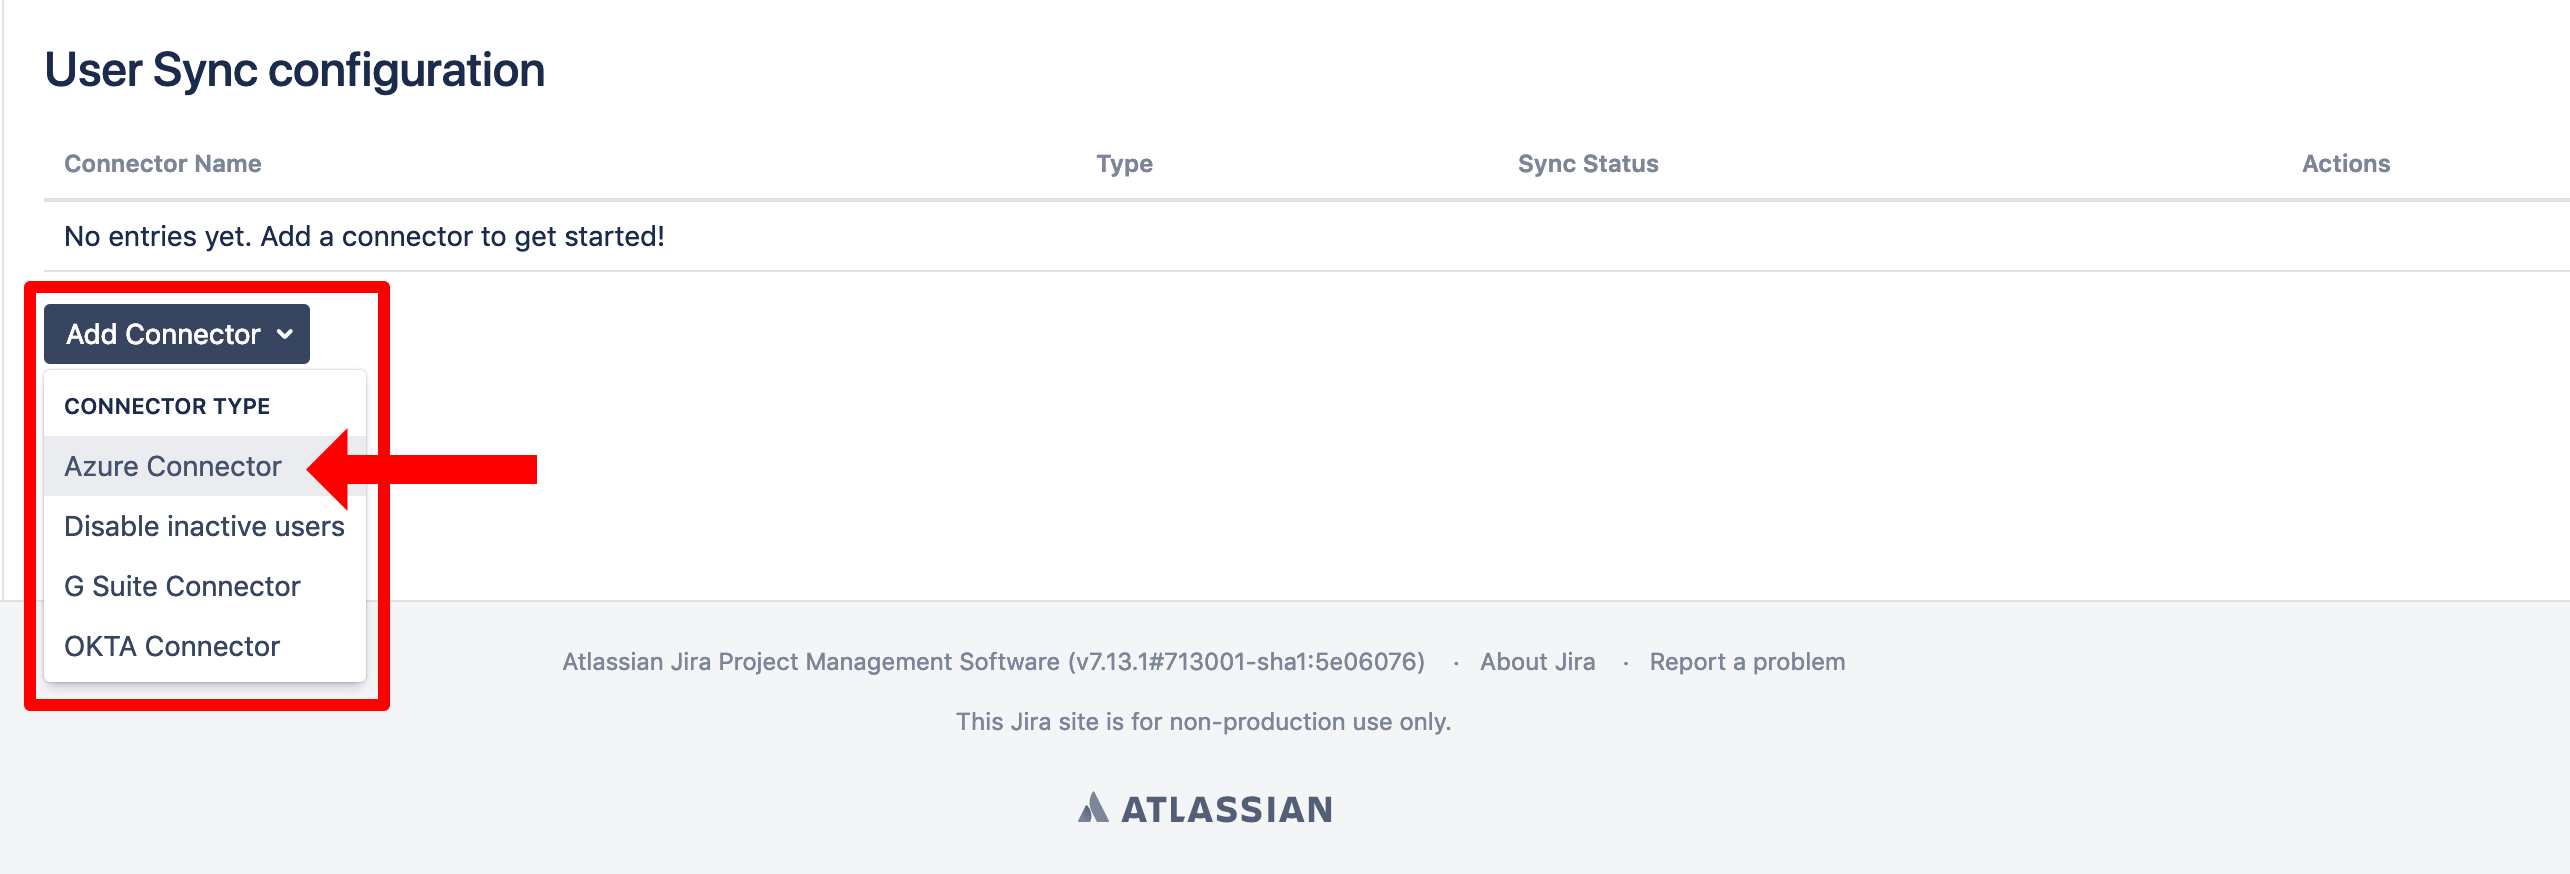
In your Atlassian application, go to UserSync, click Add Connector and choose Azure Connector.
Insert the Application ID, Directory ID and the Application secret into the UserSync connector.
To take the full advantages of User Sync, scroll down and tick "Enable Scheduled Synchronization". You can control the sync interval via a Cron Expression.
Do not forget to save your configuration. Scroll down to the bottom of the page and hit "Save".
