Azure AD B2C with Manual Provisioning
After completing this setup guide, you will set up Azure AD B2C with Manual Provisioning and your Atlassian product for the SAML SSO app. Additionally, you will enable the SSO redirection and test SSO.
Prerequisites
To use the SAML SSO app with Azure AD B2C, you need the following:
An Azure AD subscription
An Azure AD B2C Tenant (please check this Microsoft article for more information)
A (trial) subscription for the SAML SSO app
Admin access to your Atlassian product
Users are already available in your Atlassian product and Azure AD B2C
Step-By-Step Setup Guide
Install the SAML SSO app
In your Atlassian product, open the in-product marketplace as described in the Atlassian documentation.
Search for "resolution saml" and click "Install" for SAML Single Sign On (SSO) by resolution Reichert Network Solutions GmbH.
After the installation is complete, click Manage Apps/Addons.
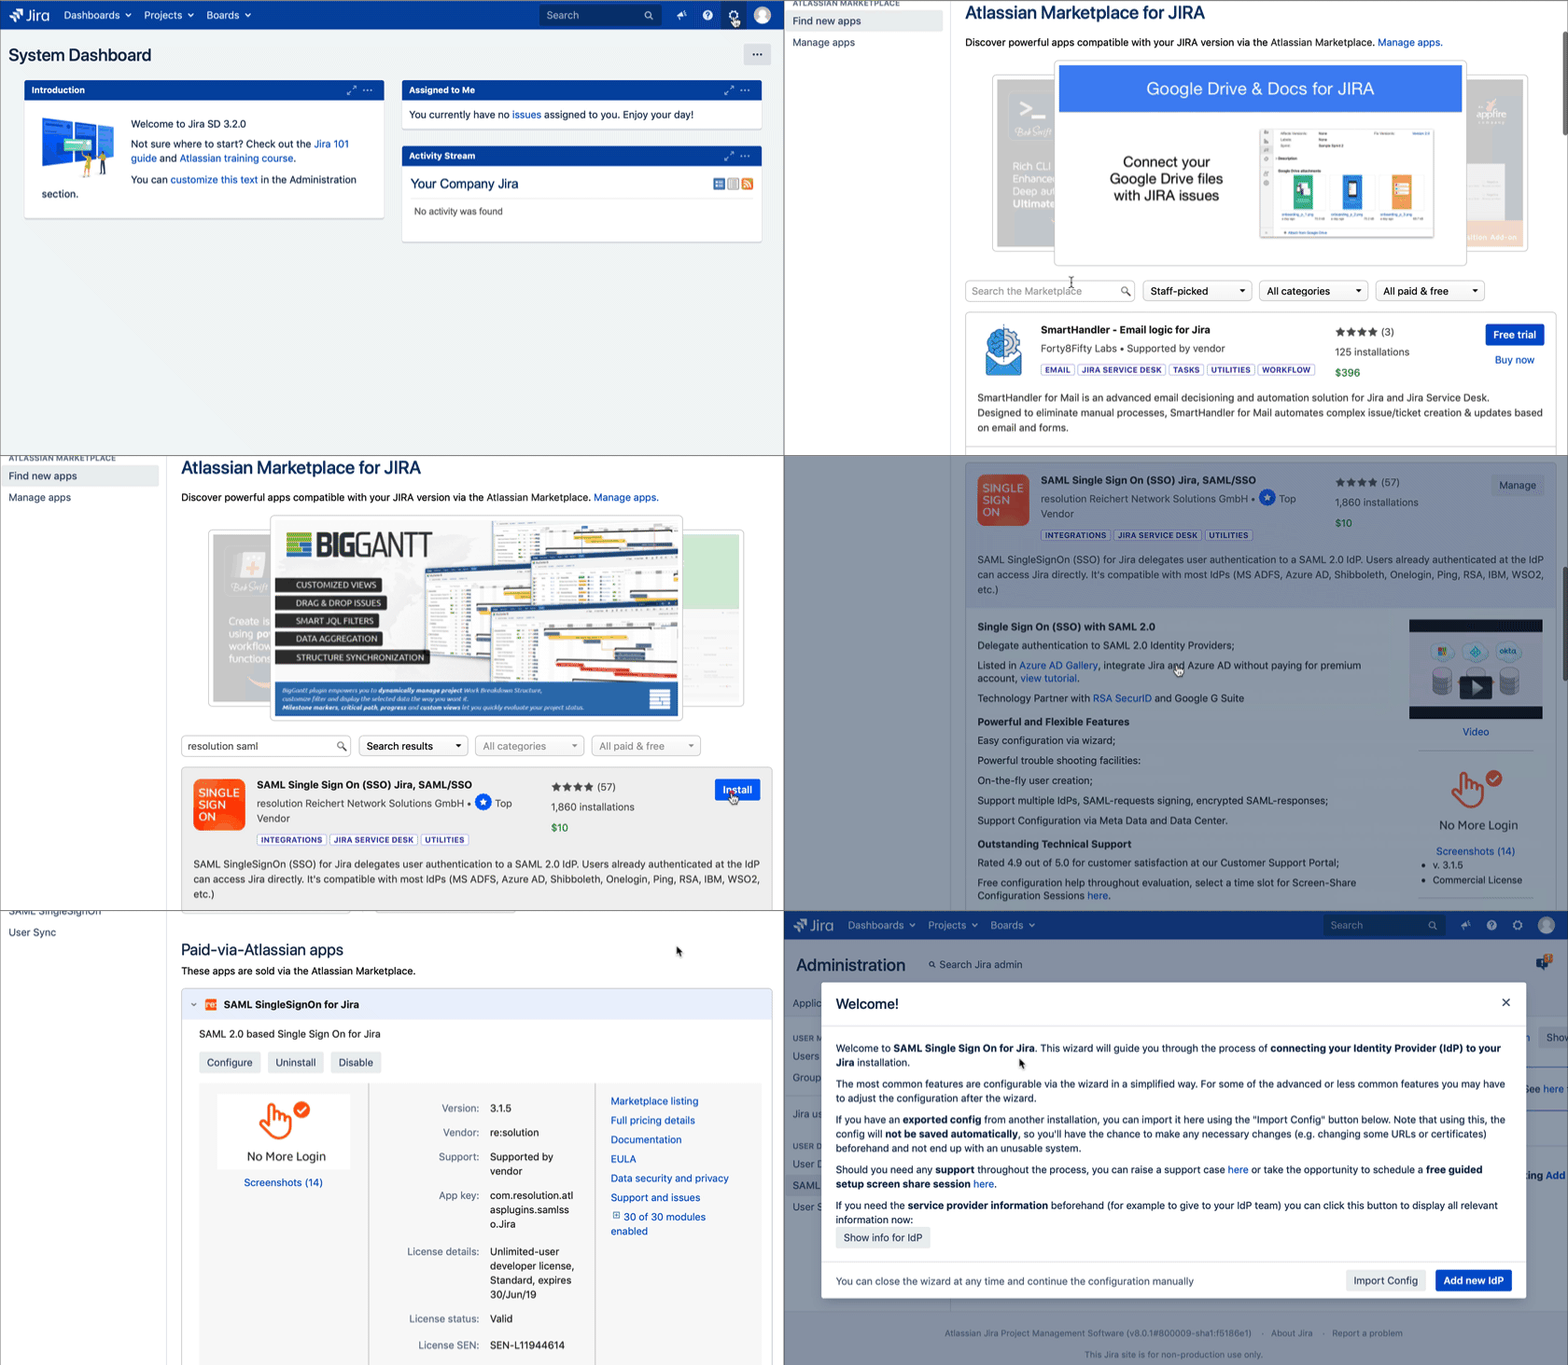
Configure SAML SSO
For the next steps, please go to Manage apps (or addons), choose SAML SSO and click Configure.
First Steps - Wizard
After you click "Configure", the Wizard will be triggered. If not, or if you want to add another Identity Prover (IdP) to your existing configuration, click on "+ Add IdP". This guide assumes, that there is no IdP configured.
The Wizard greets you with information, click on "Add new IdP" to proceed.For the IdP Type, choose "Azure AD". You can also choose a name. Click on "Next" to continue.
In the next step, you will configure Azure AD B2C. Please keep this tab open or copy the information.
Create and Configure an Azure Enterprise App for SAML SSO
Adding an Enterprise Application for the SAML SSO App
Navigate to http://portal.azure.com.
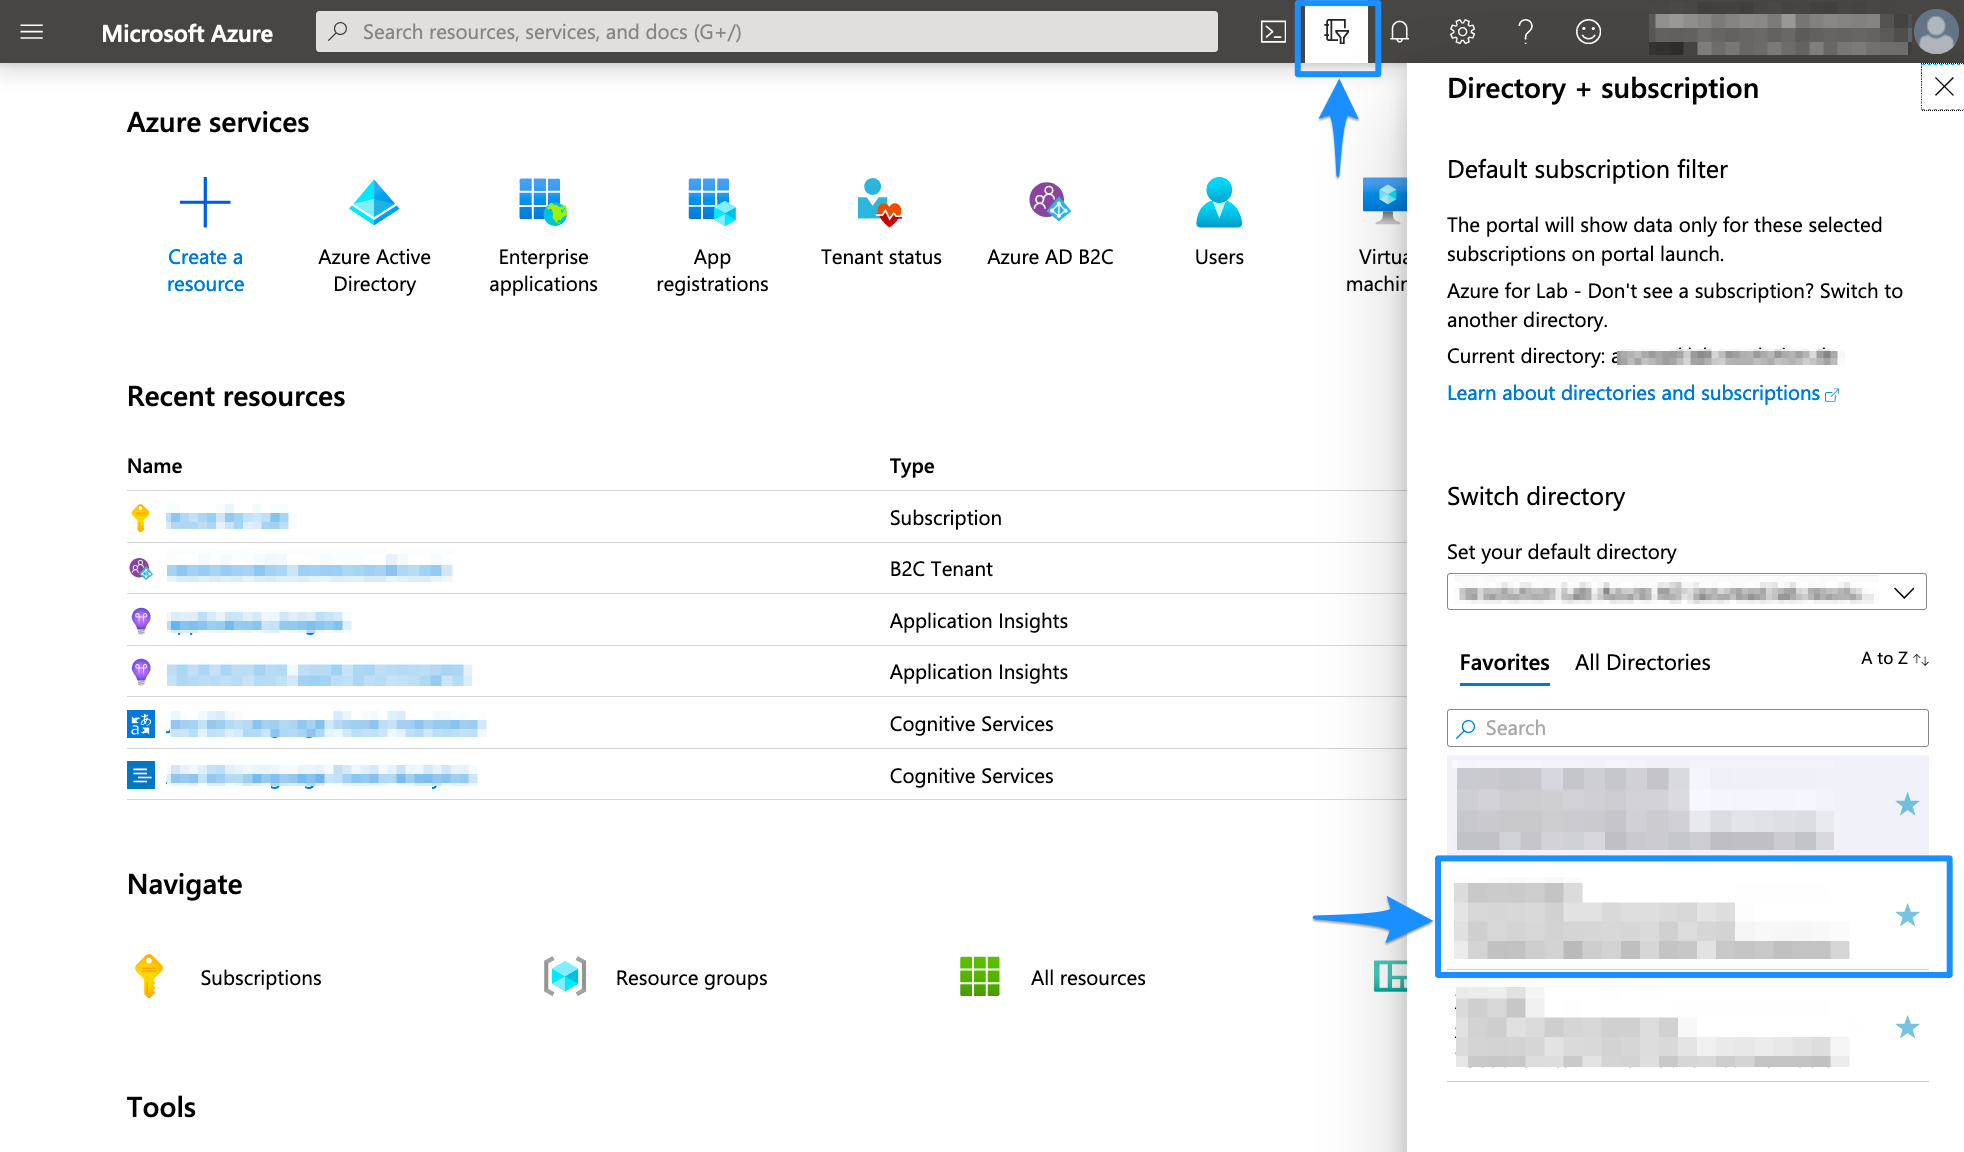
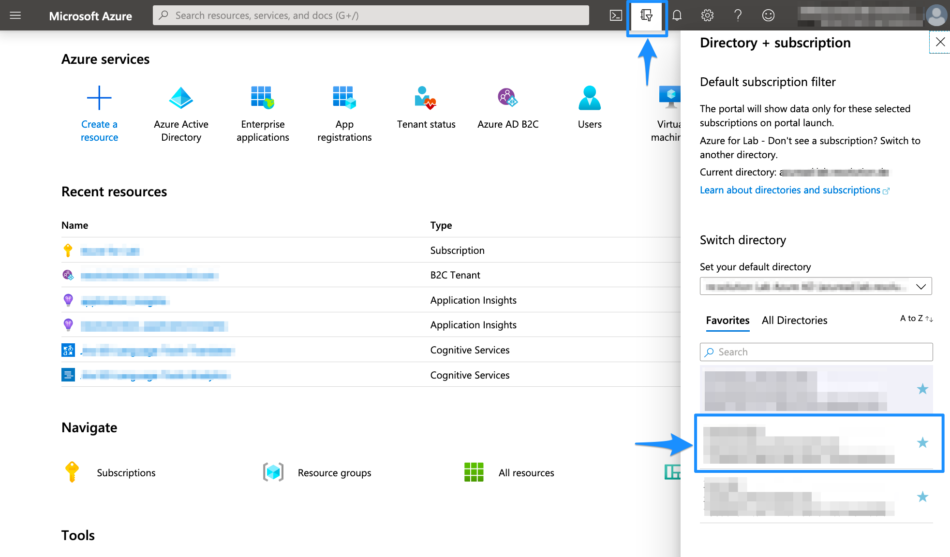
Select the Directory + Subscription icon in the portal toolbar, and make sure you have selected the directory that contains your Azure AD B2C tenant.
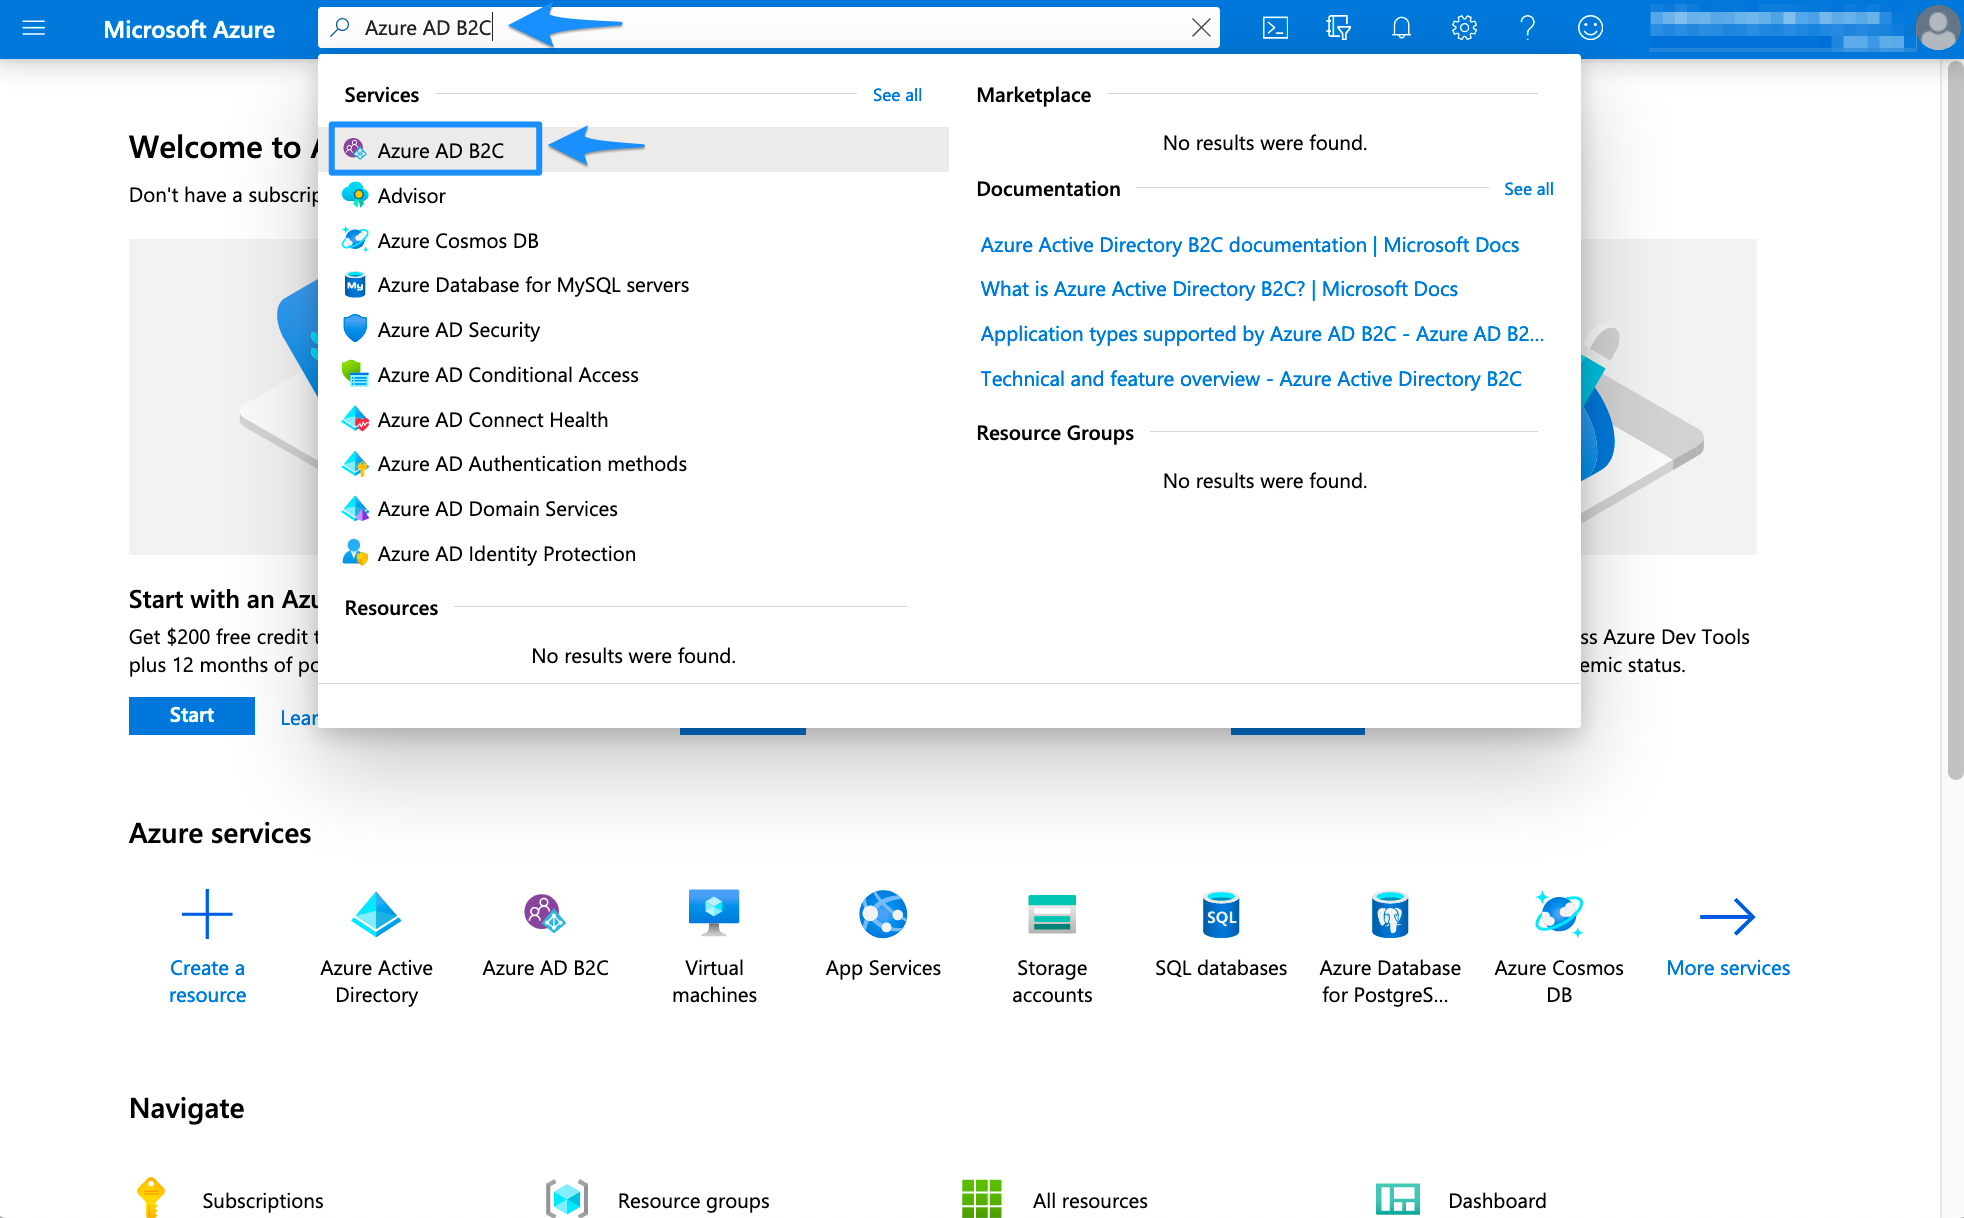
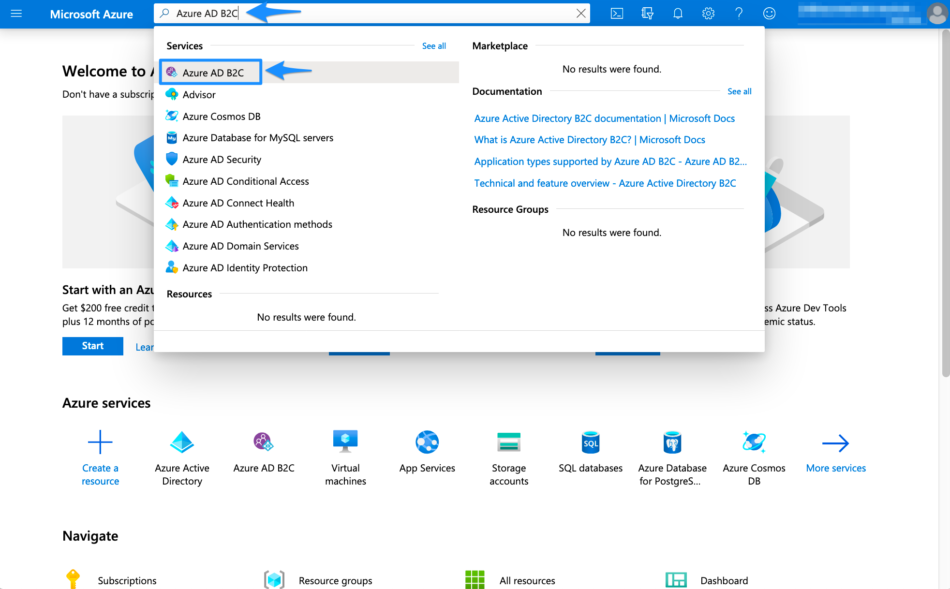
In the Azure portal, search for and select Azure AD B2C.
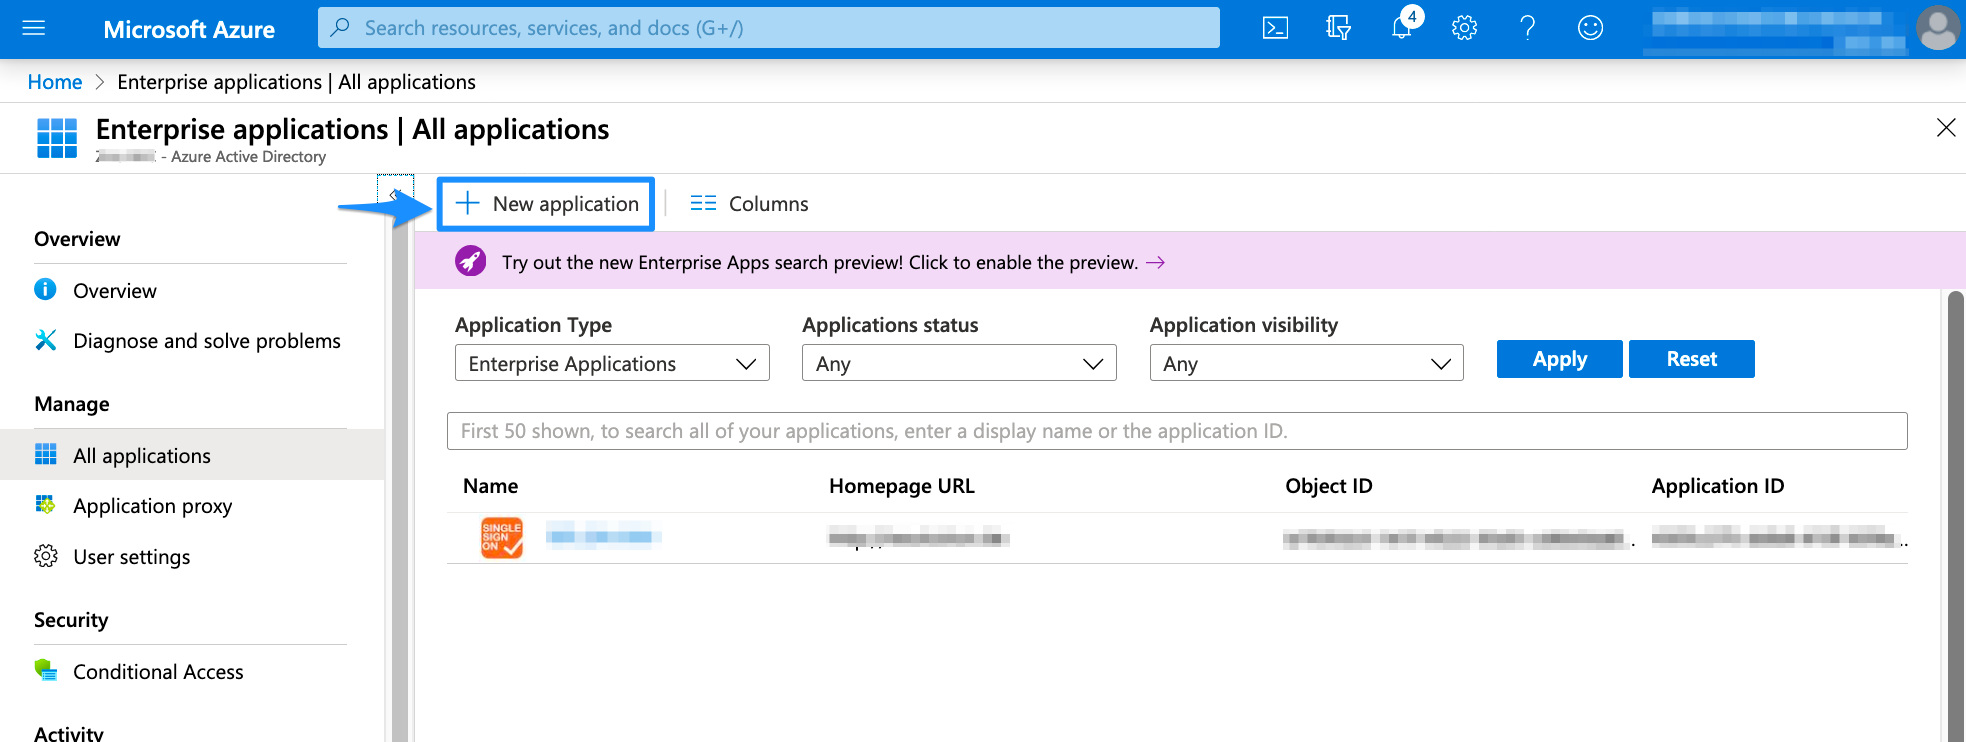
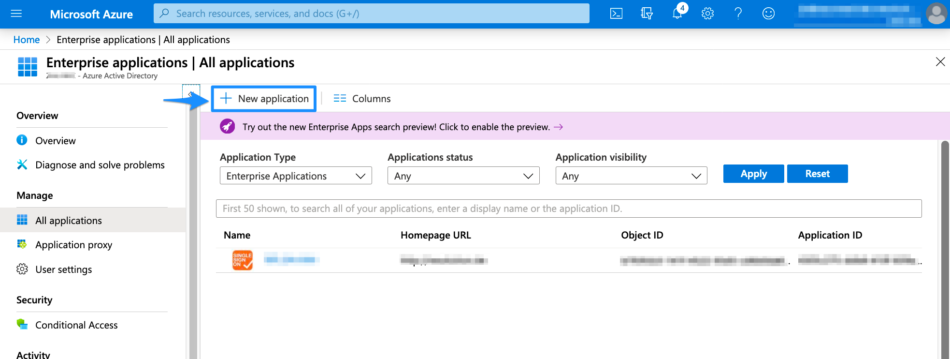
Navigate to the Azure Active Directory page, then select Enterprise applications under Manage in the left panel.
Select New Application to add a new enterprise application.
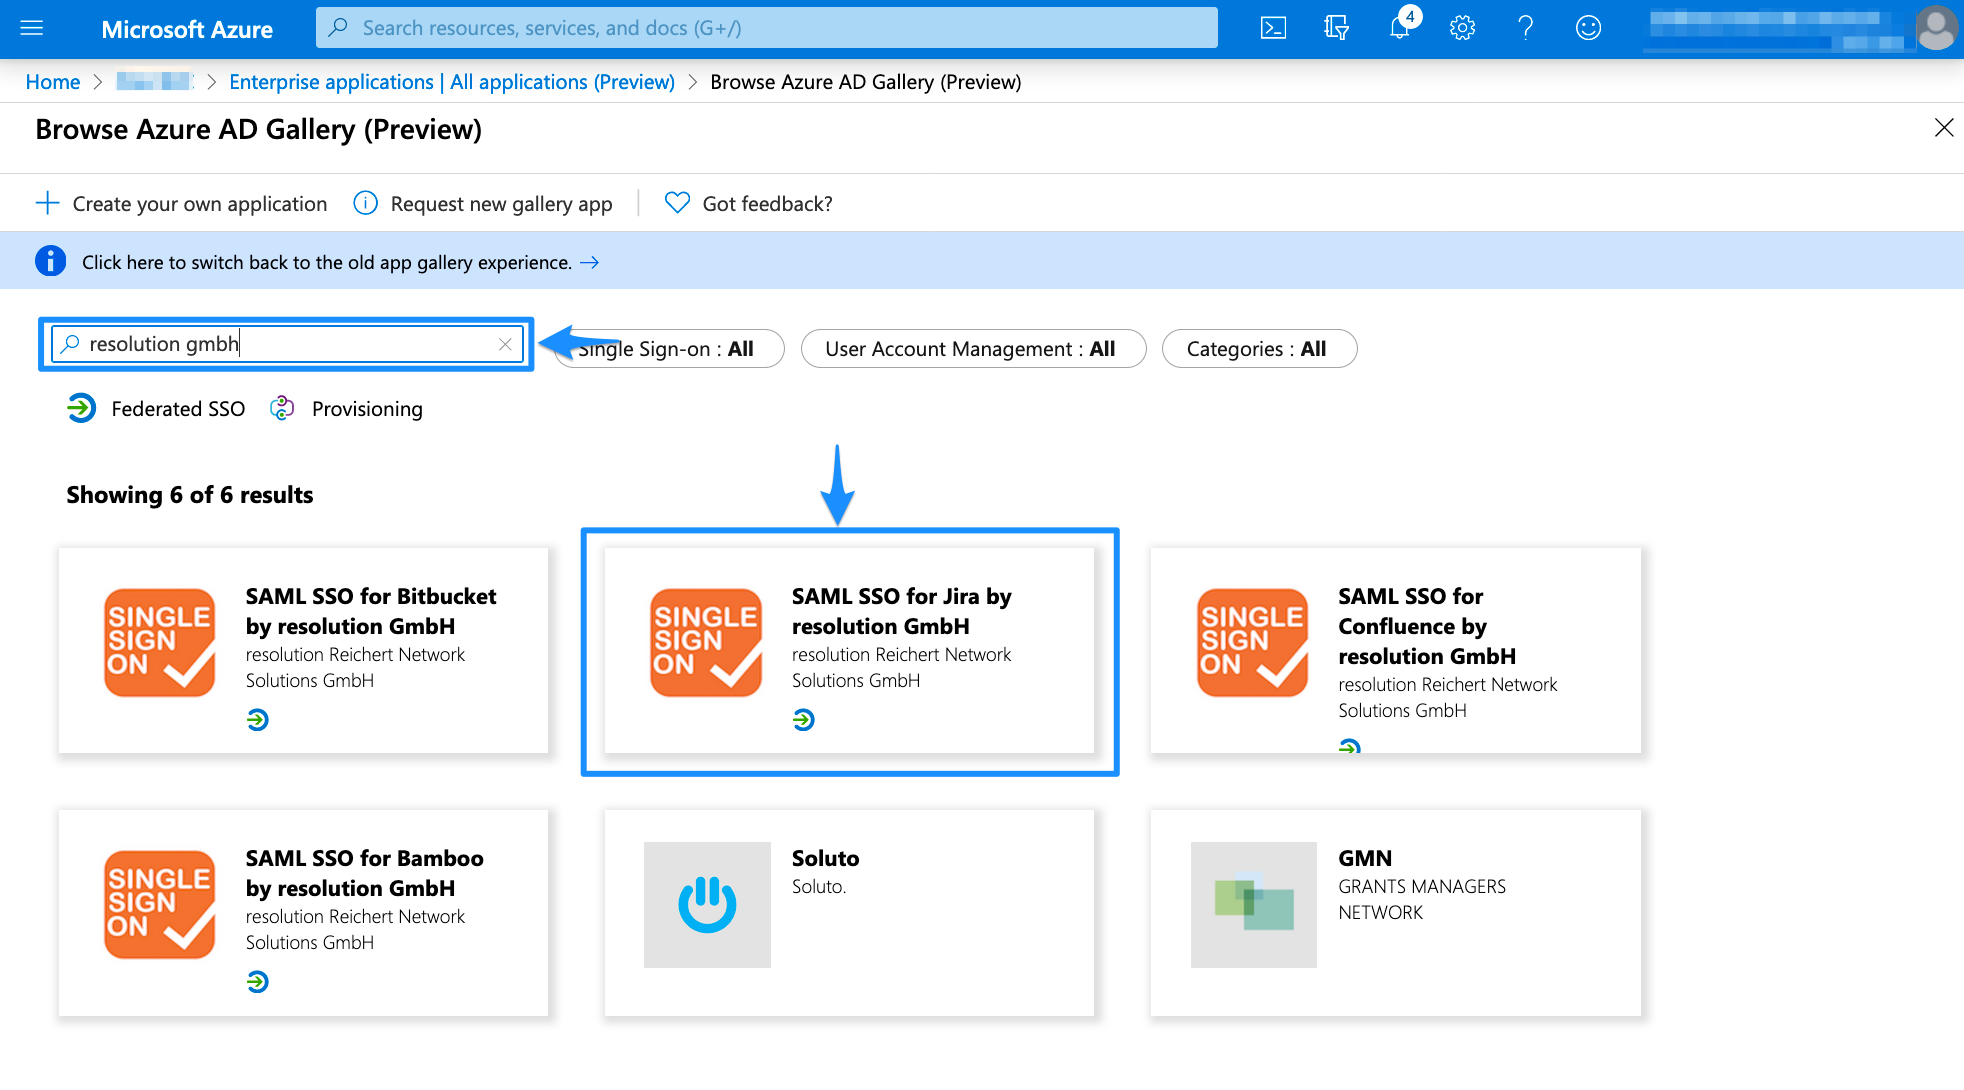
We created presets in the gallery for the SAML SSO app. Search for "resolution gmbh" and choose the version which matches your Atlassian product, e.g. "SAML SSO for Jira by resolution GmbH" for Jira.
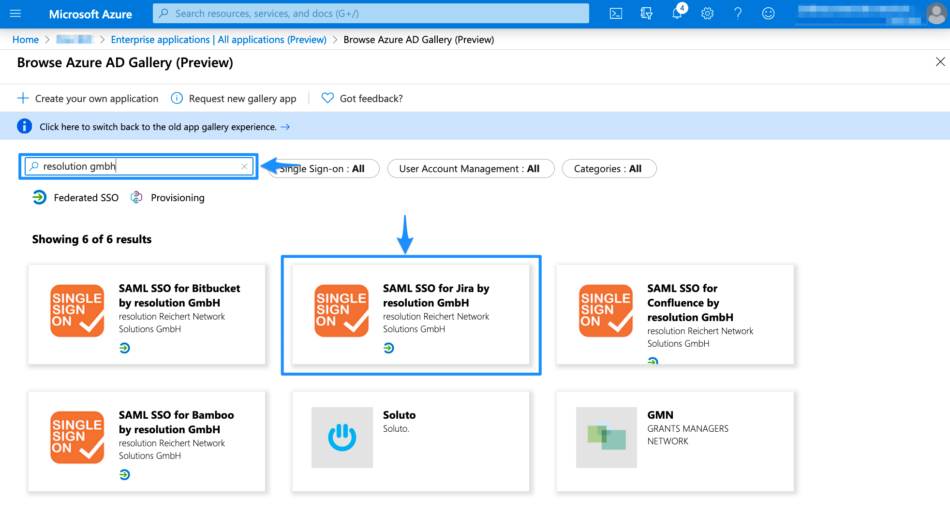 Browse Apps
Click Add to add a new enterprise application. You can also choose a new name for it.
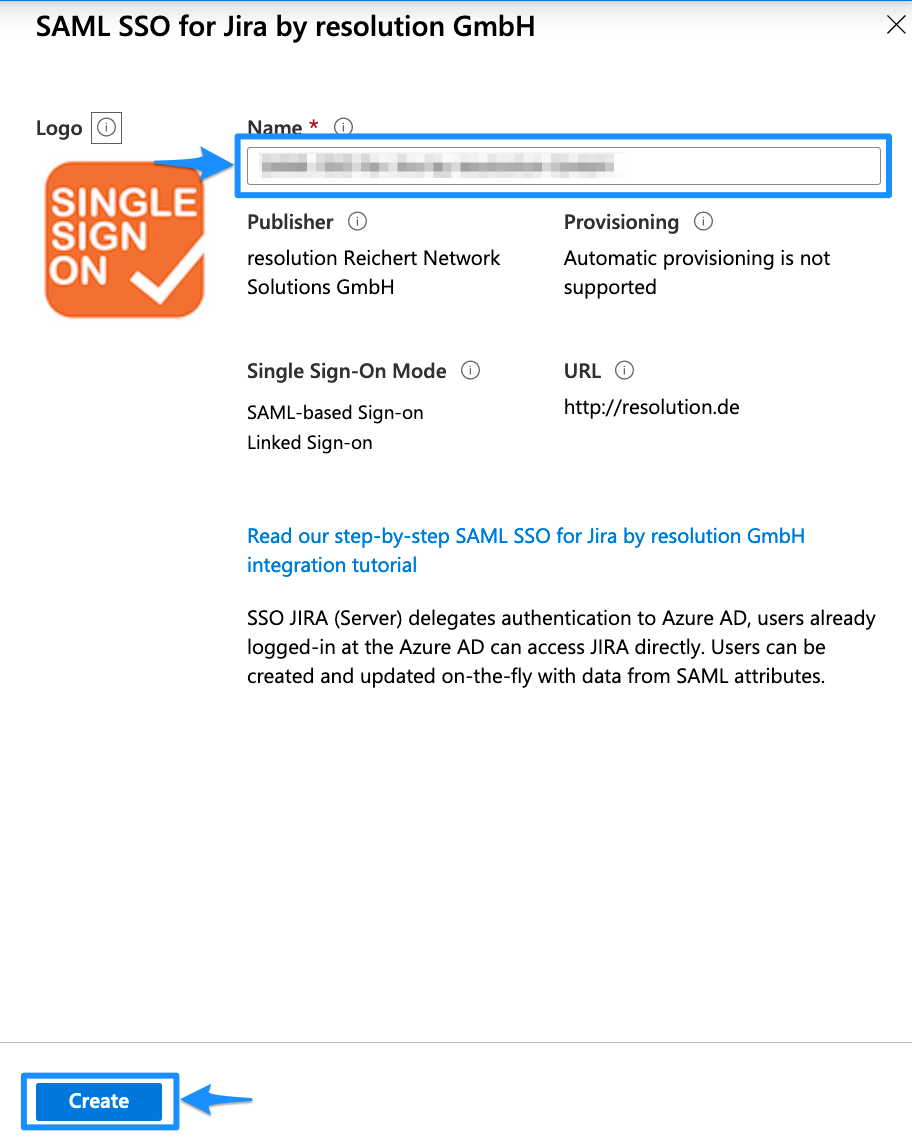
Please wait until the Azure portal redirects you to the enterprise application you just created. This can take a couple of seconds. For the next steps, you will configure the enterprise application.
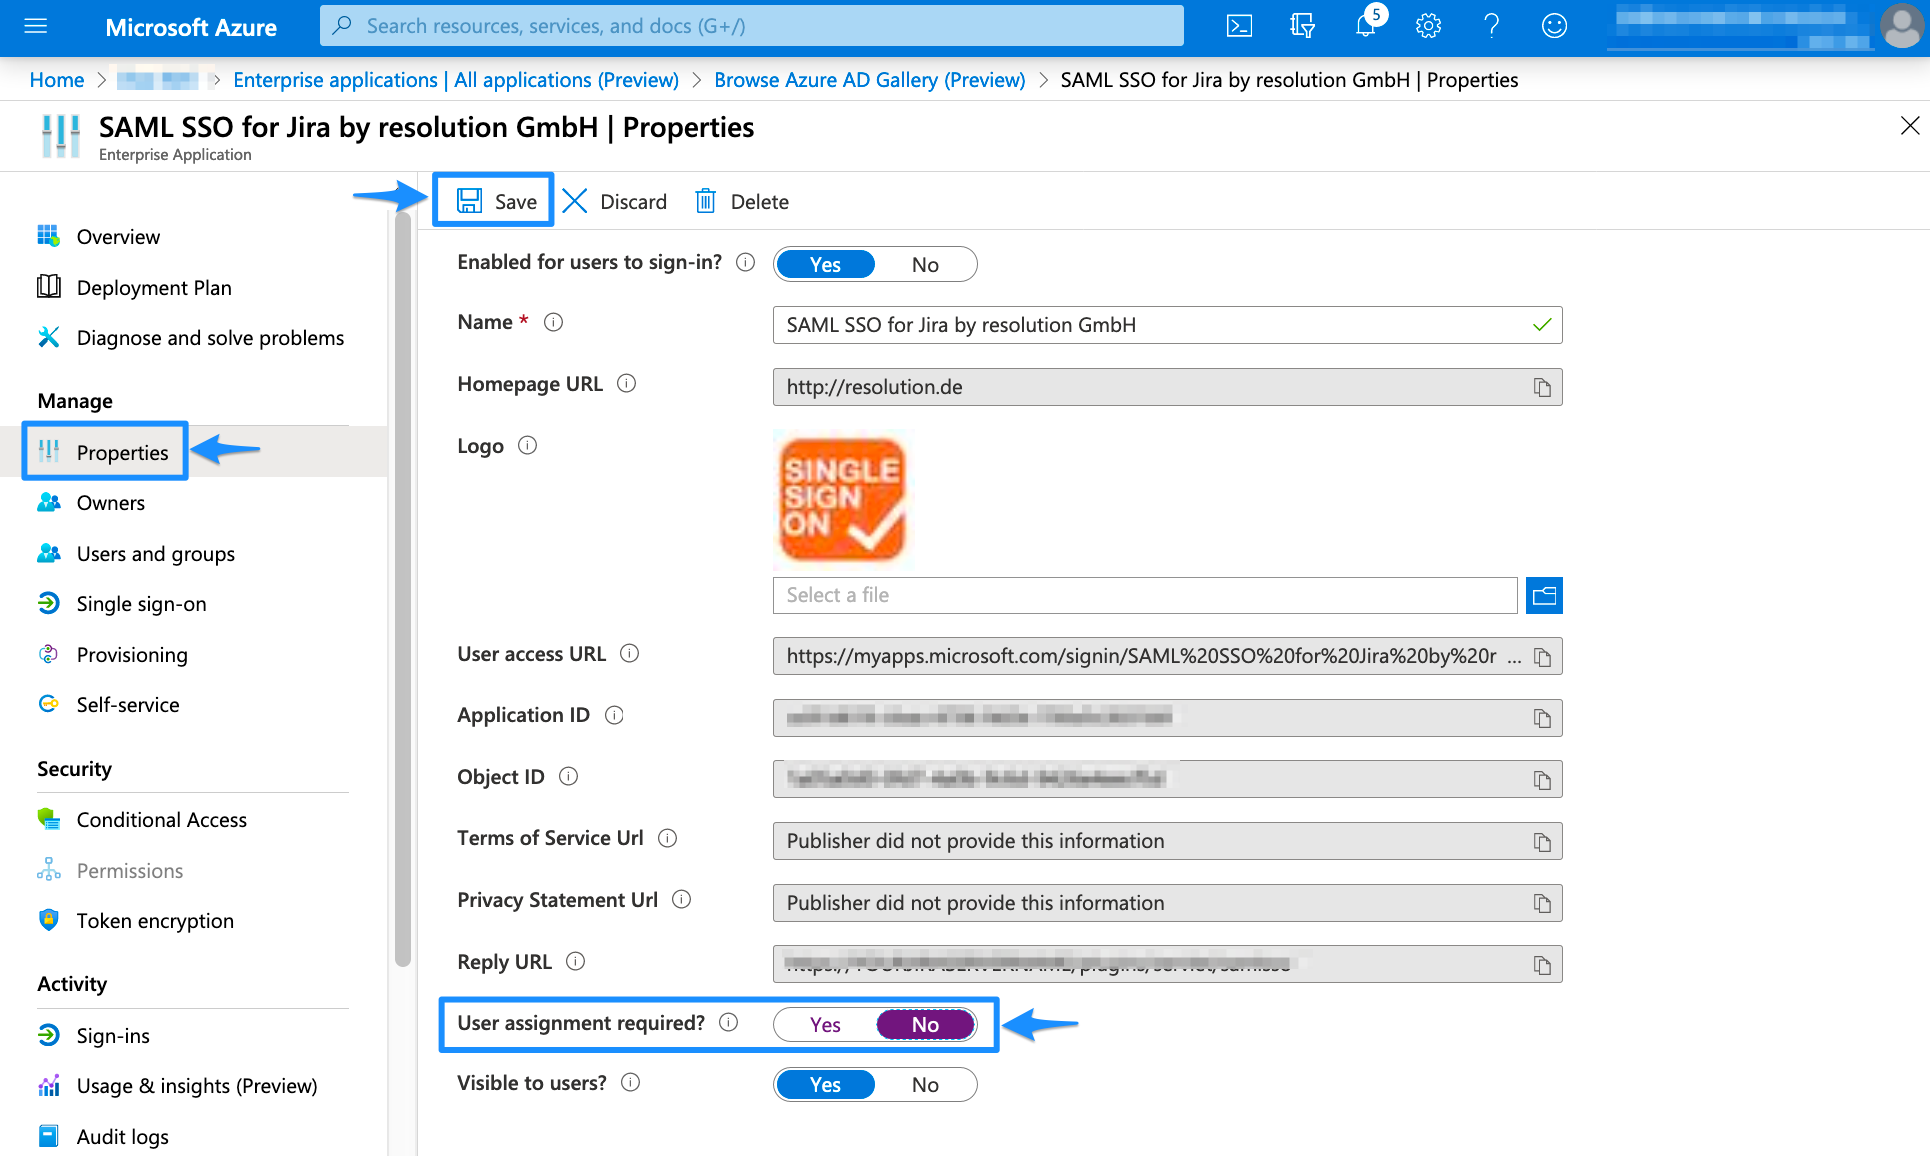
Deactivate User Assignment Required
In the left panel, click Properties. In the new window, scroll down to User assignment required? and set the option to NO. Afterward, Save your configuration.
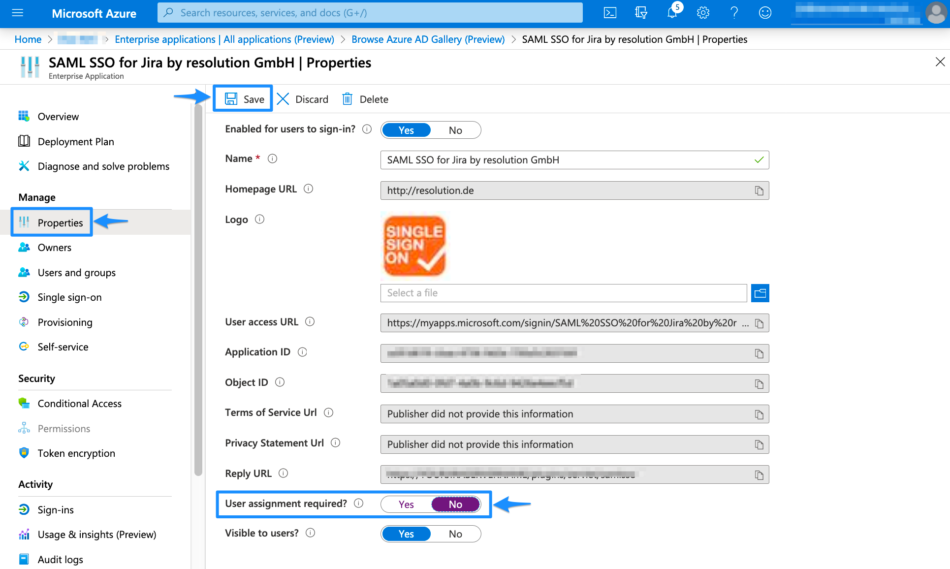 Deactivate User Assignment Required
Configure the SSO
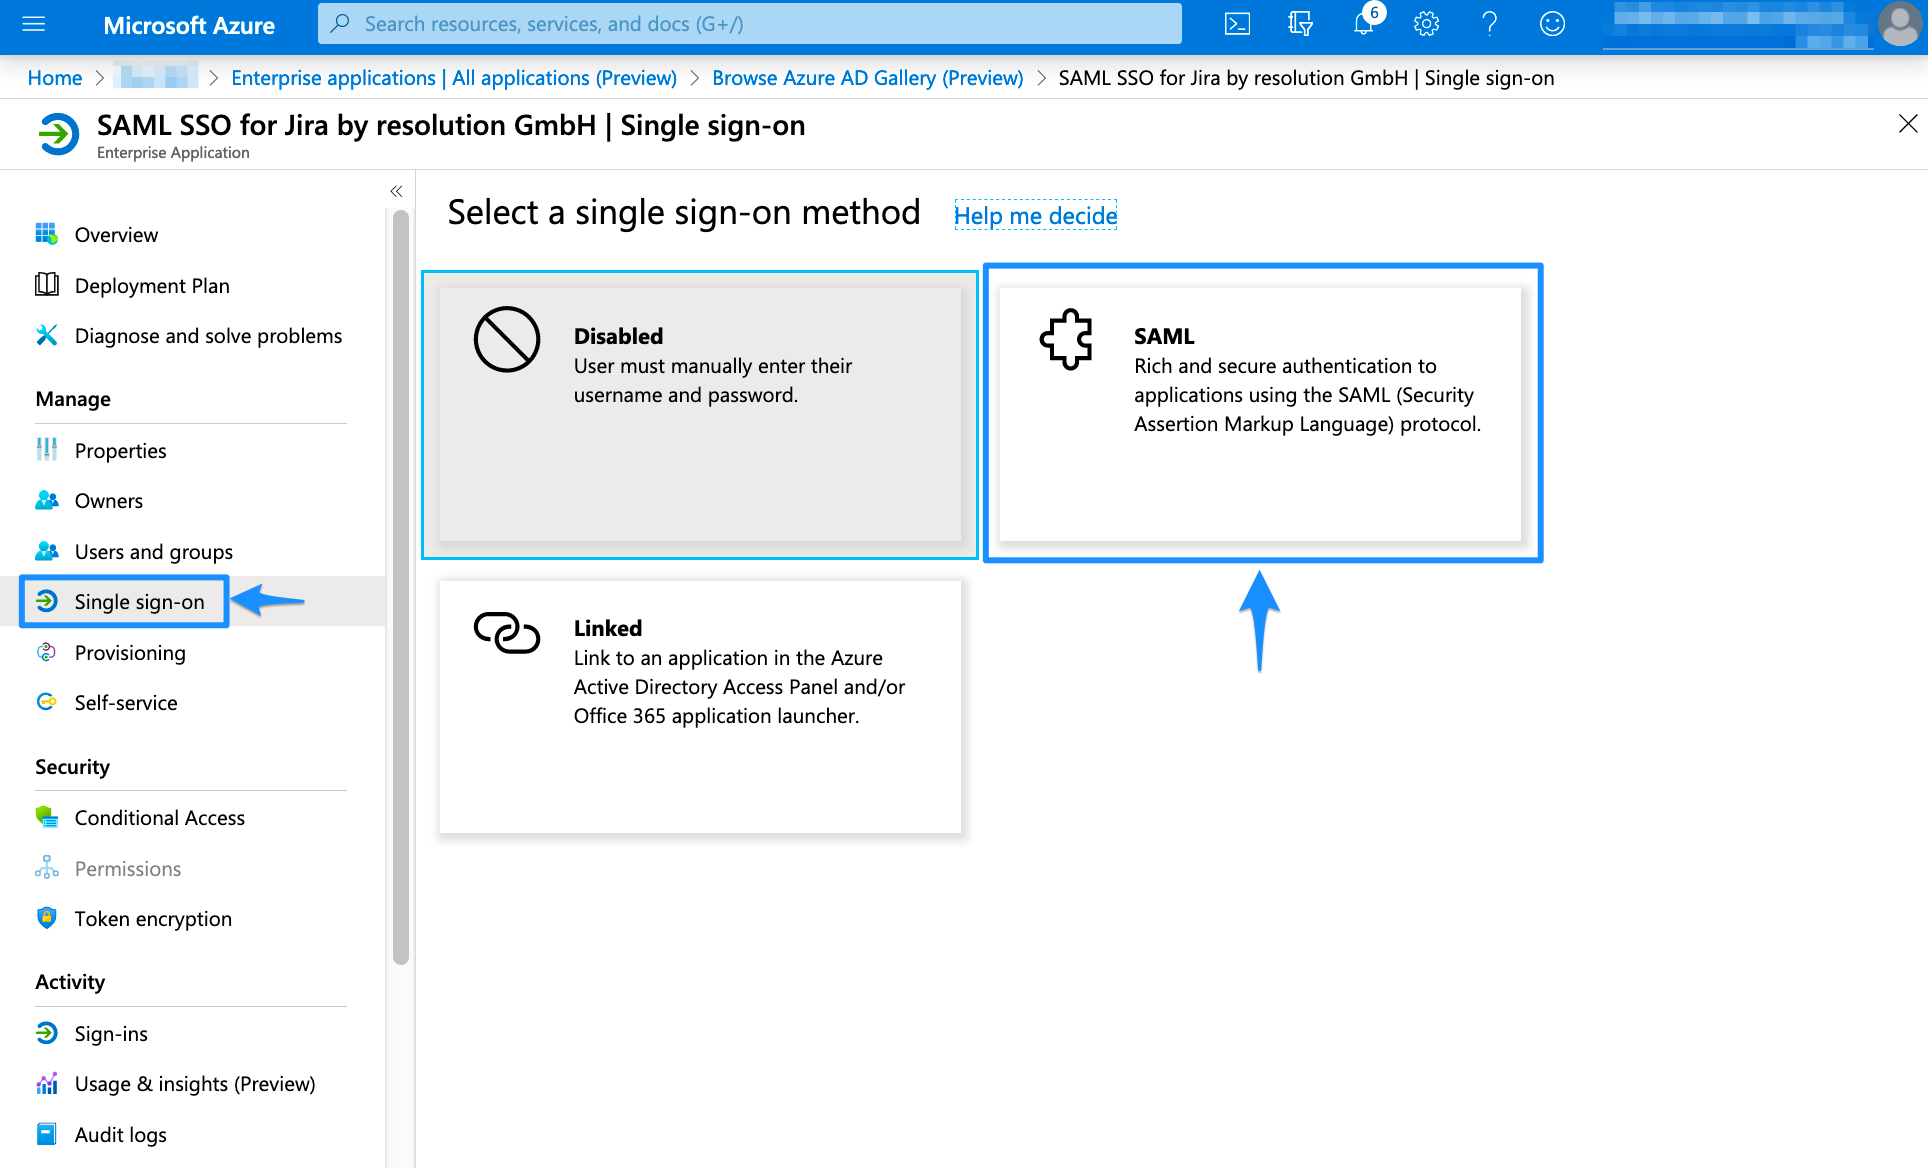
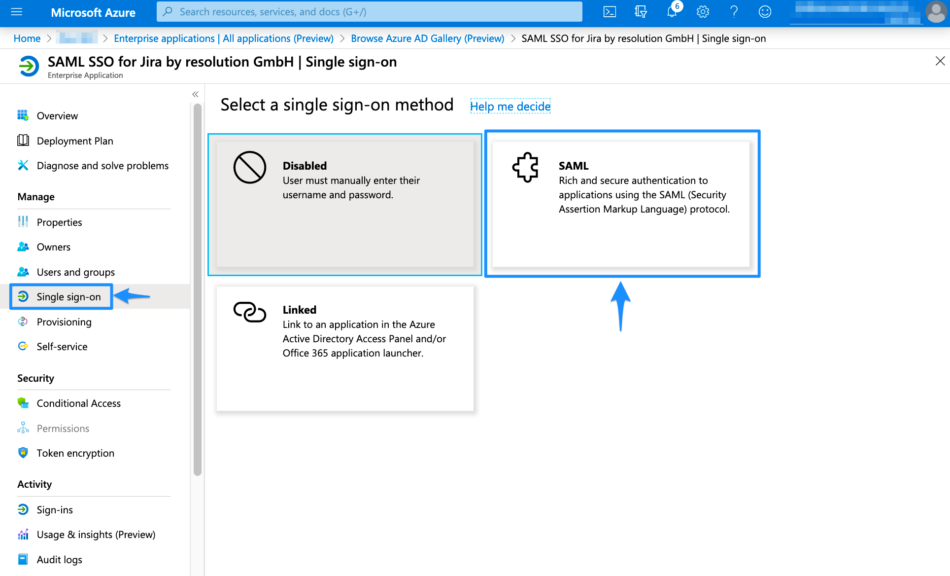
In the left panel under Manage, choose "Single sign-on". Then click SAML for the Single Sign On method.
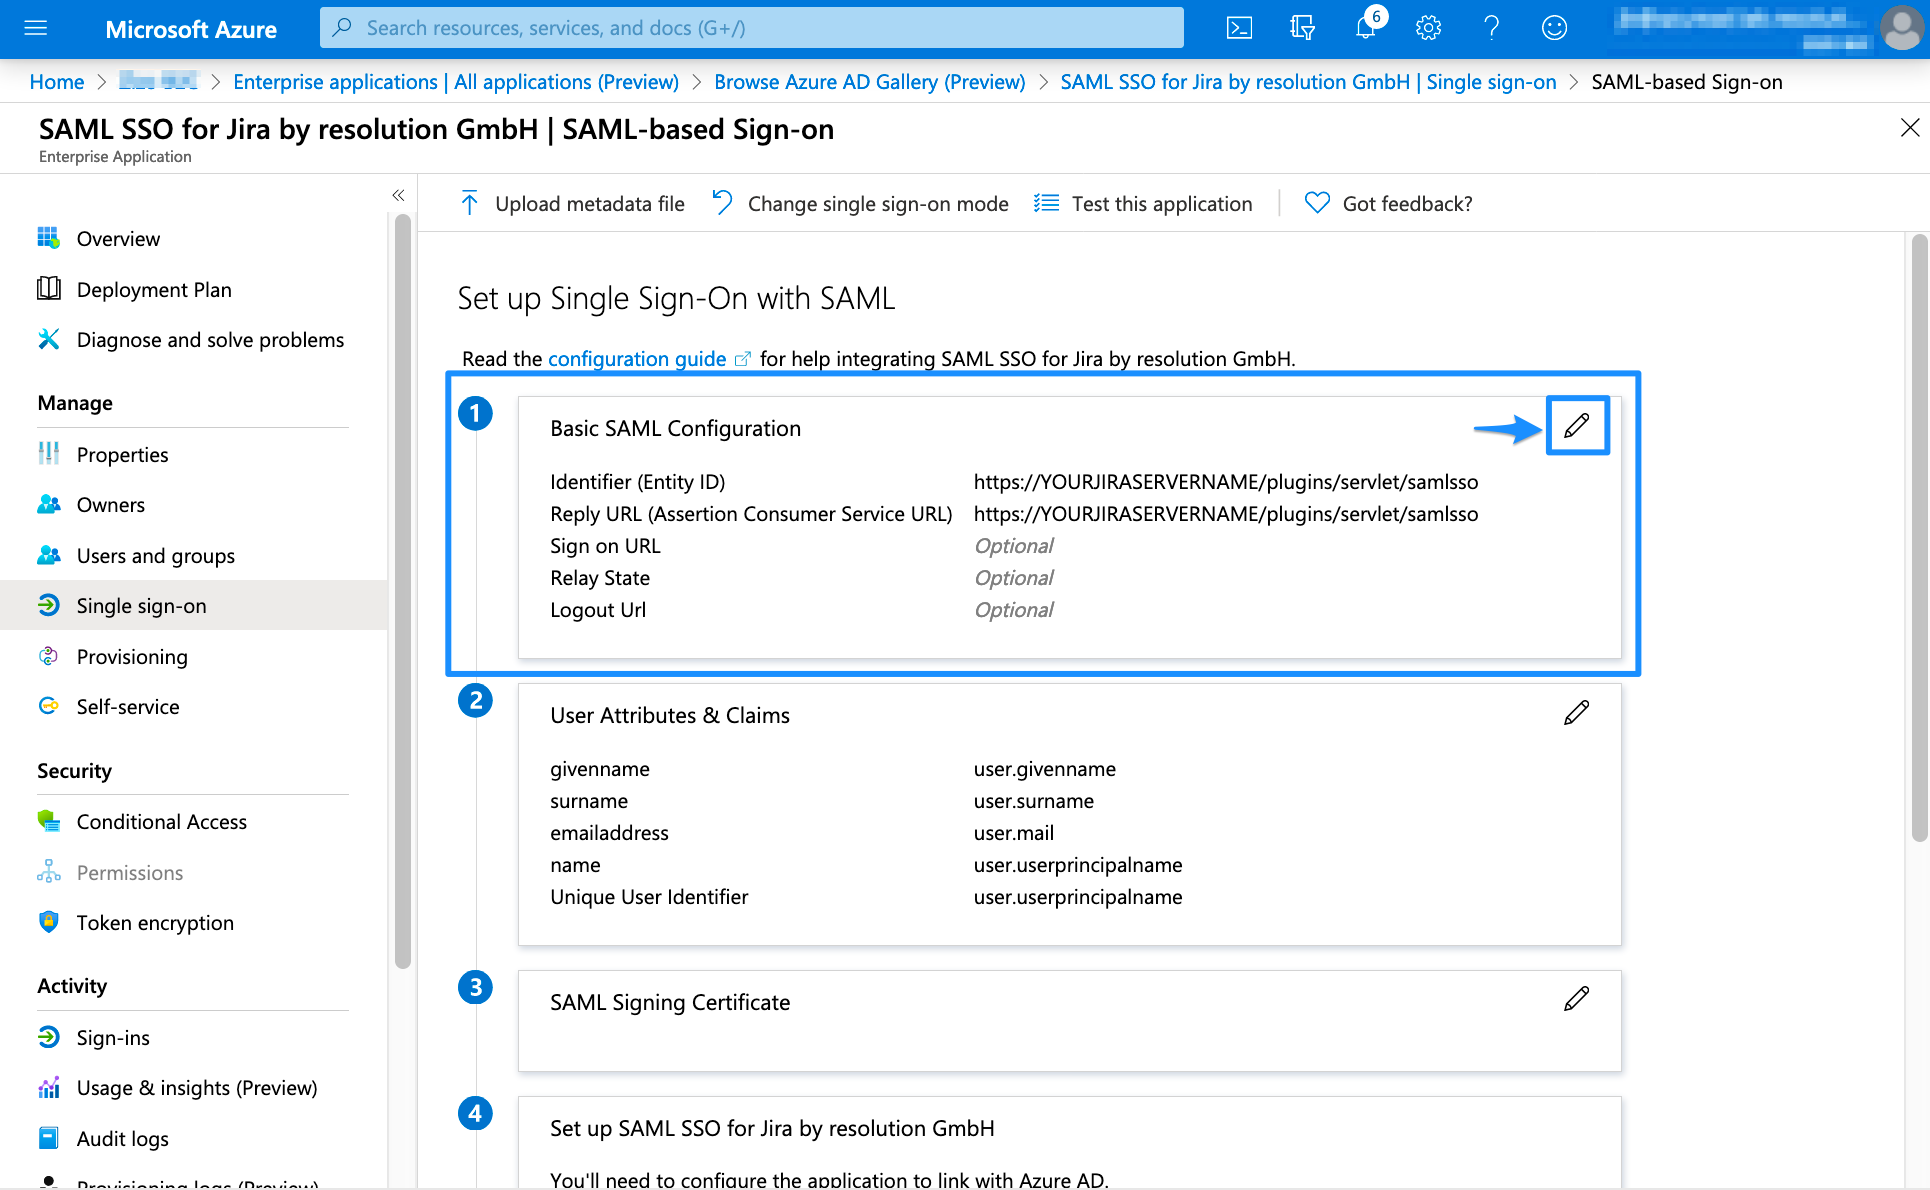
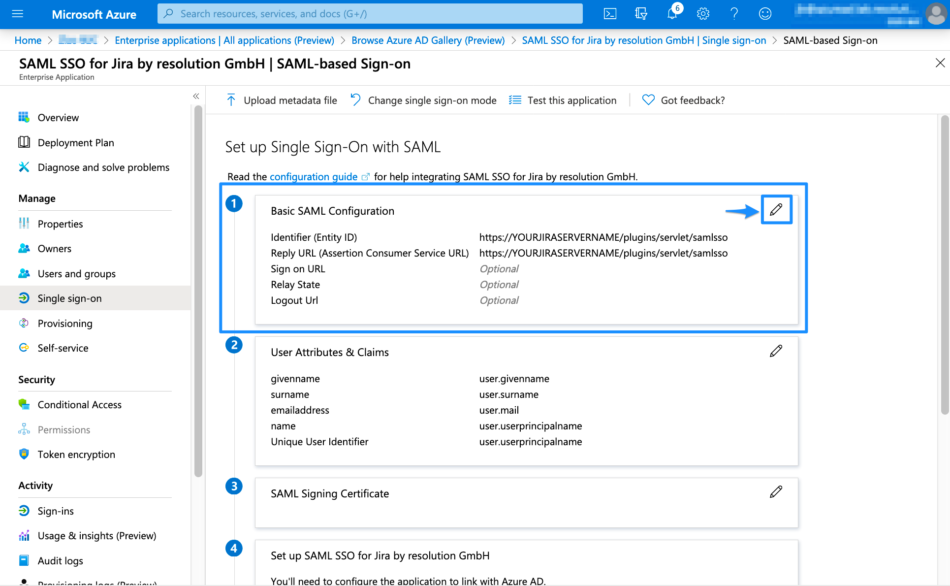
Click the pen symbol in Basic SAML Configuration.
Set the Identifier (Entity ID) and the Reply URL (Assertion Consumer Service URL). You can find both in the last window of the wizard.
In general, the needed URL for both is: https://<base-url>/plugins/servlet/samlsso
You need to substitute <base-url> with the base URL of your Atlassian product instance. The gallery application already provides the needed URLs. You only have to substitute YOURJIRASERVERNAME with the URL of your Atlassian product instance and then click Save.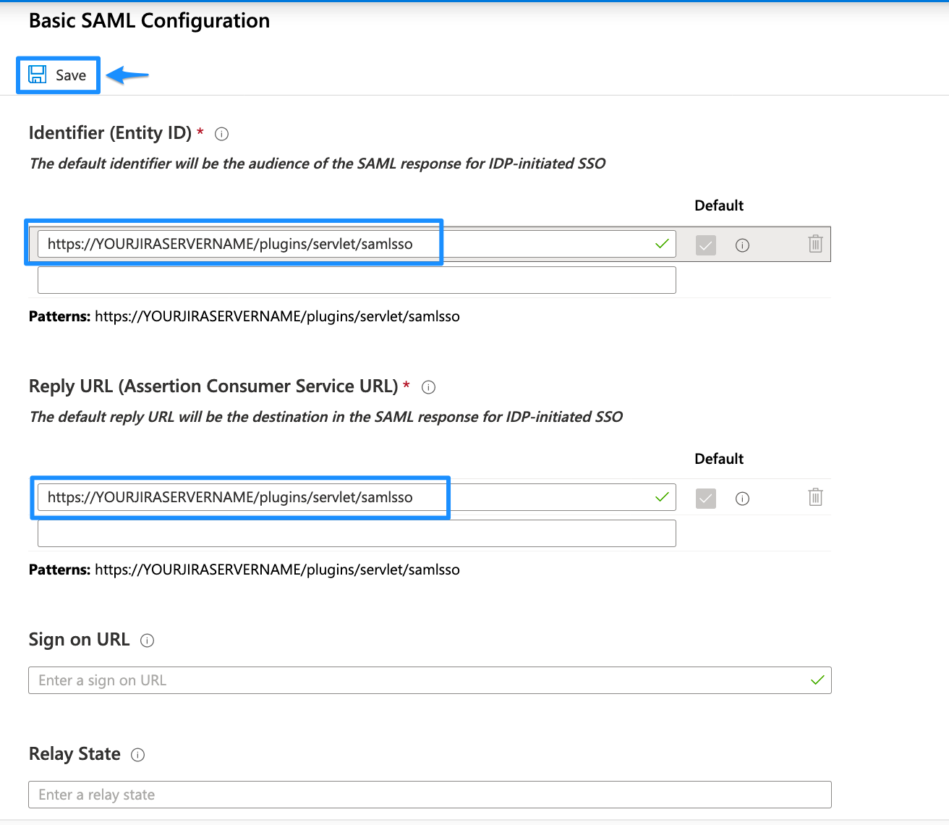 SAML SSO Basic Configuration URLs
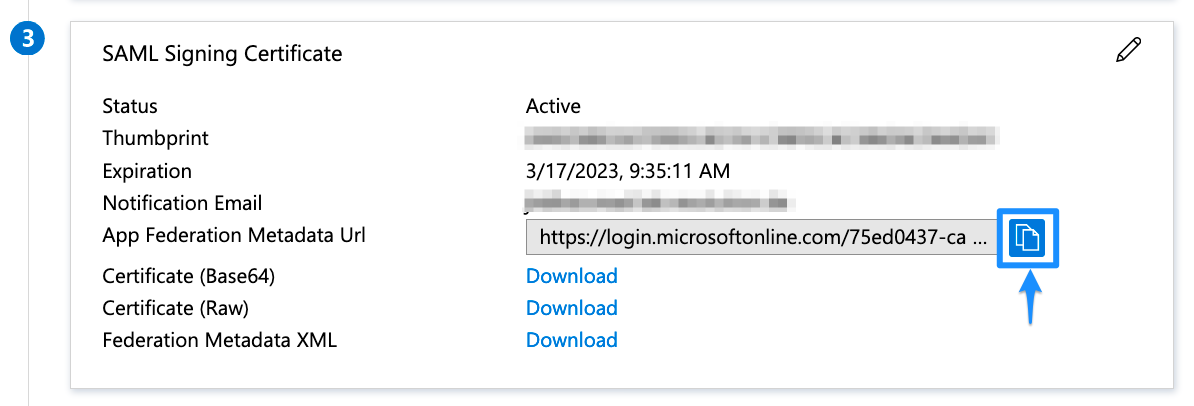
Scroll down to SAML Signing Certificate and copy the App Federation Metadata Url. The link will be used to configure the SAML SSO app.
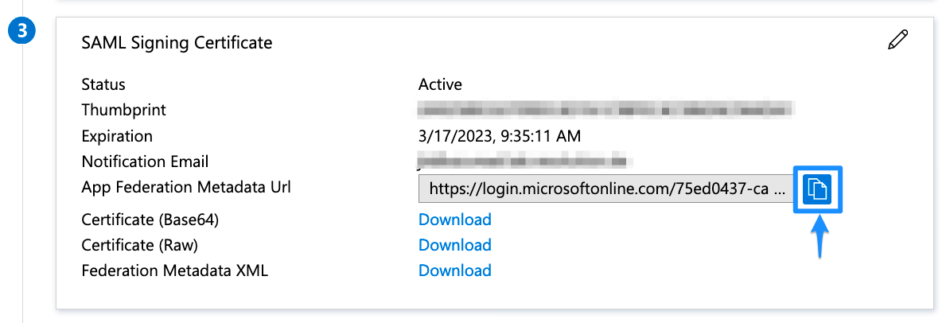
The configuration in Azure AD B2C is now finished. In the next step, we will finish the configuration in the SAML SSO wizard.
Finishing the Configuration - Wizard
Paste the App Federation Metadata Url that was obtained before in the "Metadata URL" textfield.
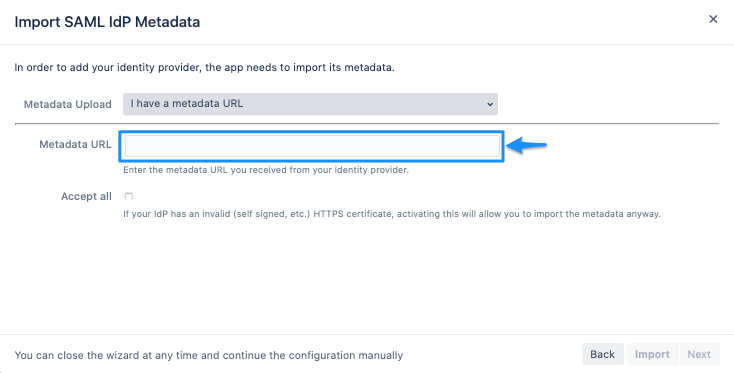 Metadata URL
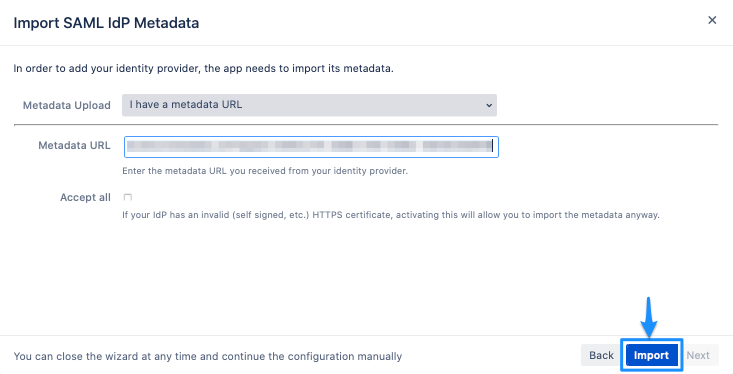
Click on "Import".
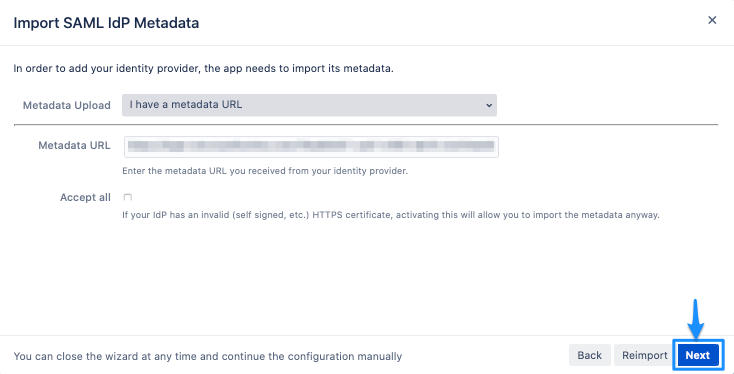
Click on "Next" to continue.
For User update, choose No User update, and click Save & Next.
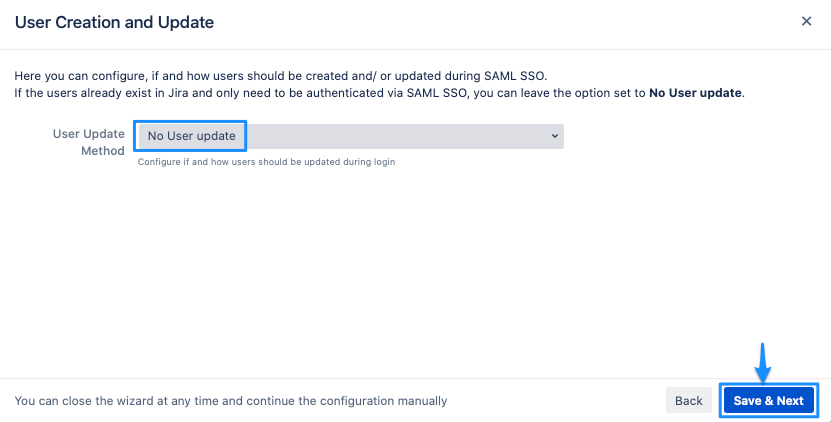
Now it is time to test your configuration.
Testing SSO
The wizard also allows testing the Single Sign On. Just follow the steps to test if the login works as expected.
Click on "Start test" to proceed.
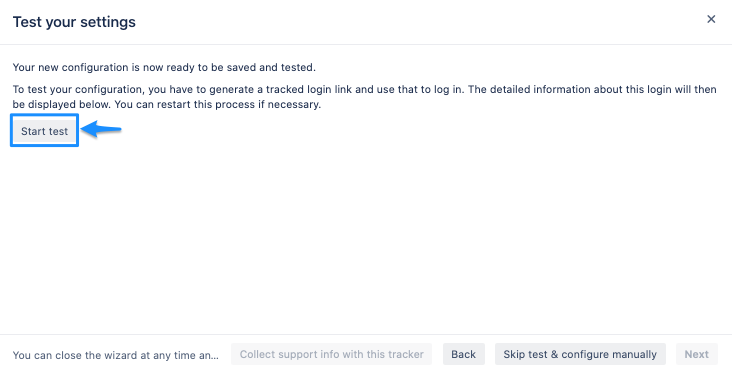
Copy the blue marked link and open a new incognito/private tab or a different web browser. Then, paste the link and navigate to it.
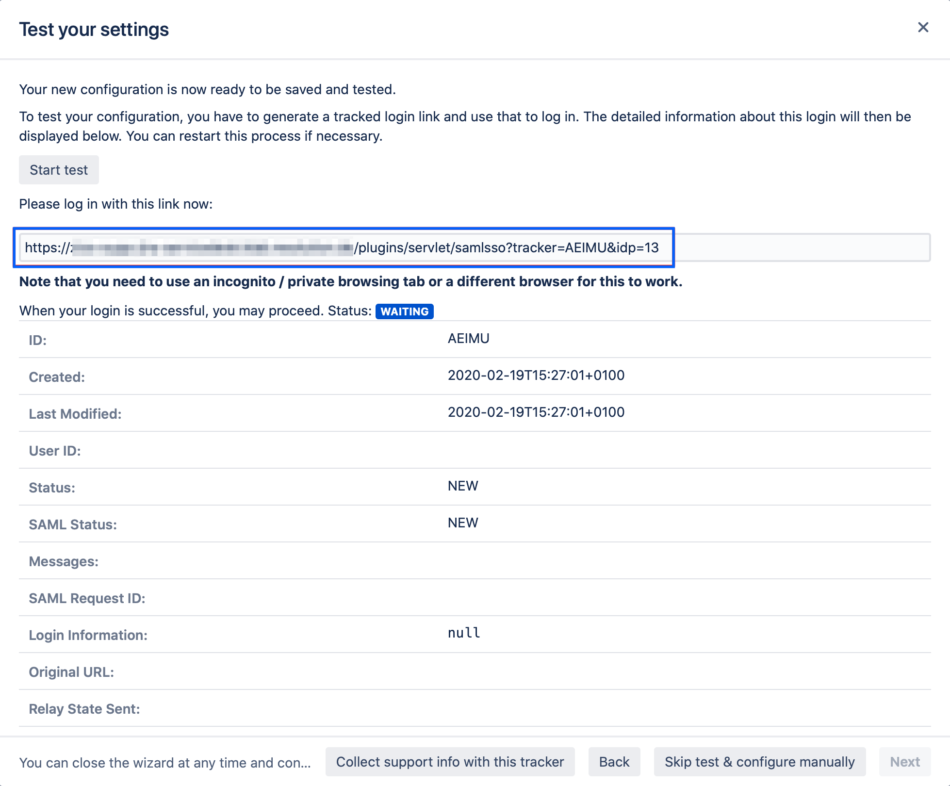
You will be now redirected to Azure AD's login page. Please log-in with your username and password.
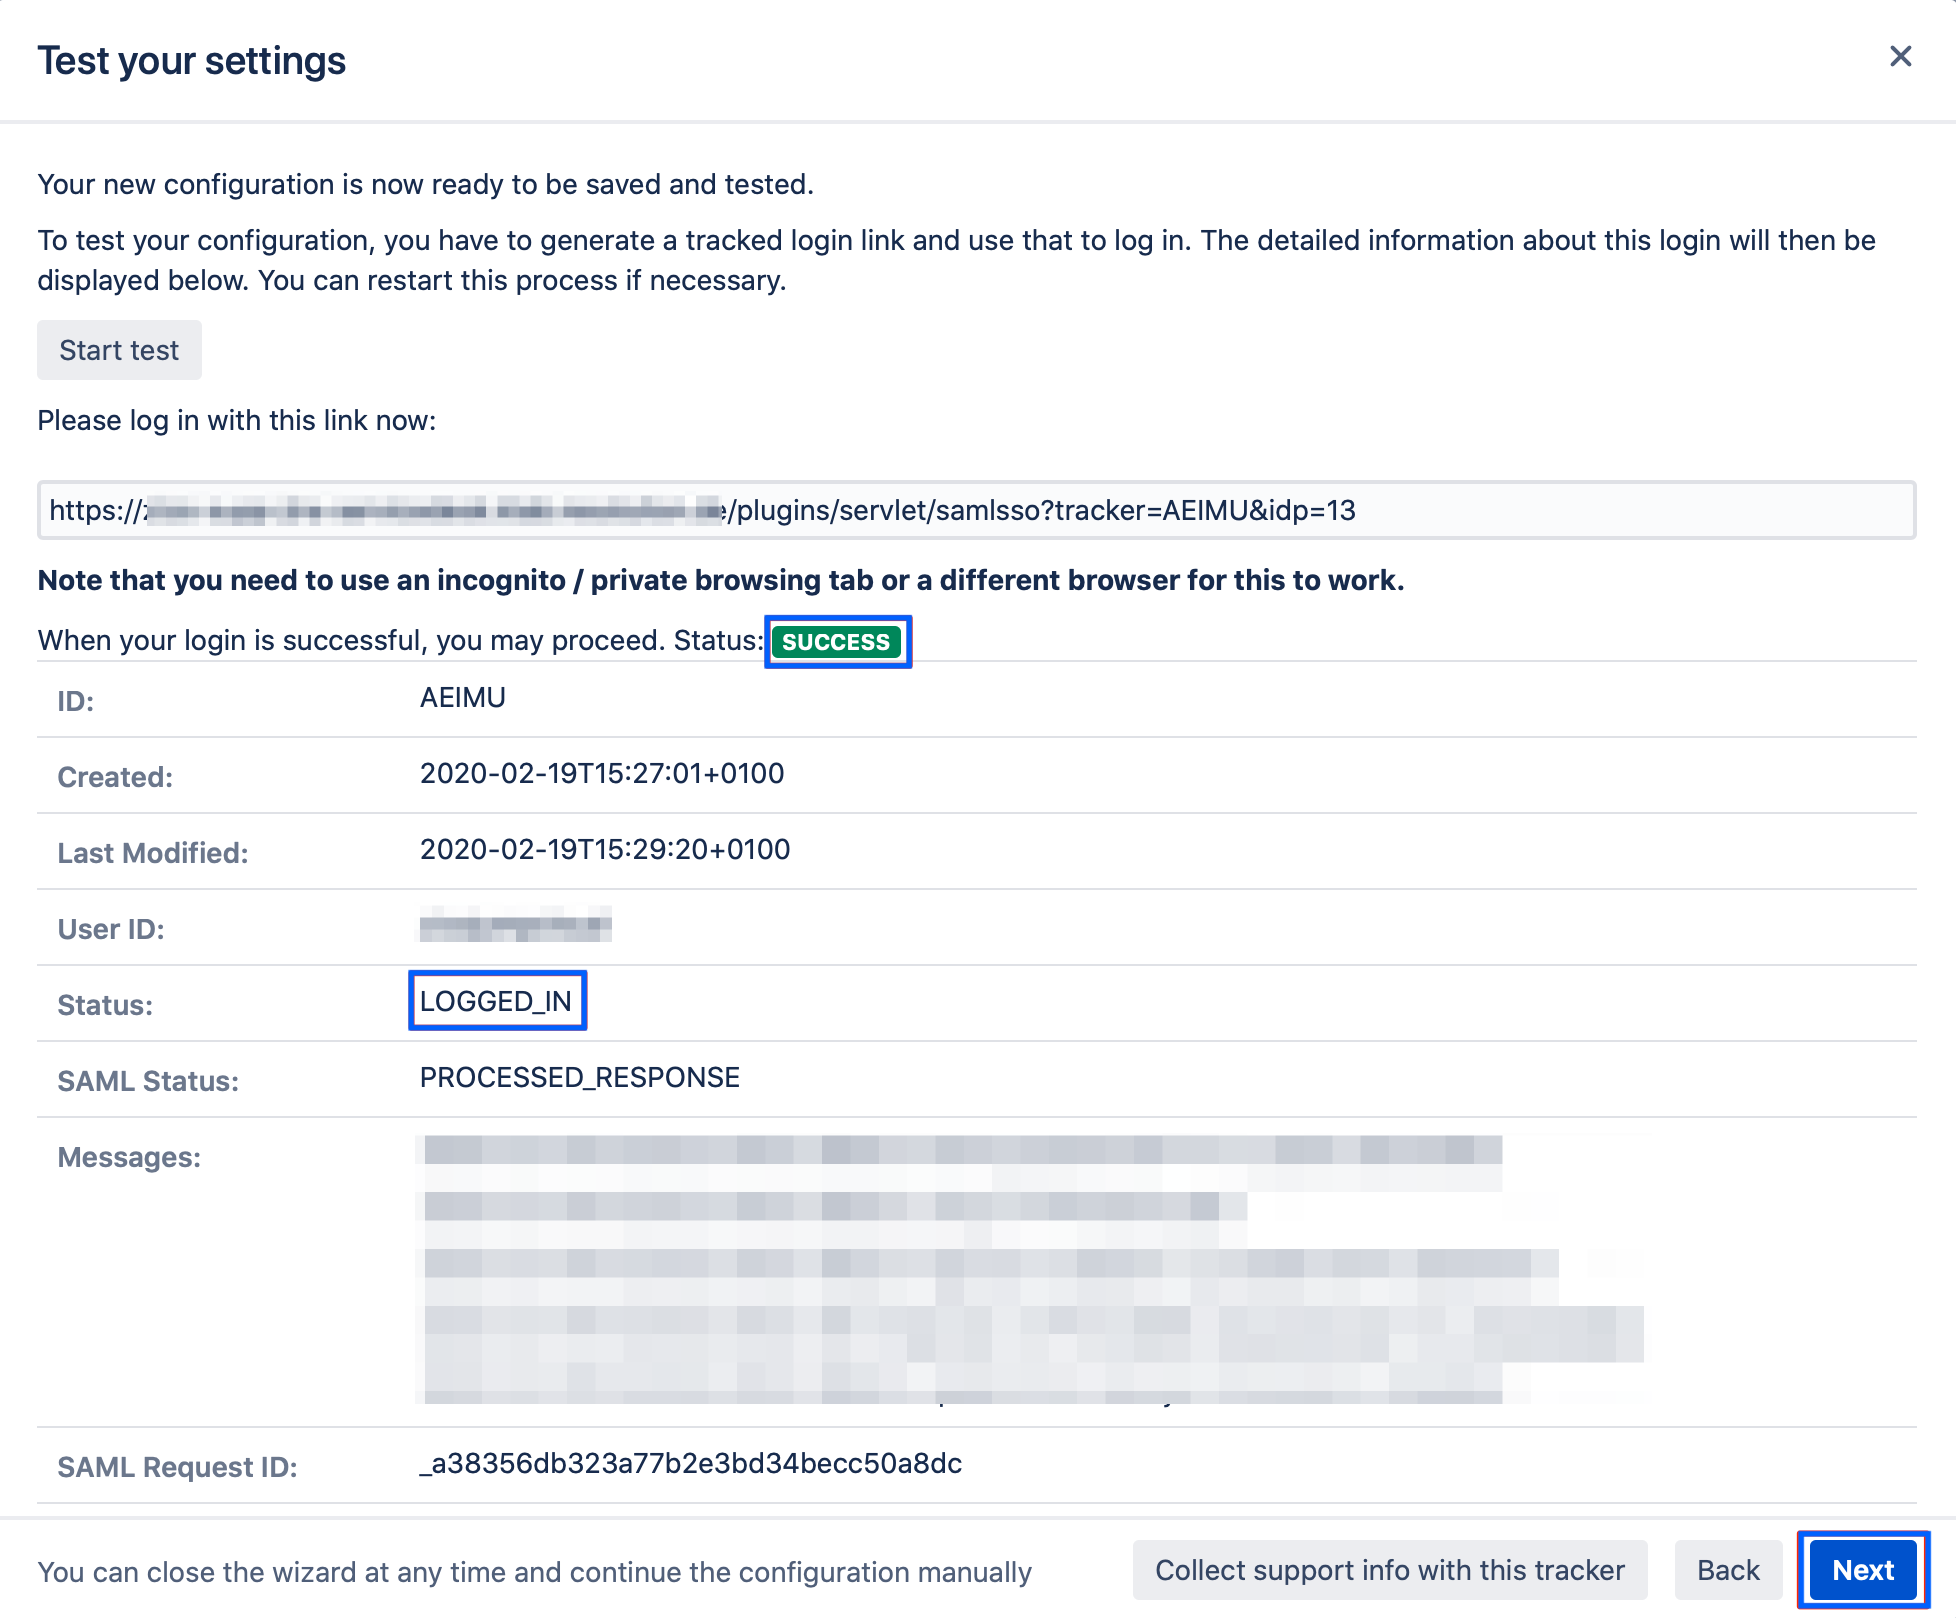
If everything worked fine, you will be logged in to your Atlassian product. In the other tab/browser in which you were configuring the SAML SSO plugin, you can see also the "SUCCESS" status, if everything worked as expected.
Click Next to proceed.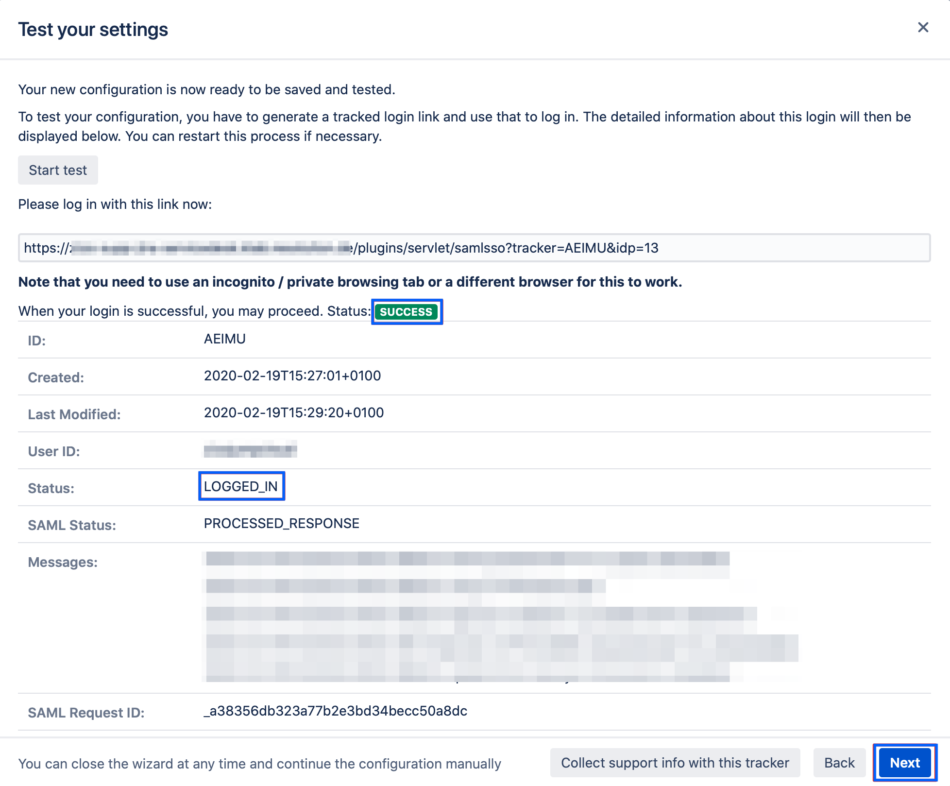
SSO Redirection
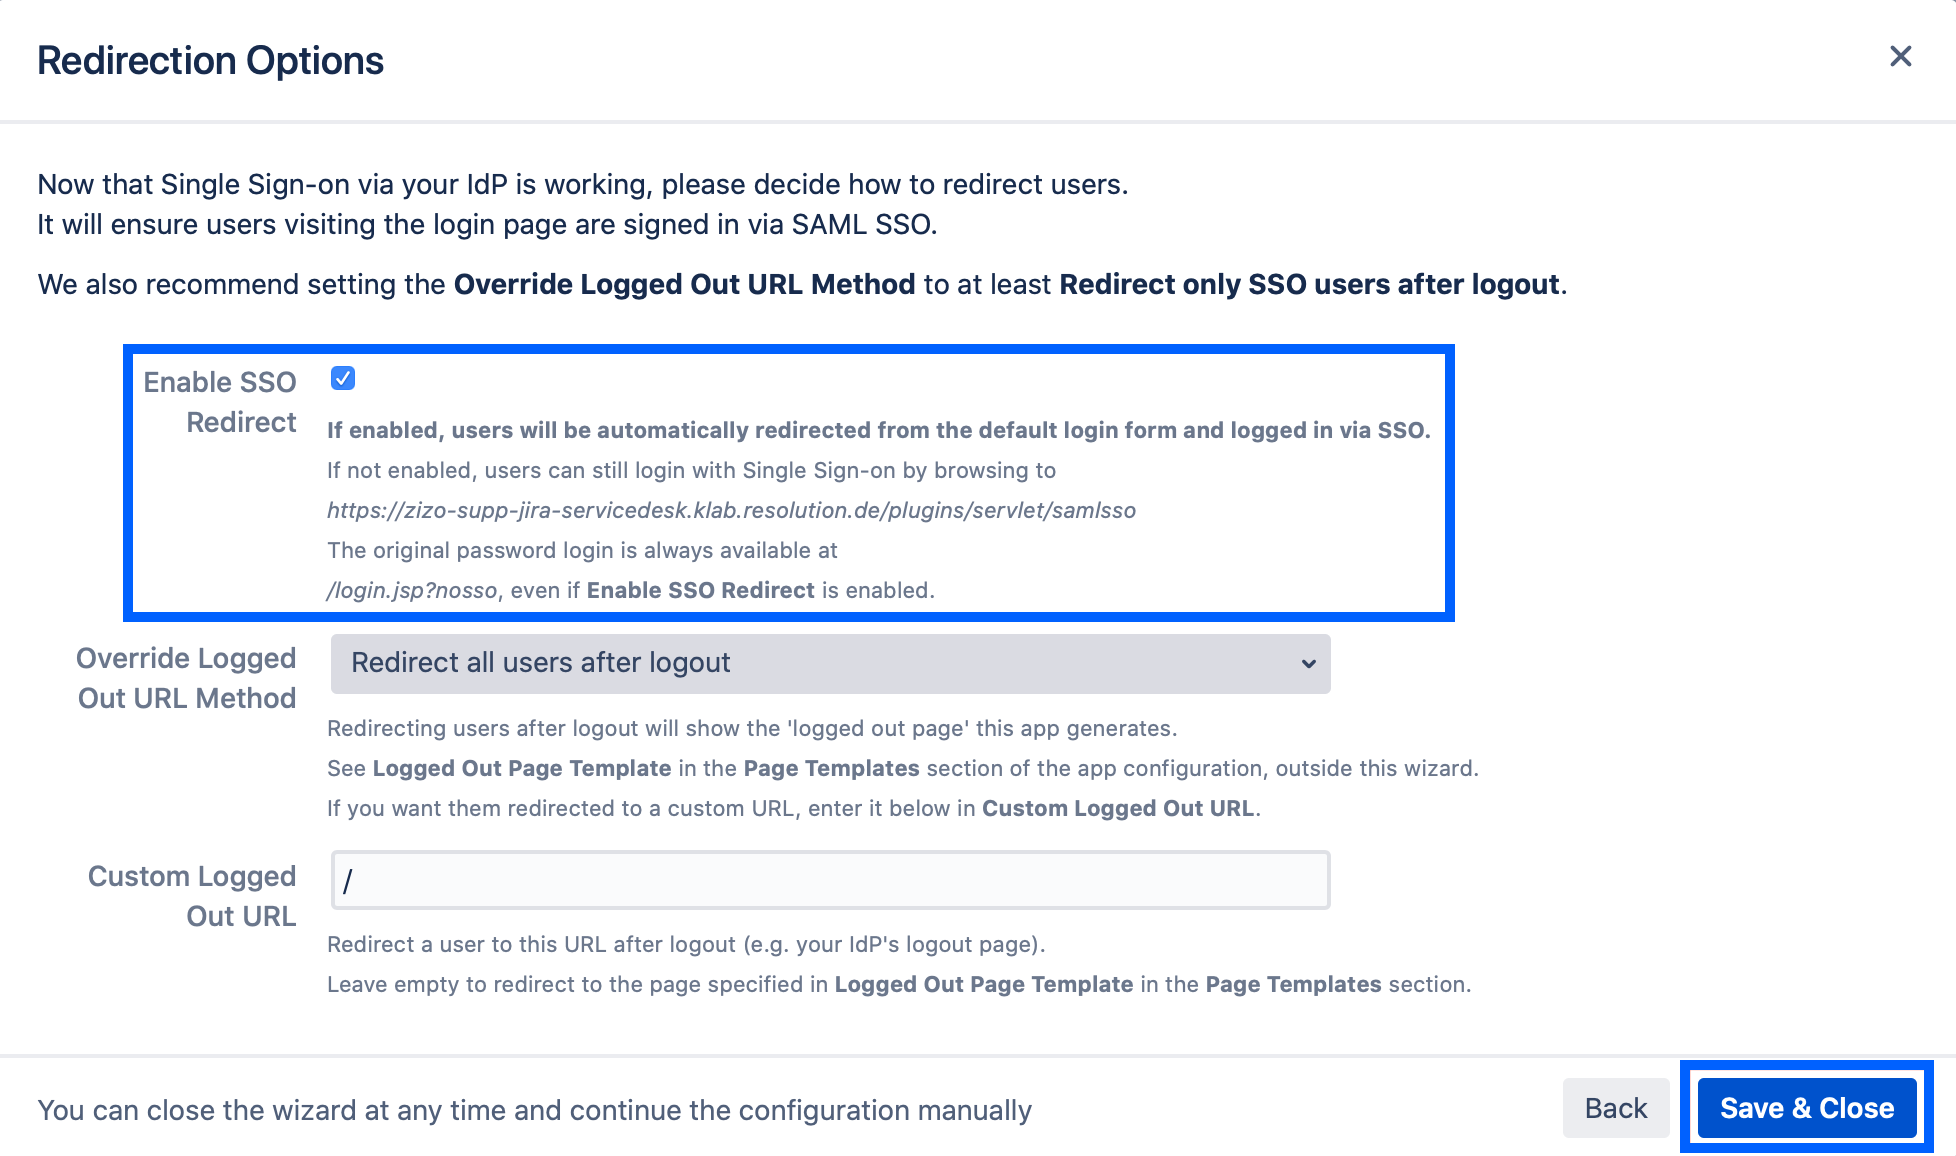
As a last step, you can set the Enable SSO Redirect option. If set, all users will be redirected to Single Sign On, thus they will be logged in via the IdP.
Click on Save & Close to finish the configuration.